Export Tab (4.0)
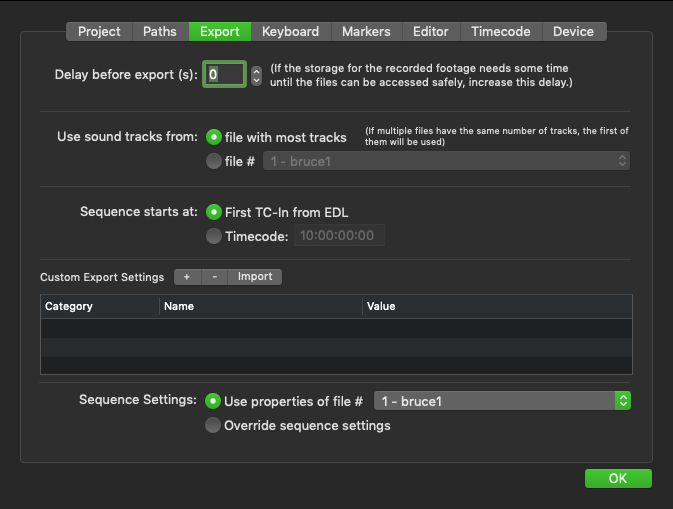
- Delay before export: use this feature to leave some "safety time" for closing the write process of the new media. Depending on the length of your recording, the storage system might need some seconds to finish moving the file.
- Use sound tracks from: choose your main Audio source to be tracklayed in the Timeline.
- Sequence starts at: choose the Timecode for the sequence.
- Custom Export Settings (Adobe Premiere Pro only): see below.
- Sequence Settings: choose between using the settings of a file or using a custom sequence setting (= override sequence settings).
Custom Export Settings (Adobe Premiere Pro only):
Before you are able to import custom Adobe Settings follow these steps.
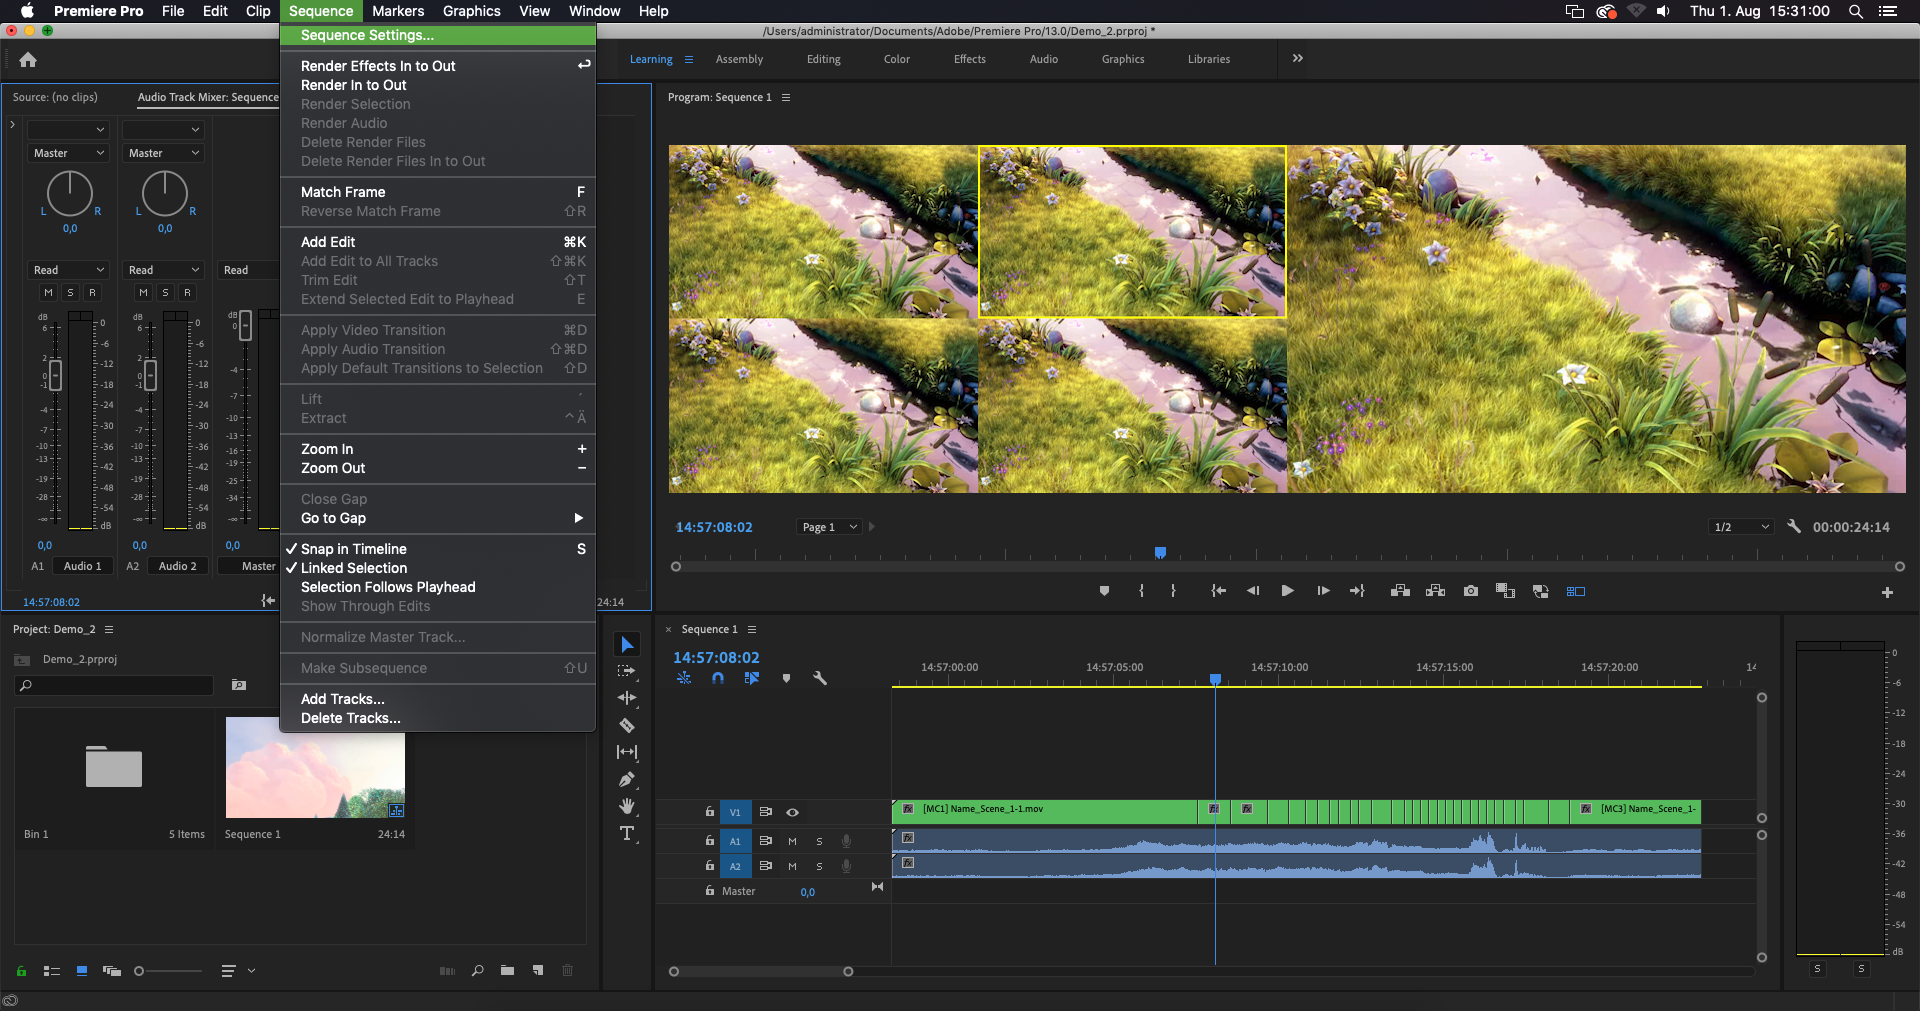
- Do one live:cut recording and export the live:cut Project.
- Import the previously exported Project into Adobe Premiere.
- Open the Sequence Settings in Premiere.
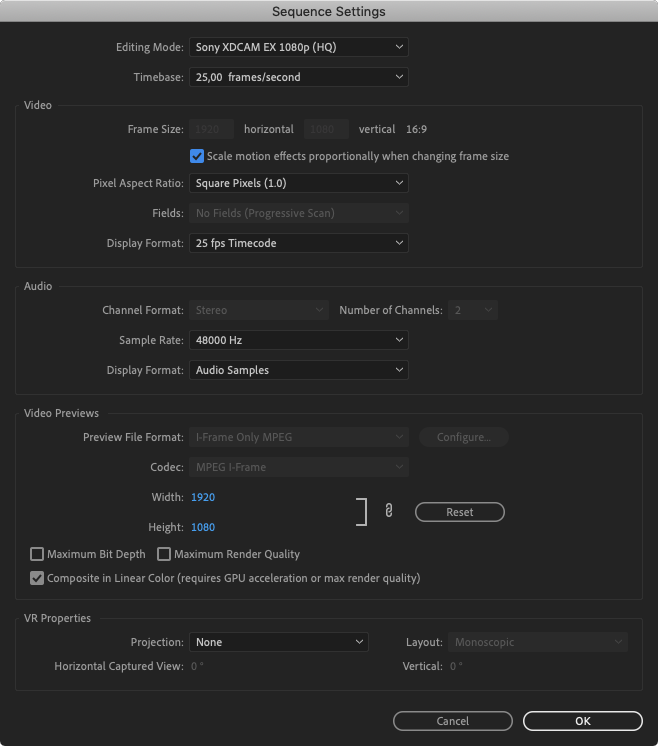
- The Sequence Settings are probably not correct and need to be changed. Change the settings accordingly to your needs and press the OK button.
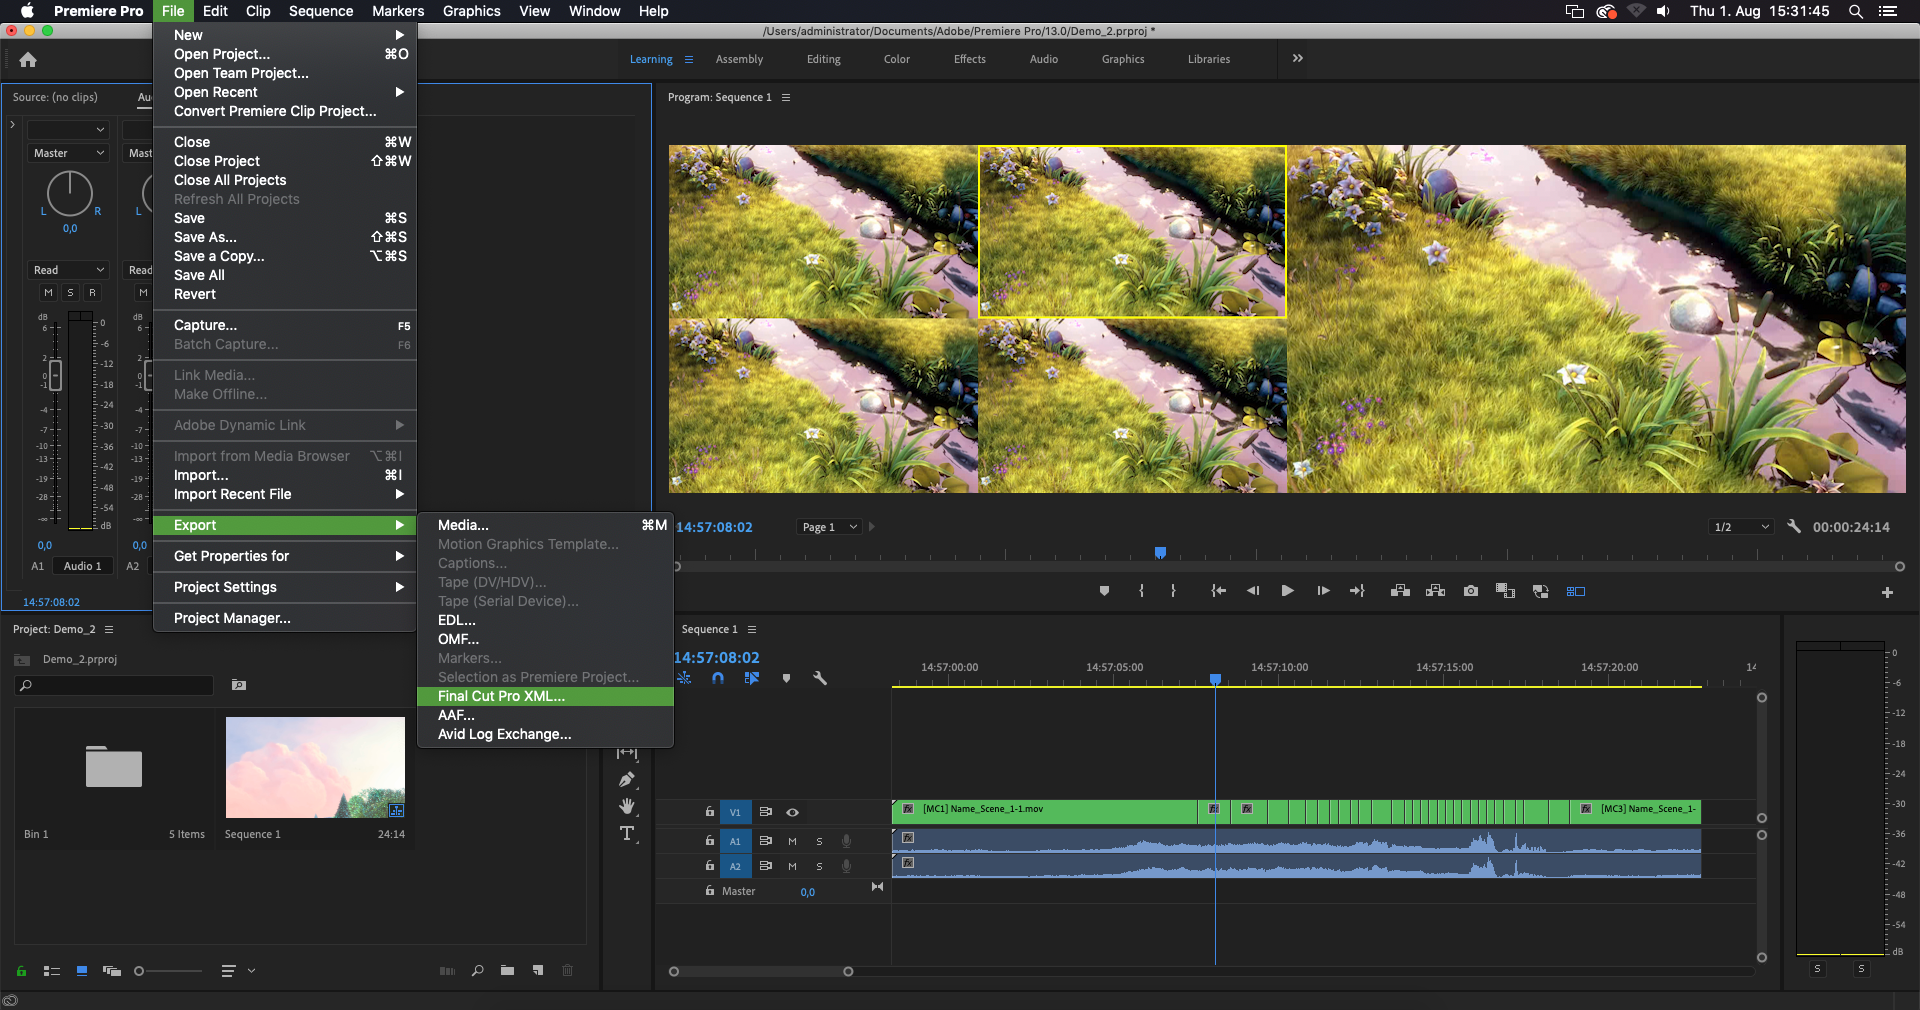
- Export the Premiere Project as a Final Cut Pro XML which can then be used for the custom settings in live:cut.
- In the live:cut Export Preferences use the Import button to import the previously created XML.
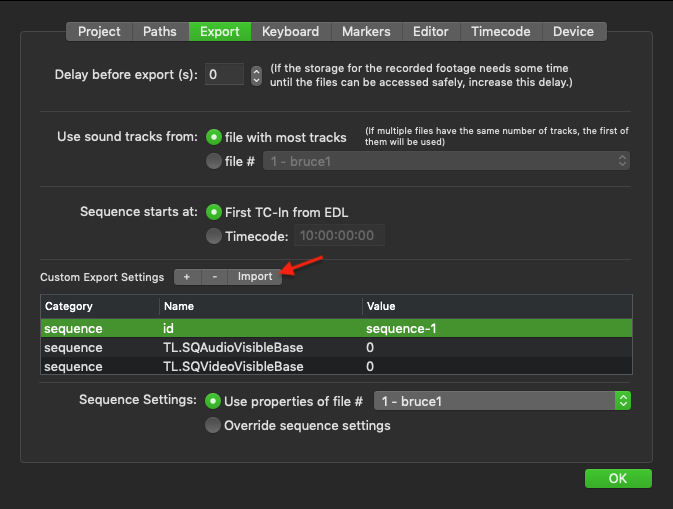
- Press the OK button to save the Export settings.
, multiple selections available,