Naming Presets (4.0)
While it is possible to enter a Name for each Capture in the just:in User Interface manually, Naming Presets can be used to speed up the naming process rapidly. From automatic file numbering to timestamps and user customized variables – Naming Presets provide file naming in an efficient and straightforward way. They are defined per Device and are available for all Channels of the particular Device.
Table of Contents
Overview
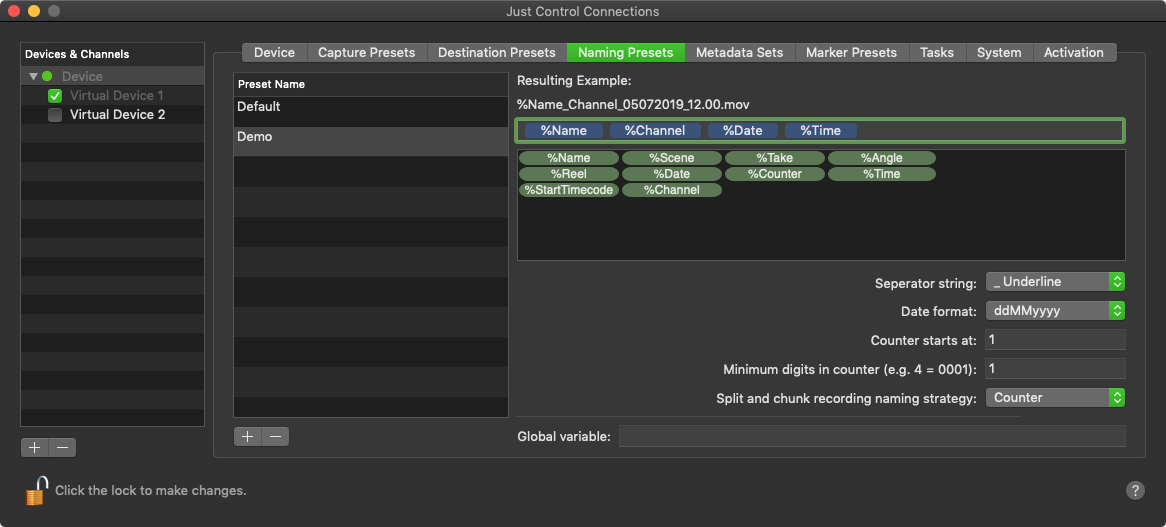
Open the Configuration Panel, select the desired Device for which you want to create Naming Presets and switch to the Naming Presets Tab.

- Naming Preset List: lists all available Naming Presets for the currently selected Device. Use the plus and minus buttons at the bottom to add and remove Naming Presets.
- Resulting Example: shows the resulting filename.
- Variable Drop Zone: drag and drop Variables from the Variable List (4) onto this field to create your custom Naming Preset.
- Variable List: lists available Variables to create your custom Naming Presets. Drag and drop a Variable onto the Variable Drop Zone (3) to create your custom Naming Preset.
- Naming Preset Settings
- Separator string: the separator which will be used between the Variables.
- Date format: the date format which will be used for the %Date Variable.
- Counter starts at: starting number for the %Counter Variable.
- Minimum digits in counter: sets the number of digits when a Counter is used. For example when you set the number of digits to 4, any Counter will have four digits (0001, 0002, 0003…)
- Split and chunk recording naming strategy: choose what happens with the naming of files captured in Crash Mode.
- Counter: every chunk's filename gets a static counter Variable
- Respect Time and Date flags: the Variables %Date and %Time will be respected.
- Global Variable: fixed Variable which is put in front of the filename of every Naming Preset.
Add/Remove a New Naming Preset
- Switch ti the Naming Preset Tab and use the marked Buttons ("Plus/Minus") to add or remove (selected Naming Preset) from the Naming Preset list.

Configure a Naming Preset
Naming Presets consists of different types of variables. There are predefined variables (like %Date, %Time, %Channel, %StartTimecode, %Counter), which will be replaced with the actual date, time, channel name or start timecode when starting a recording and there are predefined variables (like %Name, %Scene, %Take, %Angle or %Reel), which can be filled within the Inspector for each channel. Furthermore you can add custom variables (any further variable with %-sign before the actual variable) or static text to Naming Presets. Below detailed information about these variables can be found.
Work with predefined variables
Predefined variables can simply be moved from the variables list (4) to the Variable Drop Zone (3). There (3) you can add as many variables as you want, you can remove, reorder or adjust (double-click) them and above the Variable Drop Zone (3) you can see the resulting clip name.
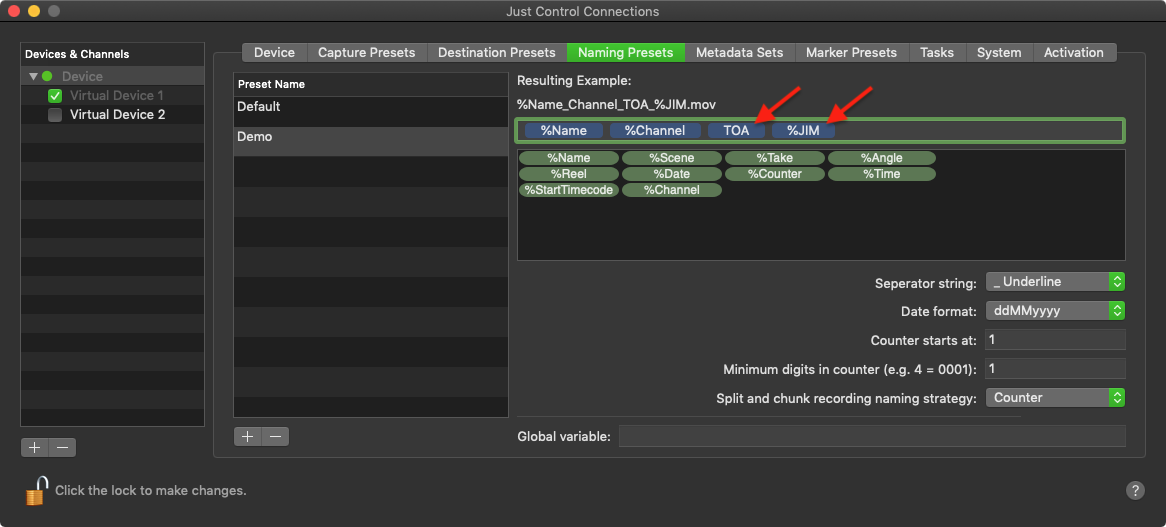
Add Static Text or Custom Variables to a Naming Preset
You can add any text or variable to the Naming Preset. When using a %-sign before the variable or text, you can make sure that this variable can be filled/edited within the User Interface, when adding a variable with the %-sign, then this will be handled as static text within the clip name.
Use the Global Variable
The Global variable will be used in all available Naming Presets for the selected Device.

Work with Metadata Variables
tbd