4. just:play Channels & The Timecode Display (v2.5)
Working with just:play Channels
Once just:play has been started it will gather the Channel information from just:connect and present the information through the user interface to you. Depending on the status of the Channel, the user interface will look slightly different.
Channel States
- Online: an active just:out is playing out the content which is scheduled at the moment. All changes will be executed – without any additional action from the user.
- Offline: there is no master or redundant engine assigned or started to any of the layers. Nothing is playing out at the moment.
Online Channel
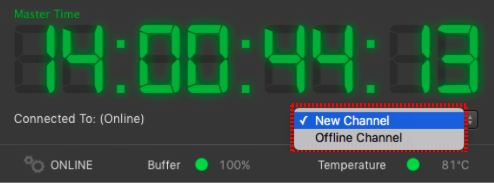
This is how the control area of an Online Channel looks like.
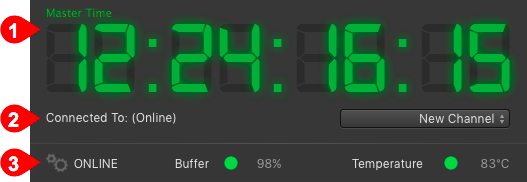
- The Master Time appears in green color.
- The Connected To info shows "(Online)".
- At the bottom the buffer and temperature values of the Mac running the just:out engine are displayed.
All other parts of the user interface look the same, no matter if it is an Online or Offline Channel.
Offline Channel
This is how the control area of an Offline Channel looks like.
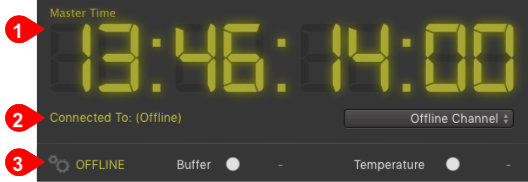
- The Master Time appears in yellow color.
- The Connected To info shows "(Offline)".
- At the bottom the buffer and temperature values are not displayed.
All other parts of the user interface look the same, no matter if it is an Online or Offline Channel.
Usually an Offline Channel is used to build playlists which are later used in an Online Channel. For this the playlist has to be saved which is explained in detail in chapter 7.16 Saving And Reusing A Playlist.
Switching Channels
If there are multiple Channels available in your network, you can switch between them.
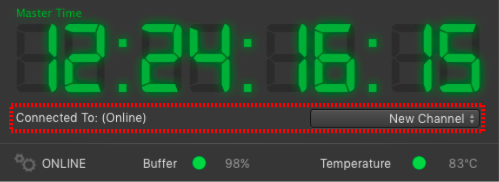
- Click on the Channel drop-down menu.
- Select another Channel on the same network.
Switching to another Channel means that the whole interface will change to reflect the status of the other Channel.
If you try to connect to a Channel with insufficient permissions you will get a warning. Please contact your system administrator for more information.
just:play Timecode Display
The Timecode Display provides info like the current Playout time, the time to the next live event or the time to the next sync point.
Timecode Display Colors
Once you open just:play and connect to a Channel the Timecode can have one of three different colours.
| Timecode Display | Channel Type |
|---|---|
| Online Channel |
| Offline Channel |
| Offline or Online Channel in Edit Mode |


Master Time Mode

- This mode is the default mode when just:play is started.
- In Master Time Mode you can watch the current Playout.
- The Timecode is green and synchronized with the Engine's time, which means that the user interface reflects the current Playout position.
- In Master Time Mode, dragging items within the Timeline and altering the duration of Graphic elements within the Timeline is not possible. Nevertheless it is possible to change the attributes of any item in the Inspector as long as it is not in the past.
- You can edit the Rundown in the Workbench area by dragging and dropping elements (i.e. adding/deleting elements or changing their position independent of the time mode).
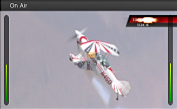
- In Master Time Mode, the On Air Preview shows the current output, depending on the preset chosen in the just:play preferences. The passed through Live Signal is not visible when using the DSK based switch to live mode. Please contact your system administrator for more info.
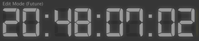
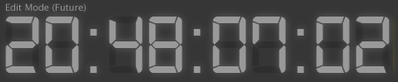
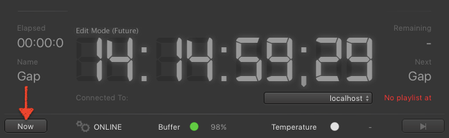
Edit Mode
- Dragging the Timeline's ruler or double clicking an Element in the Calendar View, Workbench or Timeline activates Edit Mode.
- Changing the day in the Calendar View also activates Edit Mode.
- The Timecode is grey and shows the current Preview position. The user interface reflects the status of the Playout like it would be at the displayed time.
- Edit Mode will either show the Past or the Future. A small text above the Timecode display informs about that.
- All elements are greyed out in case Edit Mode shows the past.
Switching Modes
Switching from Master Time Mode into Edit Mode
Drag the Timeline's ruler or double click an element in the Calendar View, Workbench or Timeline. Changing the day in the Calendar View will also activate Edit Mode. There are certain functions (like the ability to drag and drop elements in the Timeline) which are only available in the Edit Mode.
Switching from Edit Mode into Master Time Mode
Click the Now button. You are now back in Master Time mode. This will also highlight the Video Layer automatically.
Functions of Edit Mode
Scrubbing the Timeline
To preview Videos, drag and scrub the Timeline ruler to watch a frame accurate preview in the On Air Preview. It is not possible to preview Audio files, Events or realtime Graphic elements.

Changing the Position of Elements in the Timeline
To change the position of an element in the Timeline, simply drag and drop it within the Playlist in the Timeline.

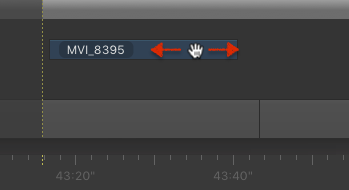
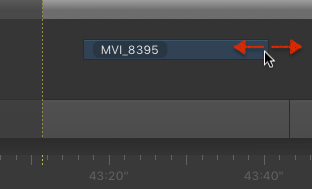
Changing the Duration of Graphic Elements
In Edit Mode you can change the length of a graphic element (which has at least one stop frame) by moving the mouse pointer to the beginning/end of the graphic element and drag the start/endpoint. Note that graphic elements snap to the start/endpoints of items in the Video layer.
Changing the Position of Graphic Elements
In Edit Mode you can change the position of a graphic element. Hover the mouse pointer over the middle of the element, then drag and drop it to another layer and/or another point of time on the same layer. Note that graphic elements snap to the start/endpoints of items in the Video layer.