4.1 Control Area & Timeline
Control Area
The Control Area allows you to preview the item which is currently selected in the Workbench/Timeline (shown in the Preview View) and it shows the final output signal (shown in the On Air View) which is sent to the Video output device and/or the RTMP stream. In addition it shows some system relevant informations.
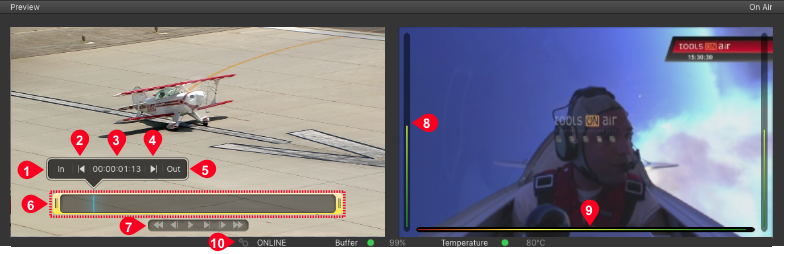
- Set In-Point (Videos only): Defines the in-point of a Video. Scrub the blue CTI and click on In to define a new in-point.
- Go to In-Point (Videos only): Moves the CTI to the defined in-point.
- CTI Position: Shows the timecode of the CTI position.
- Go to Out-Point (Videos only): Moves the CTI to the defined out-point.
- Set Out-Point (Videos only): Defines the out-point of a Video. Scrub the blue CTI and click on Out to define a new out-point.
- Trimmer and CTI (Videos only): The yellow trimmer is a visual representation of the in/out-point. Using the blue CTI you can scrub through the Video, which allows you to get a better overview.
- Control (Realtime Graphics items can also be previewed here. Use the play button to start the preview and to release stop frames. Use the rewind button to jump to the beginning of a realtime Graphic.)
 Rewind
 Play/Pause
 Step One Frame Backwards
 Step One Frame Forwards
 Play Range
 Fast Forward
 - Audio Bars: Audio bars display the Audio level on the left and right side of the On Air View.
- Timecode and Engine Status Overlay: It is possible to show the engine buffer status and the timecode in the On Air View. The Audio bars are always shown.
- Channel and System Status: Shows the status of the Channel, the engine buffer level and the temperature of the CPU running the just:out engine.
Control Area: Timecode Display
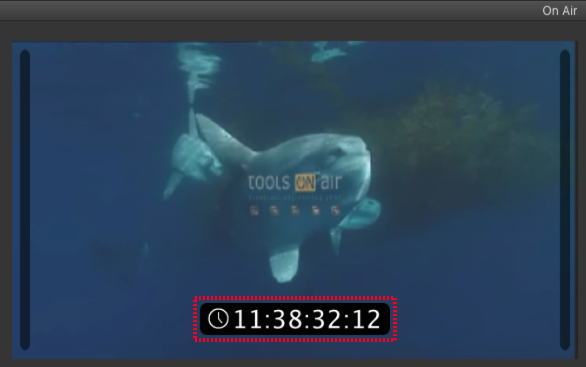
You can choose whether the timecode is integrated into the On Air View or if it is shown as a floating window.
On Air View Timecode
The timecode can be shown in the On Air View. It will not be visible in the final output signal.
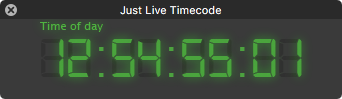
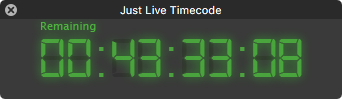
Floating Timecode Window
- To show the timecode in a separate, floating window, unselect the menu item View → Docked Timecode.
- The timecode window can be resized and moved to another screen.
Timecode Modes
Clicking the timecode in the On Air View or the floating window toggles between three modes:
- Mode 1: Time of day.
- Mode 2: Elapsed time of the element playing in the Video 1 track.
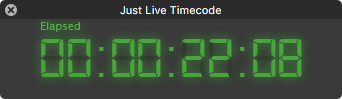
- Mode 3: Remaining time of the element playing in the Video 1 track.
Control Area: Channel and System Status
The Channel Status, the Buffer Level and the Temperature allow you to check the status of the Playout engine. The temperature is updated every 30 seconds, so it can take up to 30 seconds before this information is shown for the first time.

- Green: Good buffer status.
- Yellow If the buffer status is below 50% it must recover to green in time, otherwise the Playout will stagger.
- Red: The engine's buffer is completely empty and the output will drop frames or even stall completely.
- Green: the temperature is fine.
- Yellow: the temperature is slightly too high, the Playout will stagger if the temperature rises even more.
- Red: the temperature reached a critical level and the Playout will drop frames or even stall completely.
In case the temperature of the machine running the engine is to high, the operating system will reduce the speed of the machine or shut down certain functions completely. Please contact your system administrator in case the temperature indicator reaches the red level during normal usage.
Timeline
The Timeline shows all elements which are loaded in one of the available layesr of the Channel but also those elements which are already playing out. This includes the element names, the elapsed/remaining time info and the' "Play" button. The visibility of the final output is defined from top to bottom.

- Layers: Depending on the configuration the Channel you will see Audio, Event, FX- and Video-Layers. The names of the Layers may differ from the ones seen in the figure above, as they have been defined by your system administrator while setting up the Channels in just:connect. It is also possible that your Channel has more or fewer Layers than shown in this figure or that certain Layers do not exist at all.
- Elapsed Timecode: Displays the elapsed time for each actual playing element. If a Layer does not contain any elements the timecode is 00:00:00:00.
- Current Item Name: Displays the name of the current item in the particular Layer.
- Poster Frame: Shows (if available) the poster frame of the current item in the particular Layer.
- Current Time Indicator (CTI): Shows the current Playout position.
- Yellow: The just:out engine is not started.
- Green: The just:out engine is started.
- Red: The just:out engine is started, but there is an FX element waiting at a stop frame.
- Remaining Timecode: Displays the remaining time for each actually playing element.
- Hide/Show Buttons: Toggle the visibility of the currently playing element(s) on the specific FX Layer. The visibility of hidden Layers can be changed in the menu Window → Show Hidden Layers.
- Audio Element: Audio elements are represented by grey bars (or slices, depending on the Timeline scale). Audio items can only be placed on Audio Layers.
- Graphic Element: Graphic elements are represented by grey bars (or slices, depending on the Timeline scale) with a gray triangle in case it has at least one stop frame in it. Only FX Layer compatible files can be placed on a FX Layer.
- Event Element: Event elements are represented by a yellow triangle. Event items can only be placed on Event Layers.
- Video Element: Video elements are represented by grey bars (or slices, depending on the Timeline scale) in the Video Layer. The bright blue part represents a finished action or loop.
- Timeline Scrub & Scale: The scale of the Timeline ruler can be changed by using your mouse wheel while hovering above the Timeline's ruler. The Timeline can either be static or rolling (Window → Static Timeline Ruler). In static mode the Timeline ruler description starts with zero, in rolling mode the description equals the engine time.