Preferences: Names Tab (just:in v2.0)
Accessing the Preferences
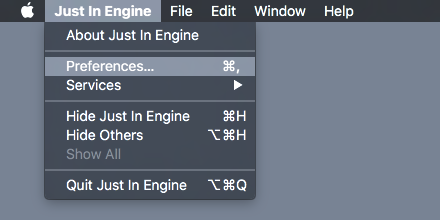
- Go to the menu Just In Engine.
- Select Preferences.
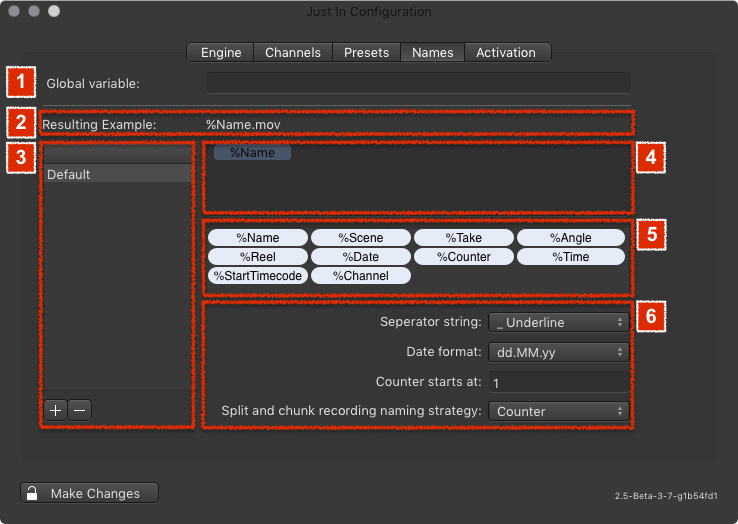
- The just:in Engine Preferences will show up as seen below.
Naming Presets
In just:in Engine you may define Naming Presets to ease up the naming of your Recordings. For example it may be desired that each written file gets a timestamp in addition to its name.
Overview
- Global Variable: fixed Variable which is put in front of the filename.
- Resulting Example: shows the resulting filename.
- Naming Preset List: lists all available Naming Presets. Use the plus and minus buttons at the bottom to add and remove Naming Presets.
- Variable Drop Zone: drag and drop Variables from the Variable List (5) onto this field to create your custom Naming Preset.
- Variable List: lists available Variables to create your custom Naming Presets. Drag and drop a Variable onto the Variable Drop Zone (4) to create your custom Naming Preset.
- Naming Preset Settings
- Separator: the separator which will be used between the Variables.
- Date format: the date format which will be used for the %Date Variable.
- Counter starts at: starting number for the %Counter Variable.
- Split and chunk recording naming strategy: choose what happens with the naming of files captured in Crash Mode.
- Counter: every chunk's filename gets a static counter Variable
- Respect Time and Date flags: the Variables %Date and %Time will be respected.
Adding a New Naming Preset
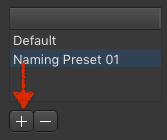
- Press the plus button in the Naming Preset List (3).
- A new entry appears in the list. Double click it.
- Enter the name for your new Naming Preset.
- Press the return key.
- Configure the Naming Preset accordingly to your needs.
Removing a Naming Preset
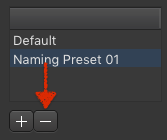
- Select the Naming Preset in the Naming Preset List (3).
- Press the minus button. This cannot be undone.
Working with Variables
Adding Static Text to a Naming Preset
- Click on an empty area in the Variable Drop Zone (4).
- Type your text.
- Press the enter key.
- The static text appears as a pale blue element in the Variable Drop Zone.
Adding Custom Variables to a Naming Preset
You can add your own Variables to a Naming Preset. Customized Variables will be displayed as additional fields in the just:in user interface the Clip section.
- Click on an empty area in the Variable Drop Zone (4).
- Type "%" (without quotes) followed by your custom Variable Name.
- Press the enter key.
- The custom Variable appears as a pale blue element in the Variable Drop Zone.
Removing Variables or Static Text
- Click on the Variable or the Static Text in the Variable Drop Zone (4).
- It will light up in bright blue color.
- Press the backspace key. This cannot be undone.
Reordering Variables or Static Text
- Drag the Variable or the Static Text in the Variable Drop Zone (4).
- Drop it at the desired position.
Renaming Variables or Static Text
- Double click the Variable or the Static Text in the Variable Drop Zone (4).
- Change the name.
- Press the enter key.


