General Configuration (just:in Engine Linux v1.5)
- Thomas Staiger
- Christian Schabasser
Before a connection to just:in Linux can be established you must install the latest just:in User Interface version on your Mac. As described in previous chapters you can download it from our support system or you can copy it from the internal SMB sharepoint of the just:in Linux system. Refer to the respective User Manuals for further information on how to install and use the just:in User Interface.
Table of Contents
Adding an Engine
- Open the just:in User Interface on your Mac.
- Go to the menu Just In → Manage just:in Linux Channels (shortcut: command + option + comma).

- The Just In Configuration window appears.
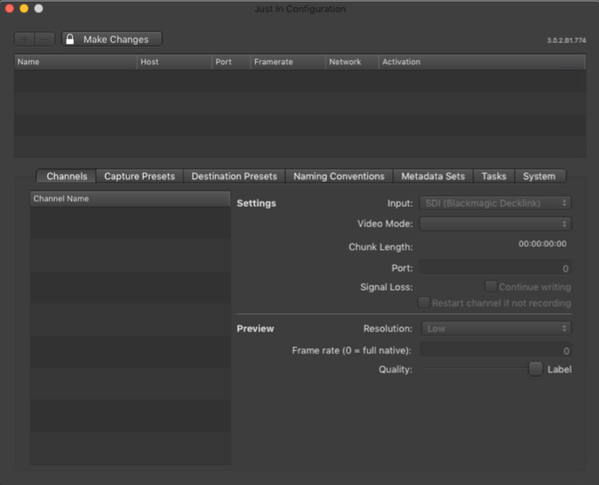
- Unlock the configuration window by pressing the Make Changes button.

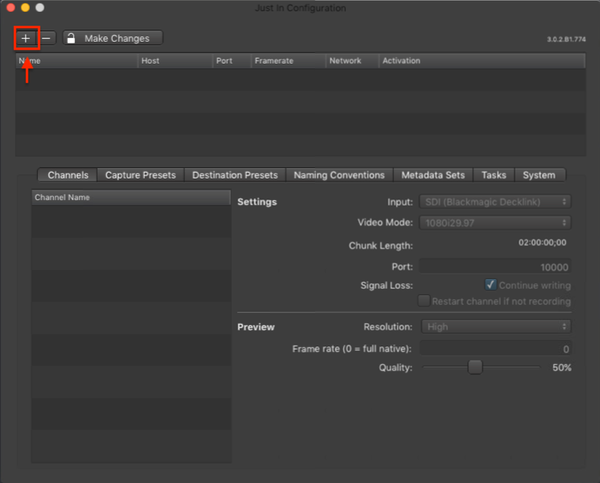
- Press the plus button in the upper left to add a just:in Engine.
- Enter the IP Address and the Port of the Engine. The default Port is 5000.
The default port can be changed as soon as a just:in Engine has been connected successfully.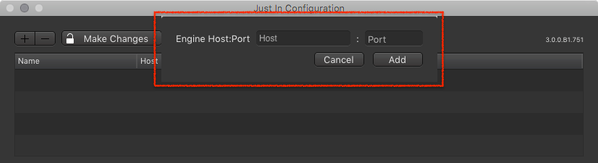
- Press the Add button.
- The Engine Configuration Wizard shows up.

- Device Name: enter an Engine name. This can be any name and will be used to identify the Engine in the Engine List.
- Channels: set the number of Channels (= SDI Inputs).
- Channel Name: set the Channel name. This can be any name and will be shown in the just:in User Interface.
- Input: select either AJA or BMD as SDI Input Device.
- Default Storage Path: this is the path where the Engine stores files by default. A default Destination Preset will automatically be created with this path. You must enter a Linux filesystem path here. Do not enter a Mac path here.
- SDI Format: select the Video Mode of the Engine.
- First Channel Port: sets the Port for the first Channel.
- Engine Host:Port: will be set automatically. This only needs to be changed if just:connect is running on a different machine.
- Metadata/Capture Preset List: allows you to filter and select available Presets.
- After entering all settings you can select Presets in the Capture Preset List. They will be created automatically after pressing the Configure button.
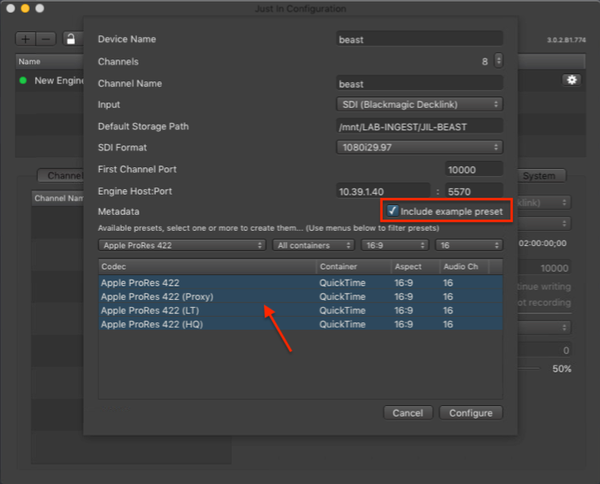
- If everything has been configured properly the connection to the Engine will be established. If not please → contact us.
Changing Engine Settings
After configuring the basic settings of an Engine all available Channels are listed in the Channel List. Channels, Presets, Naming, Metadata and Tasks are displayed accordingly to the selected Engine in the Engine List.
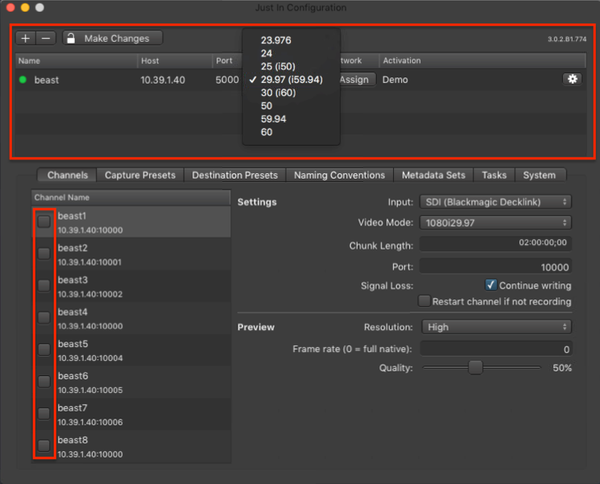
Changing the Engine Name, Host, Port and Framerate
Deactivate all Channels by clicking on the checkbox for each Channel in the Channel List.
Deactivating a Channel will make it unavailable in connected just:in User Interfaces.
- In the Engine List you can now change the Engine Name, the Host and the Port by double clicking it. The Framerate can be changed with the drop-down menu.
Changing the Engine Network Settings
- Deactivate all Channels by clicking on the checkbox for each Channel in the Channel List.
- In the Engine List press the Assign button.

- Enter the new IP Address for the Engine Host and the Clock Host. Do not change the Port numbers.
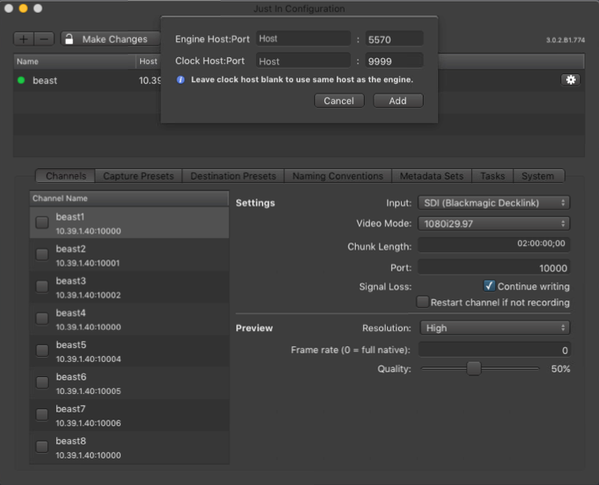
- Press the Add button when you are done.