To change Channel Settings deactivate the desired Channel(s) by unchecking the corresponding checkbox(es).
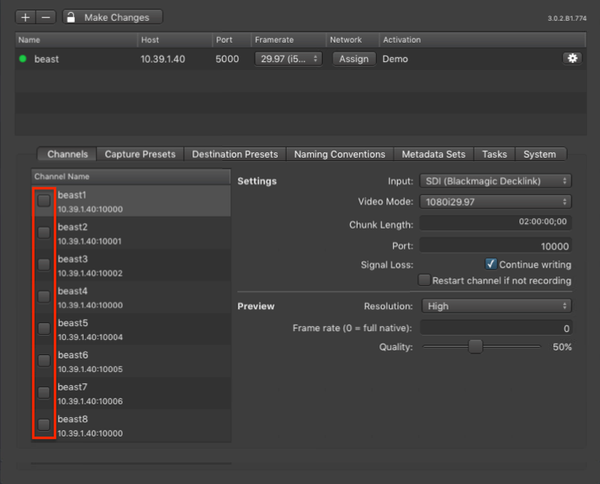
Deactivating a Channel will make it unavailable in connected just:in User Interfaces.
Basic Channel Settings

Settings:
- Channel Name: Edit the Channel name by double clicking on the name within the Channel List.
- Input Source: Select the Input Source here.
- Video Mode: Select a Video Mode here. The modes depend on the Engine's Framerate and the Video Device.
- Chunk Length: Set the Chunk Length here. The maximum is 12:00:00:00.
- Port: Edit the Channel Port here.
- Signal Loss: By default a Channel continues to write into the same container when there is a signal loss during recording. The gap during the signal loss will be filled with black frames automatically. The Channel might get out of AV sync in case of a a signal loss that occurs on a running Channel/Engine. By disabling this option, the channel stops recording when there is a signal loss during recording.
- Restart channel if not recording: This option is disabled by default. When enabling this option the channel will be restarted after a signal loss. This will only be done when the channel is in idle mode. Channels in recording mode will not be restarted.
Preview Settings:
- Resolution: Two resolution options are available:
- High: 640x360px
- Low: 480x270px
- Frame rate: Preview frame rate can be changed between 0 (native or 30) 30.
- Quality: Can be changed between 10-100%.
(Re-)Enabling a Channel
After changing the settings of a Channel you need to enable it again by clicking on the corresponding checkbox. You can only activate Channels with valid Video Modes.
