Naming Presets (just:in Engine Mac v3.5)
- Thomas Staiger
- Christian Schabasser
Owned by Thomas Staiger
While it is possible to enter a Name for each Capture in the just:in User Interface manually, Naming Presets can be used to speed up the naming process rapidly. From automatic file numbering to timestamps and user customized variables – Naming Presets provide file naming in an efficient and straightforward way.
To make any changes you need to click on the Make Changes button in the lower left and enter the admin password.
Table of Contents
Overview
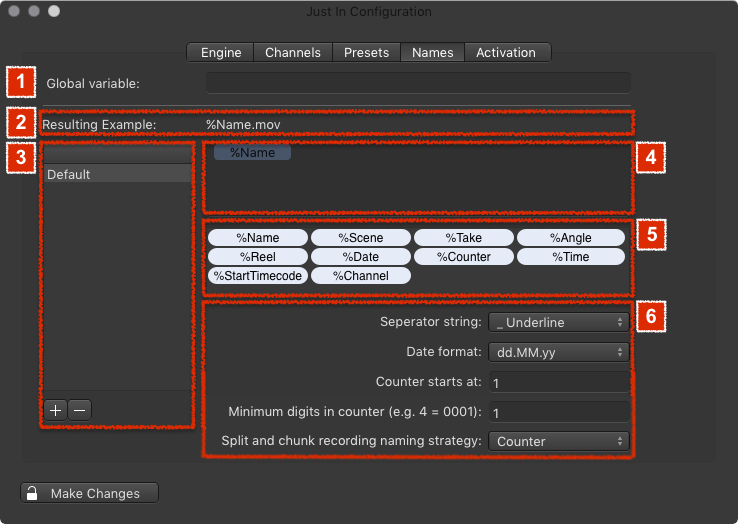
- Global Variable: fixed Variable which is put in front of the filename.
- Resulting Example: shows the resulting filename.
- Naming Preset List: lists all available Naming Presets. Use the plus and minus buttons at the bottom to add and remove Naming Presets.
- Variable Drop Zone: drag and drop Variables from the Variable List (5) onto this field to create your custom Naming Preset.
- Variable List: lists available Variables to create your custom Naming Presets. Drag and drop a Variable onto the Variable Drop Zone (4) to create your custom Naming Preset.
- Naming Preset Settings:
- Separator string: the separator which will be used between the Variables.
- Date format: the date format which will be used for the %Date Variable.
- Counter starts at: starting number for the %Counter Variable.
- Minimum digits in counter: defines the number of digits which will be used for the "Counter" variable
- Split and chunk recording naming strategy: choose what happens with the naming of files captured in Crash Mode.
- Counter: every chunk's filename gets a static counter Variable
- Respect Time and Date flags: the Variables %Date and %Time will be respected.
Adding a New Naming Preset
- Press the plus button in the Naming Preset List (3).
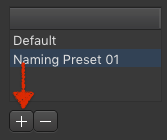
- A new entry appears in the list. Double click it.
- Enter the name for your new Naming Preset.
- Press the return key.
- Configure the Naming Preset accordingly to your needs.
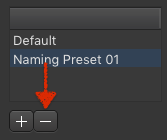
Removing a Naming Preset
- Select the Naming Preset in the Naming Preset List (3).
- Press the minus button. This cannot be undone.
Working with Variables
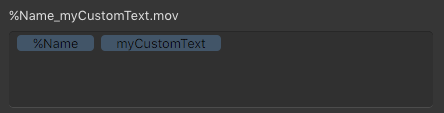
Adding Static Text to a Naming Preset
- Click on an empty area in the Variable Drop Zone (4).
- Type your text.
- Press the enter key.
- The static text appears as a pale blue element in the Variable Drop Zone.
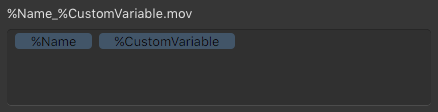
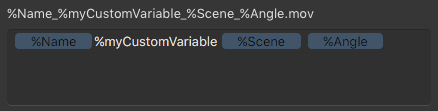
Adding Custom Variables to a Naming Preset
You can add your own Variables to a Naming Preset. Customized Variables will be displayed as additional fields in the just:in user interface the Clip section.
- Click on an empty area in the Variable Drop Zone (4).
- Type "%" (without quotes) followed by your custom Variable Name.
- Press the enter key.
- The custom Variable appears as a pale blue element in the Variable Drop Zone.
Removing Variables or Static Text
- Click on the Variable or the Static Text in the Variable Drop Zone (4).
- It will light up in bright blue color.

- Press the backspace key. This cannot be undone.
Reordering Variables or Static Text
- Drag the Variable or the Static Text in the Variable Drop Zone (4).
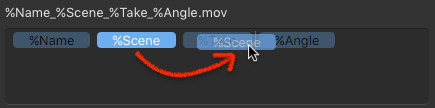
- Drop it at the desired position.
Renaming Variables or Static Text
- Double click the Variable or the Static Text in the Variable Drop Zone (4).
- Change the name.
- Press the enter key.