Markers (4.0)
Overview
The ability to set Markers for Adobe Premiere Pro (→ learn more: Markers in Adobe Premiere Pro) is extremely helpful if you want to highlight scenes in one or multiple recordings. Markers Presets can be created in the Configuration Panel and can be completely customised.
just:in writes the XMP metadata for the Markers directly into MOV containers. When using MXF containers a XMP sidecar file will be created. This process is automated.
Using Marker Presets
- Make sure that you have created at least one Marker Preset
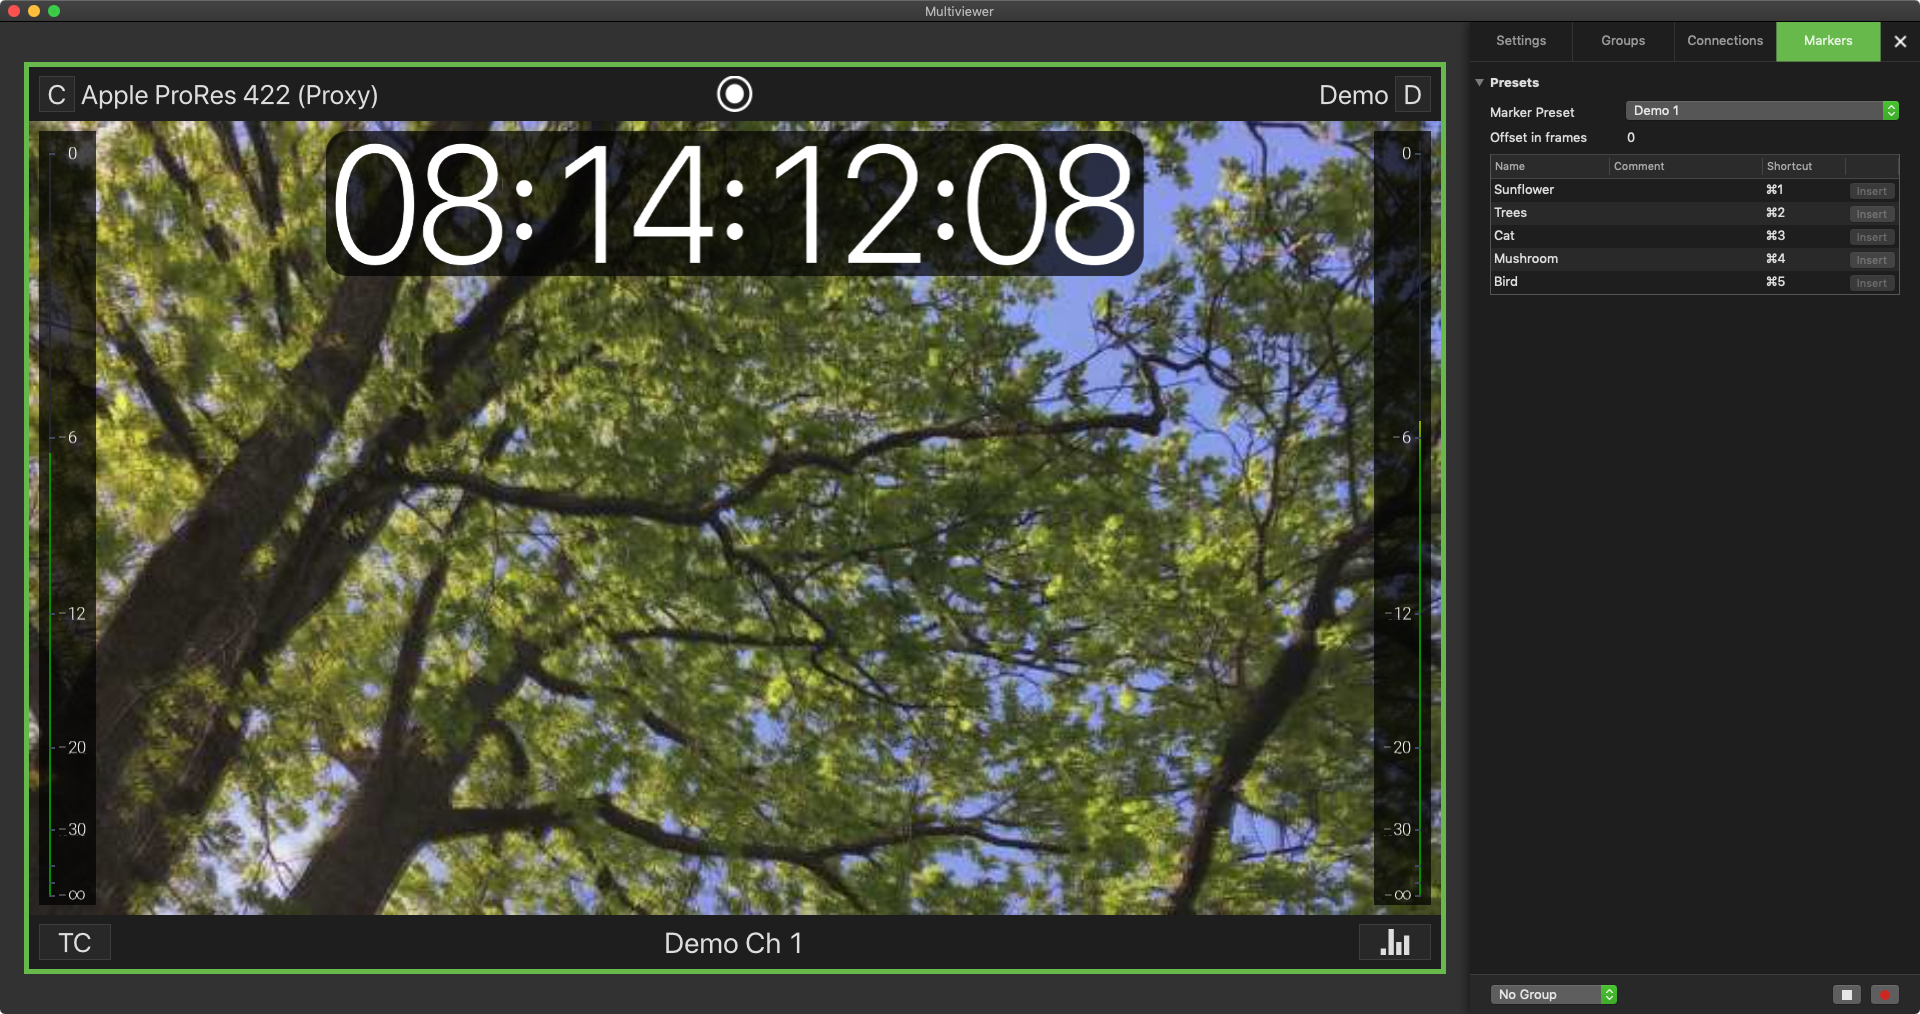
- Switch to the Markers tab.
- Select a Channel.
- Choose your Marker Preset and start recording.
When selecting a Marker Preset the available Markers are listed below.
Adding Markers while Recording
- Make sure a recording is in progress.
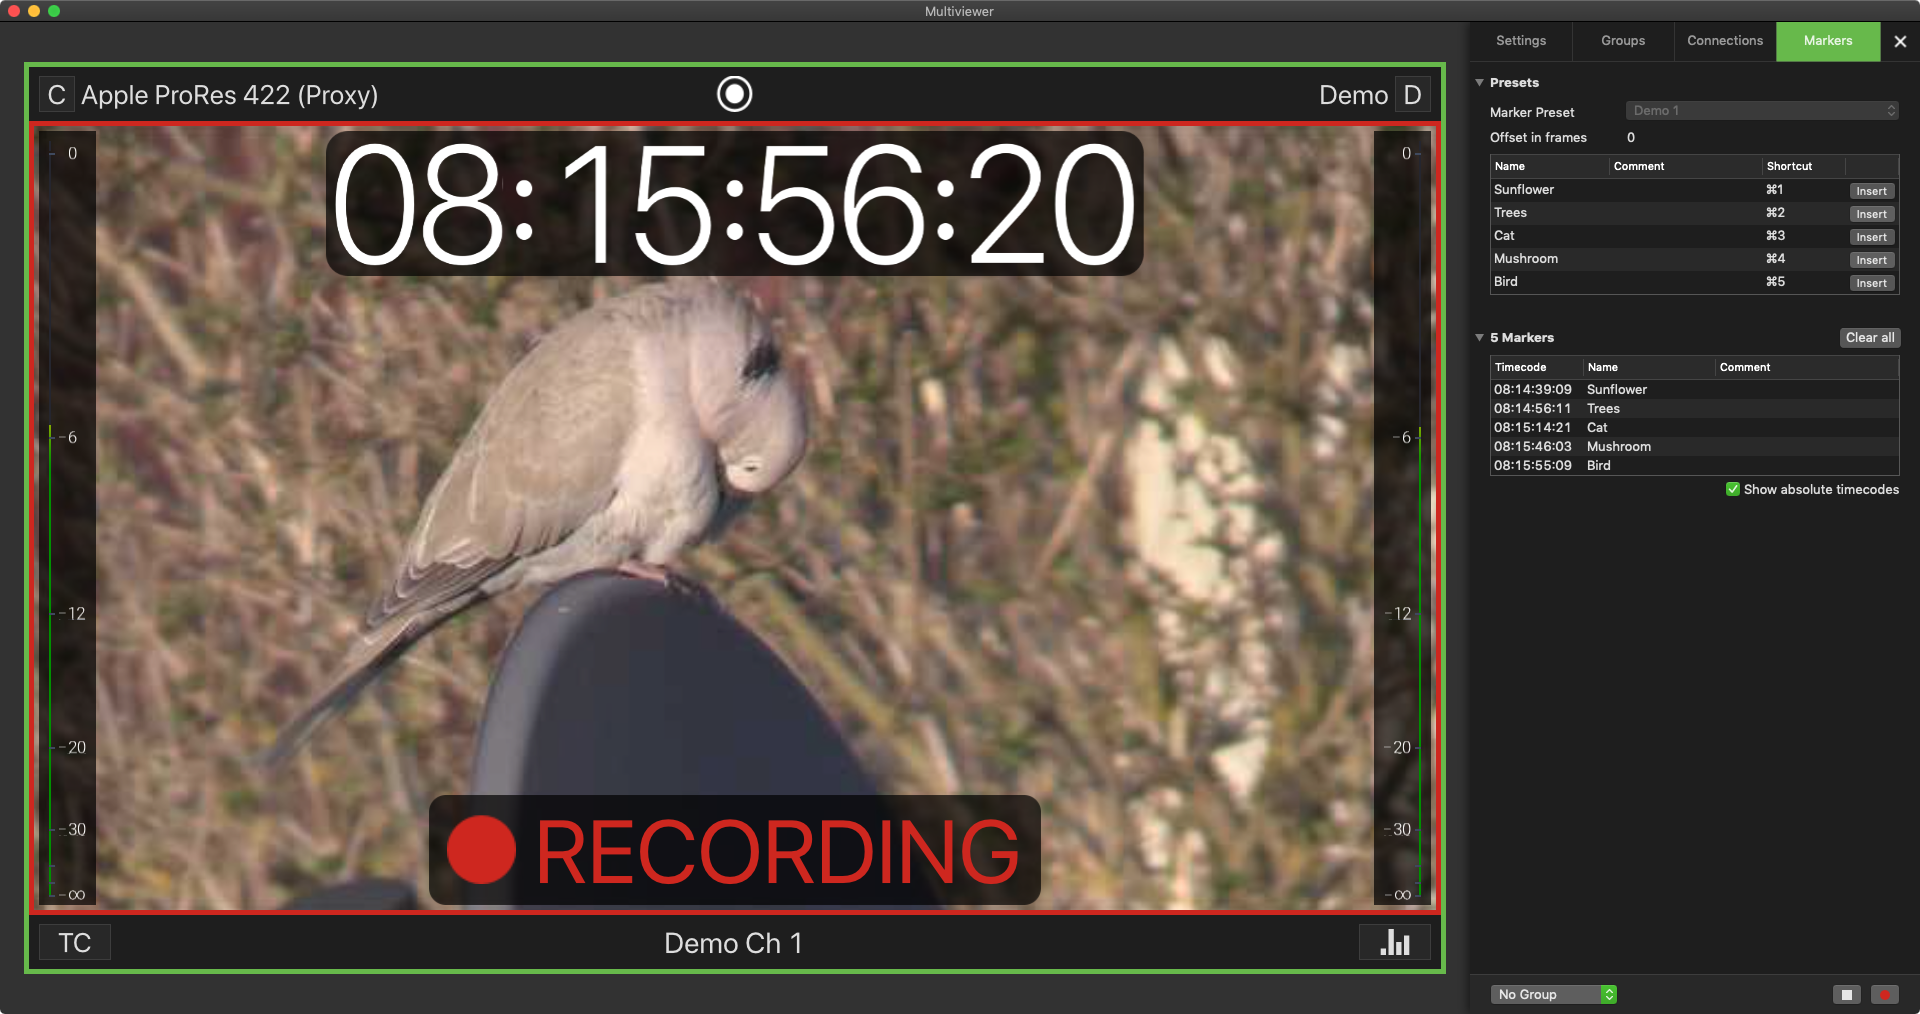
- Insert the desired Marker by clicking on the corresponding Insert button in the Markers List.
- After adding the first Marker the Marker Table will be shown below the Marker list, listing all inserted Markers for the current recording.
After stopping the recording the recorded file and the inserted Markers can be used in Adobe Premiere Pro.
Please beware that growing file support with Markers is not available, as Adobe Premiere Pro can only insert XMP metadata when the file is closed.
Importing the recorded File into Premiere Pro
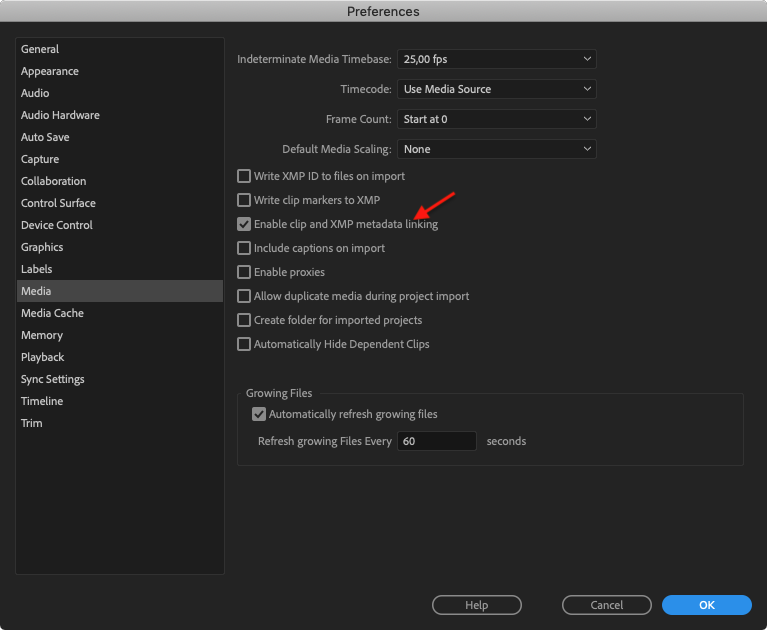
- First check if you have the Enable clip and XMP metadata linking setting activated in the Media Preferences.
- Import the recorded file.
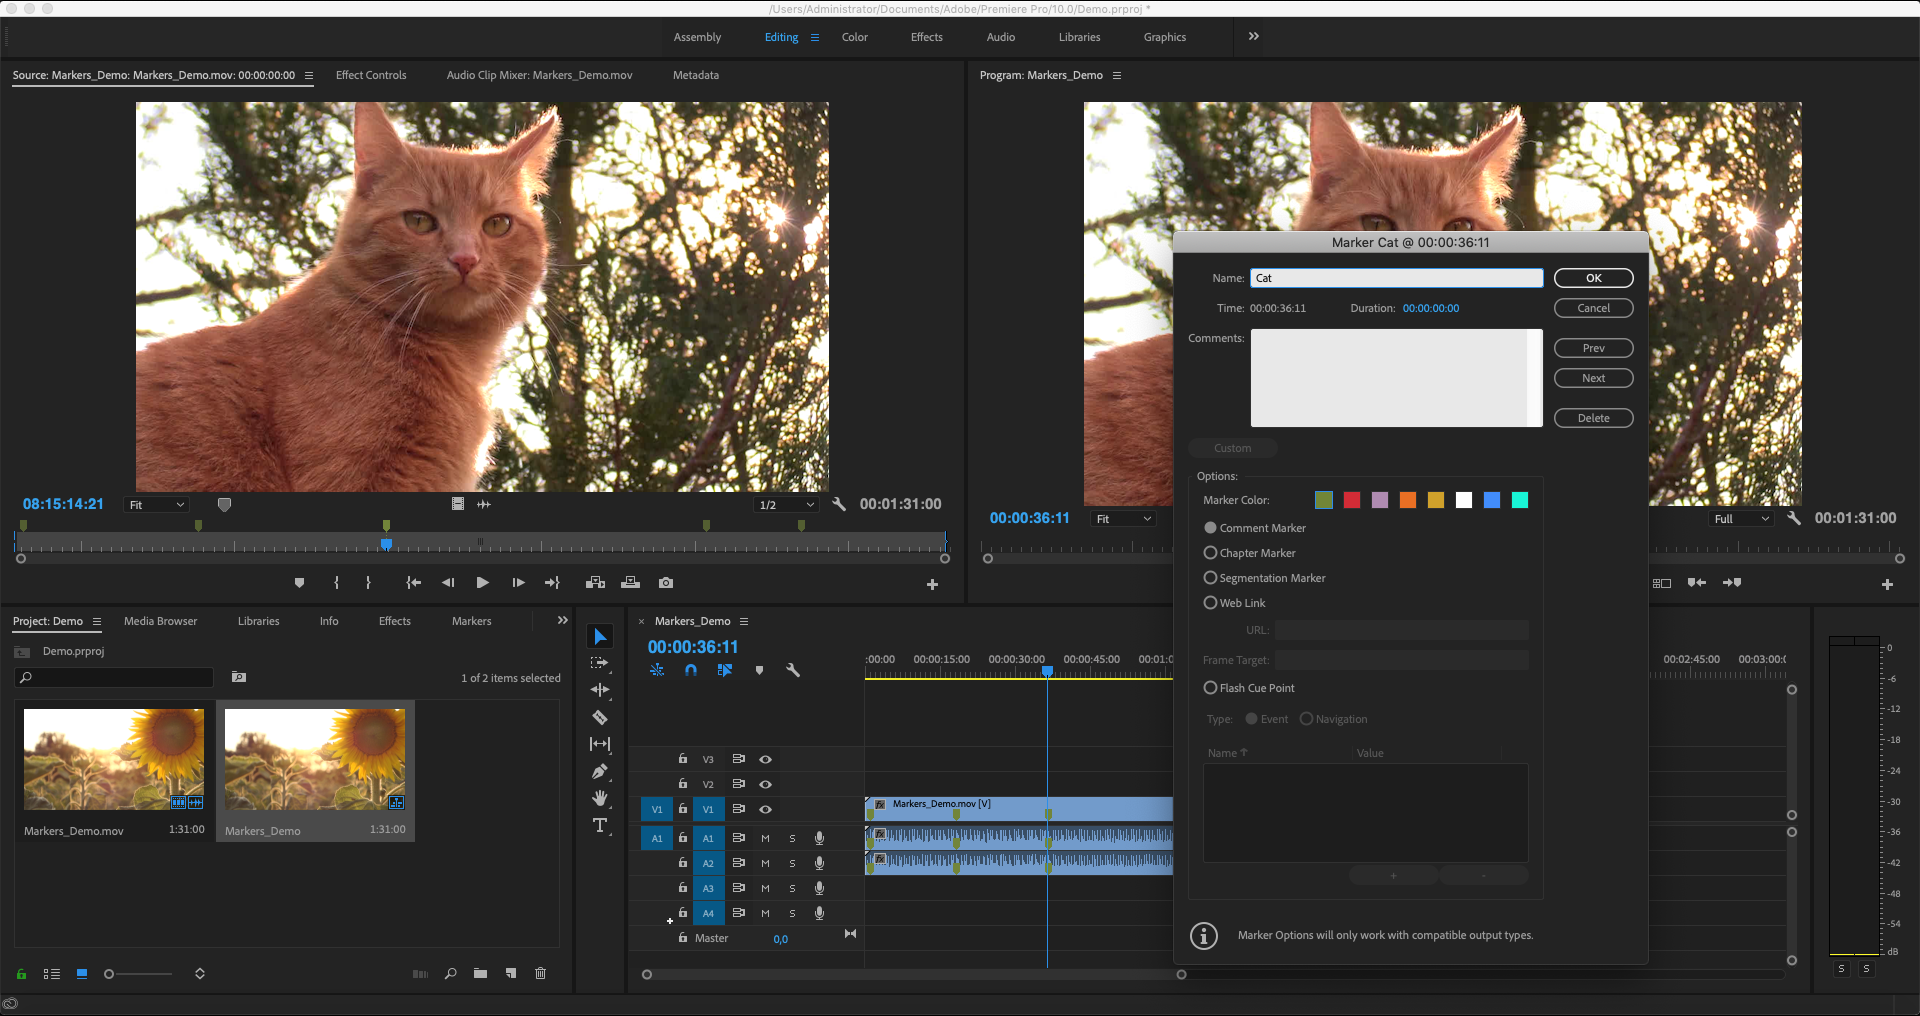
- You will see the created Markers either in the Viewer Window or directly in the Timeline of Premiere Pro.