Preparing a Channel in just:connect
Make sure that all just:play channels are configured and discoverable on the network.
In just:connect, repeat the following steps for each channel you would like to configure.
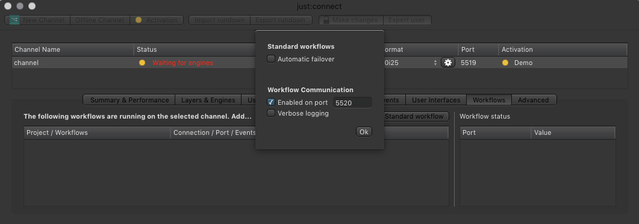
- Unlock just:connect for the desired channel and activate the Expert User mode by clicking the respective tab in the upper middle of the just:connect application window.
- Activate on the Workflows tab.
- Click on the Standard Workflow button.
- Under Workflow Communication, activate the Enable on port checkbox.
- Enter a port which is currently not used on this machine and make sure that the same port is not used for another channel on this machine.
Managing Channels in just:next
Adding a Channel
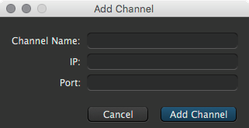
- Click on the Add Channel button in the upper right of the just:next application window.
- Enter a Channel Name. You can use any name but it makes sense to use the same name like defined in just:connect.
- IP: Enter the IP-Address of the machine running just:connect which hosts the channel you would like to control.
- Enter the Workflow Communication Port you have previously defined in just:connect.
Do not use the port of the channel which is shown in the channel view of just:connect. - Click the Add Channel button.
Editing a Channel
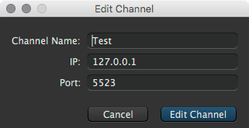
- Select a channel in the channels list of just:next.
- Click on the Edit Channel button.
- Edit the settings accordingly to your needs.
- Click the Edit Channel button to apply your changes.
Removing a Channel
- Select a channel in the channels list of just:next.
- Click on the Remove Channel(s) button.
- You will be asked if you really want to remove the selected channel(s).