Edit-While-Recording
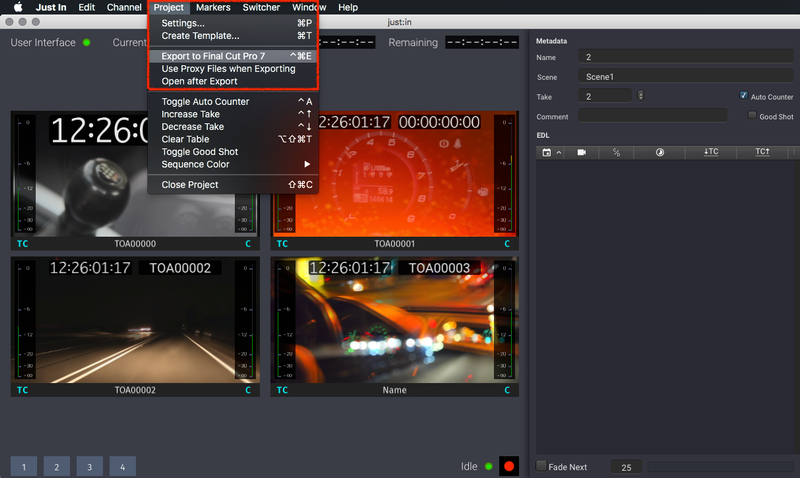
When using Apple Final Cut Pro or Adobe Premiere Pro you can export your takes while recording. Open the menu Project → Export to… to export to your desired Editor. Keep in mind that Edit-While-Recording only works on hardware which offers enough processing power for live:cut and the ingest process.
Adding Gaps to your Multicam Project
With your vision mixer or GPI simulator it is possible to switch to a source that doesn't "exist". To do so set up one Channel (or more) in the live:cut Project Settings under the I/O Device matrix. After that, every time you switch to this non existing source you will get a gap in your video track. This can be perfect for inserting graphics, other prepared video layers or other ISOs recorded on a camera.
Capturing via the Second Capture Instance
You can – apart from your High-Res files – capture additional media files via the second capture instance. This workflow needs more CPU and disk performance and should not be activated by default. If your workflow requires additional media files recording, please contact the ToolsOnAir support team to discuss this particular setup.
Channel QuickView
When using live:cut with plenty of Channels it may be necessary to quickly see a Channel in full size. Double-click on a Channel or select it and press the spacebar to see it in full size. Double-click it again to go back to the Channel overview.
Fade Next
When enabling the Fade Next option, this option stays activated for all following cuts as long as this option gets disabled again. If this option should be reseted after the next cut, then there is an option in the Switcher Menu, which is called "Automatically Reset Fade Next".

