...
| Info |
|---|
Before continuing make sure to read the article Connecting to the just:store Web-based Administration Interface |
Click on System in the sidebar.
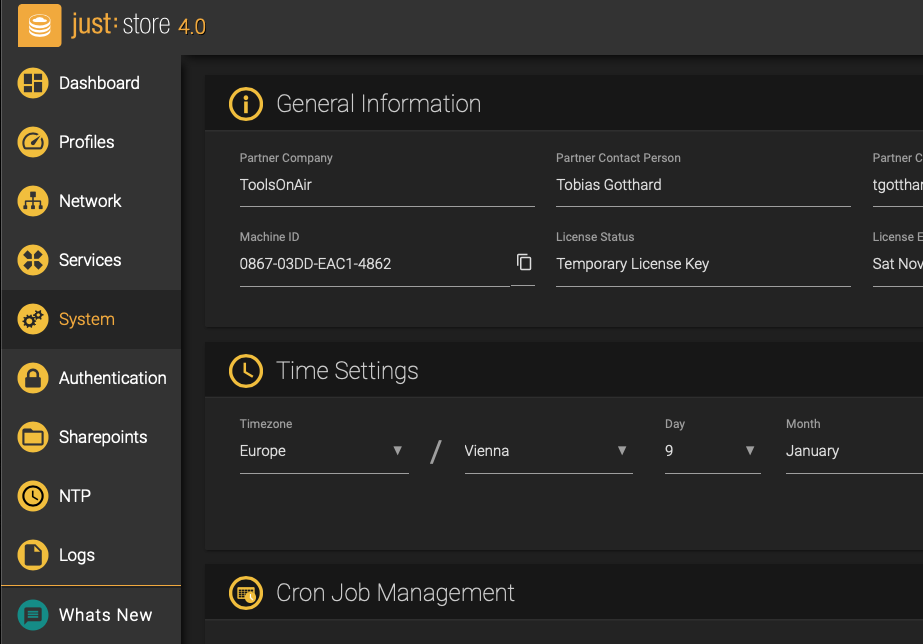
The System Settings will be shown, allowing you to configure system-related settings.
...
Copy the Machine ID and create a ticket in our Helpdesk. You will receive a serial number via email.
Press the Edit button next to the Serial Number field and paste your previously received serial number. Press the Save button afterwardsafterward.
The General Information overview should now reflect your activation.
...
| Note |
|---|
These settings can only be changed if you are an administrator and not using chronyd for getting the time information automatically. |
When not using NTP, you can define your time settings here.
...
Custom CronJob Schedule: predefined options for the cron job execution time.
Minute(s): choose at which minute(s) the job should be scheduled.
Hour(s): choose at which hour(s) the job should be scheduled.
Day(s) of month: choose at which day(s) the job should be scheduled.
Month(s): choose at which month(s) the job should be scheduled.
Week Day(s): choose at which week dayweekday(s) the job should be scheduled.
Drag and drop file here: allows you to upload your cron job file.
...
Warning Quotas Limit-Timer: this timer checks if the warning size is reached and for the set time you will be able to use the maximum size which you set on the Sharepoint.
Warning inode Limit-Timer: this timer checks if the inode limit is reached and for the set time you will be able to use the maximum limit which you set on the Sharepoint.
Warning Realtime Blocks Limit-Timer: this timer checks if the realtime real-time block limit is reached and for the set time you will be able to use the maximum block limit which you set on the Sharepoint.
...
For e-mail notifications to work, you need to enter valid SMTP settings here. You can test your settings afterwardsafterward, making sure that the settings are correct and notifications reach their destination properly.
...
SMTP Server Address: enter the hostname or IP address of the SMTP server.
SMTP Port: use port 25 for an unsecured connection and port 587 for a secure connection.
Send E-Mail Address: the e-mail address which will be displayed in the “From” field when receiving an e-mail notification.
E-Mail Addresses to notify: enter one or multiple e-mail recipients in this field, separated by a comma. All recipients here will receive an e-mail in case of a notification.
Authentication: select the type of authentication. This may require a username and a password.
Trust SSL/TLS Certificate: Enable these options when using an SSL or TLS certificate.
...