...
| Table of Contents |
|---|
...
What is Crash Recording?
Crash Recording records Video signals on the fly.
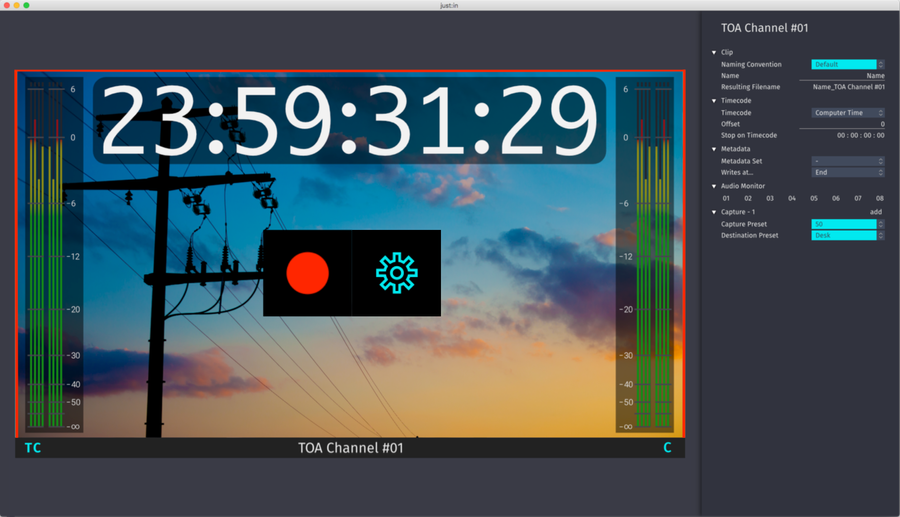
Making a Crash Recording
- Make sure to have at least one valid Capture and one valid Destination Preset in just:in Engine.

- Make sure you are connected to a Channel in just:in and select Crash Mode in the desired Channel View.
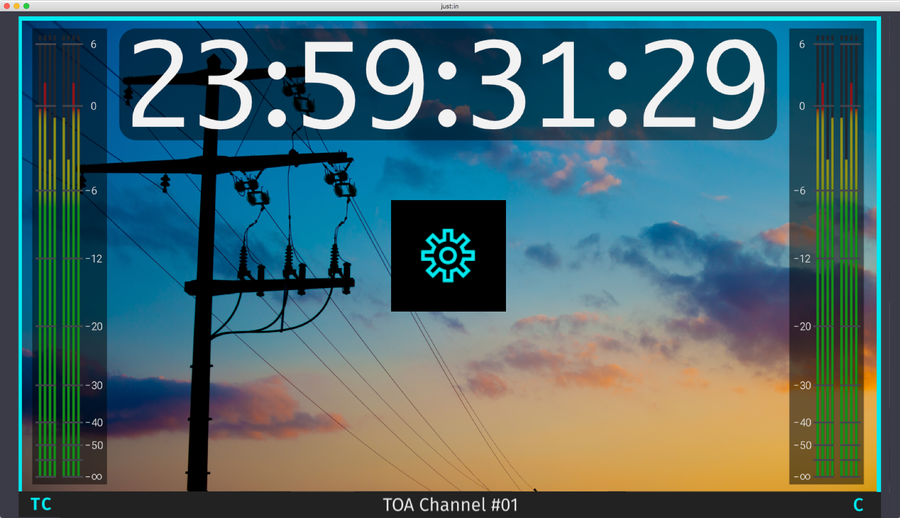
- Click on the sprocket to open the Inspector of the desired Channel.
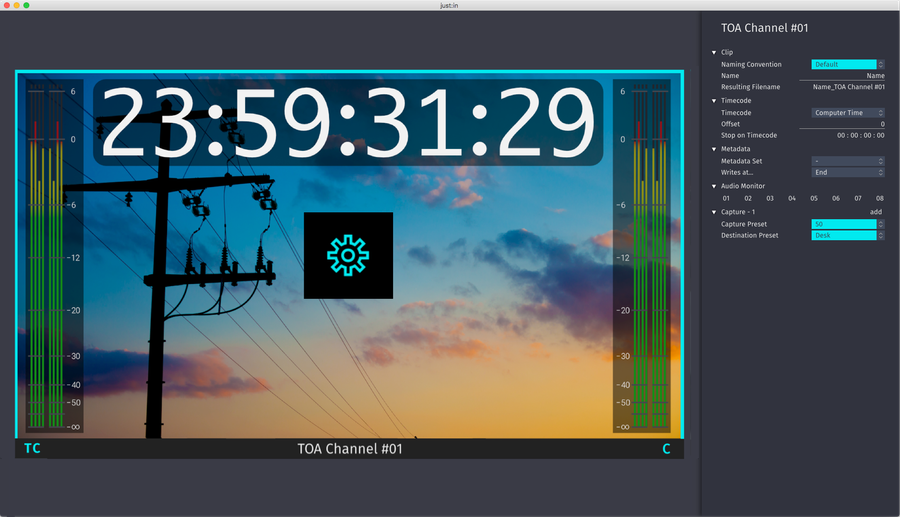
It is required to select a Naming Preset, a Capture Preset and a Destination Preset. If you wish you may modify the other settings.
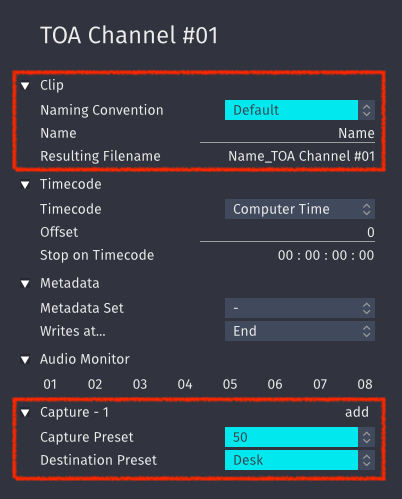
Info - Only Capture Presets which match the incoming video signal will be shown here.
- Select "-" to load a new Naming Convention or a Capture/Destination Preset which has been made recently.
Now hover over the Channel View. Next to the Inspector button there's a Record button. Press the this button to start the Recording (shortcut: command +R).
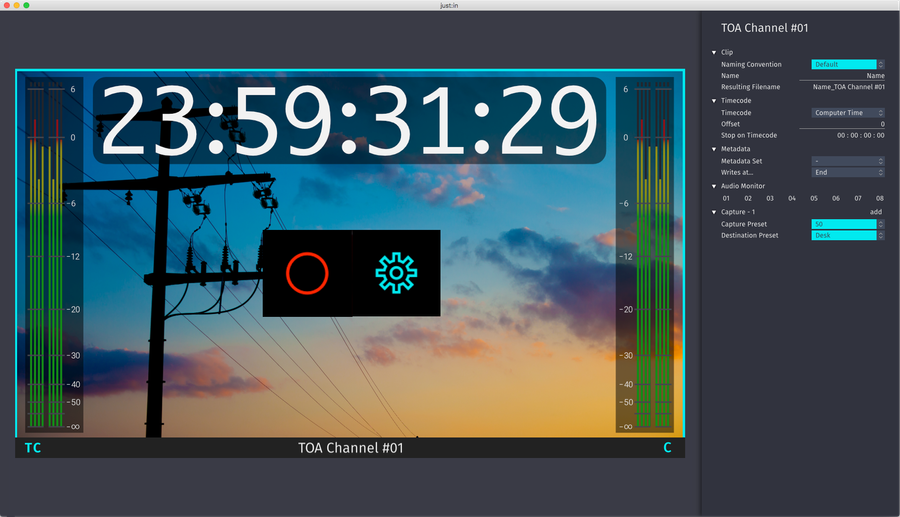
Info If the Record button does not show up, verify your Capture and Destination Presets in just:in Engine and that you have selected one here in the Inspector.
- The border of the recording Channel will continuously change colors from turquoise to red, indicating that there is a Recording in progress.
...
- Start a Recording.
- Open the Inspector.
- In the Timecode area enter a valid Timecode. Press the enter key afterwards.
- Switch Enable Stop on Timecode from Off to On.

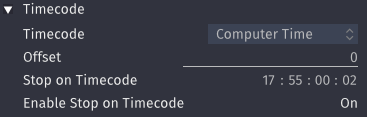
- Click the Record button to enable the Stop on Timecode feature.
...