This chapter describes the initial and basic setup of just:in Engine and the just:in user interface.
...
- Make sure just:in has been installed properly as described in the chapter Installation & Upgrade (just:in v3.0).
- Got to the Applications folder.
- Start Just In Engine. The operating system may display a window which says Verifying "Just In Engine". This process can take up to three minutes and will only happen once. If the verification process should not be possible, refer to the Known Issues (v3.0).

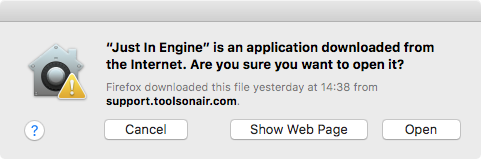
- When the verification process is done another dialog may appear. Press the Open button. This dialog will only appear once.
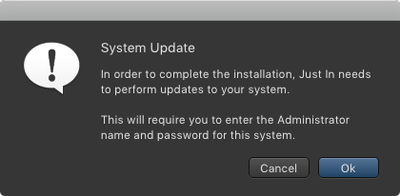
- Accept the system update dialog to continue.
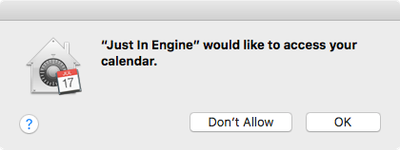
- Allow just:in Engine to access the Calendar (this is required for Scheduled Recording).
- just:in Engine will launch and display the Preferences window.
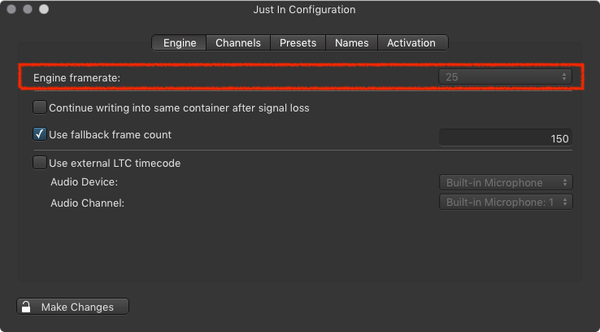
- Unlock the Preferences in the lower left corner.
- Engine tab. Select the desired framerate in the Engine tab.
Channels tab: Configure at least the Video Mode and the Audio Bitrate of the desired Channels.

Info Depending on the Video device used, the Channels tab may look different.
- Enable the Channel(s) in the Channels tab by clicking the corresponding checkbox in the Channels list.

- The Channel Status window will appear.

...