...
| Table of Contents | ||
|---|---|---|
|
Preface
You can monitor the status of and administrate just:store with a web browser. The just:store monitoring user interface shows various info like free disk space, CPU and RAM usage and more.
...
. By default
...
just:store
...
is configured
...
for direct connections
...
using the IP address 172.16.x.10. You need the exact IP address to connect to the web administration interface.
| Note |
|---|
Following animation indicates that the user interface is waiting for data. It will disappear as soon as all data has been retrieved.
|

Accessing the Network Configuration
- Open a web browser.
We We suggest using Firefox, Safari, Edge or Chrome. Internet Explorer can cause style and function issues. - Enter the IP address or hostname of the just:store system you want to connect to into the address bar of your web browser.
- Press the enter key.
- Select Administration on the main page and wait for it to load.

Network Overview

On the network overview you will see all physically network interfaces. With version 3 it is also possible to add notes to a network interface to make it easier to find the right network connection.
- As already mentioned a new feature of just:store is the network Note. We allow for the Notes all UTF-8 characters. Please keep in mind the size .

- Enter your login credentials and press the Login button.
- In the upper bar click on Network.
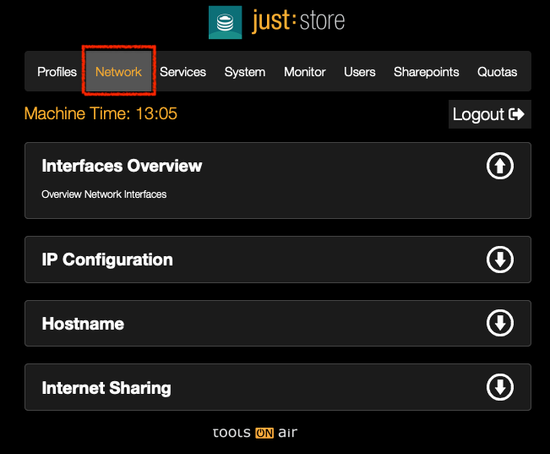
- To show or hide a section click on the respective arrow icons.

Network Overview
The network overview shows all physical network interfaces.
- Note: you may add a custom Note to each network interface. All UTF-8 characters are allowed. The width of the column depends on the textlength of the Note. We suggest to keep keeping the Note as short as possible.
- Every Type: displays the configuration type of the network interface has a State. The green sign shows you that the .
- State: green means just:store is connected with your client. The red sign shows that you have troubles with either the cable or the client is not reachable.
- If you want to Edit a network interface click the orange button. (The style can be look different)
Changing Network Configuration
Changing a network interface has to possibilities. You can either enter the network information manually or get it from a DHCP Server.
Static

- Type can either be Static or DHCP
- Note: You can set a title for example the client ID
- IP: Enter the correct IP Address
- Subnet Mask: Ask your network administrator (for direct connection Red means that there's a connection issue (cable connection issue or client not reachable).
- Edit: click this button to edit a network interface.
Editing a Network Interface
You can use a static configuration or DHCP.
Static Configuration
In the network overview, click on the Edit button of the network interface you want to edit. The IP Configuration section will be shown.


- Type: select Static.
- Note: enter a custom Note, for example the client ID (optional).
- IP: enter the IP Address.
- Subnet Mask: enter the subnet mask. For direct connections we suggest 255.255.255.0).
- Gateway: Ask your network administrator enter the Gateway (optional).
- DNS 1: Ask your network administrator enter the first DNS (optional).
- DNS 2: Ask your network administrator enter the second DNS (optional).
- MTU: Can either be select 1500 for 1Gbit connections or 9000 for 10Gbit connections.
| Info |
|---|
DHCP

- Type can either be Static or DHCP
- Note: You can set a title for example the client ID
- MTU: Can either be 1500 for 1Gbit or 9000 for 10Gbit
| Info |
|---|
To make your changes active please click on the buttons Commit Changes and Restart Network. Only the mentioned Click on the Commit Changes and Restart Network buttons to apply the changes. Only the selected network interface will be restarted/changed. |
| Warning | ||
|---|---|---|
| ||
After restarting a network interface all client connections will be lost. Re-establish them after the network interface has been restarted. |
DHCP
In the network overview, click on the Edit button of the network interface you want to edit. The IP Configuration section will be shown.

- Type: select DHCP.
- Note: enter a custom Note, for example the client ID (optional).
- MTU: select 1500 for 1Gbit connections or 9000 for 10Gbit connections.
| Info |
|---|
Click on the Commit Changes and Restart Network buttons to apply the changes. Only the selected network interface will be restarted/changed. |
| Warning | ||
|---|---|---|
| ||
When you restart your After restarting a network interface the connection will be broken and clients must be remount the just:store |
Setting a new Hostname
...
all client connections will be lost. Re-establish them after the network interface has been restarted. |
Changing the Hostname
Head to the Hostname section. Change the hostname and click the Save Settings & Apply button. The new hostname will be working used after 10secondsapproximately 10 seconds.

Sharing the
...
Internet Connection from just:store
Head to the Internet Sharing section. If your just:store is connected to the internet you can use it as a router. You can share the internet connection over all network interfaces.

Setting up
...
Link Aggregation / Bonding
We currently have not added this feature to the user interface. If
...
your network allows
...
bonding please contact us and we will gladly help you.