5.3 Non DSK-based Switch to Live Configuration (AJA and Blackmagic) (v2.5)
Using the built-in method enables you to switch between a Live Signal and the Playout of a Video without the need of a Video router. In addition it is possible to add Graphics to the Live Signal without the need of a second Video device.
AJA Video Devices
Selecting the AJA 4K Mode Firmware
Using the AJA ControlPanel the device must be flashed to 4K Mode with 2 inputs and 2 outputs before it can be used.
- Open the AJA ControlPanel.
- Go to the Firmware section.
- In the Firmware Information area, make sure that the installed firmware is "[Name of your Video Hardware] (4K Mode)".
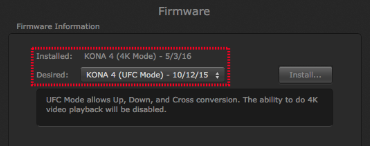
- If not, select "[Name of your Video Hardware] (4K Mode)" from the Desired menu.
- Click the Install... button.
- Follow the instructions to complete the Firmware flashing process.
Activating the 4K Mode of an AJA device will…
- …disable the ability to do hardware-based up/down/cross conversion.
- …disable the ability to activate the Downstream Keyer to play out Fill & Key.
AJA Devices and Closed Captioning
In the AJA ControlPanel in the Format section, make sure to activate the VANC option to pass-through any Closed Captioning data which comes with the input signal. Passing through of CC data is only supported using devices from AJA (Kona 4) while using a Without DSK or Disabled Live SDI input configuration in the Channel settings of just:connect.
Configuring just:connect (AJA and Blackmagic Video Devices)
- Open just:connect.
- Open the Advanced Output Format settings of the desired Channel.
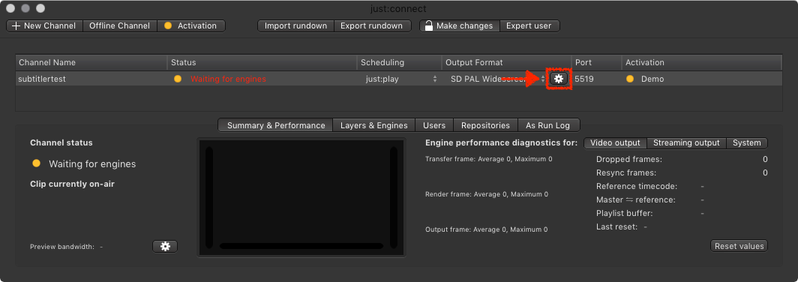
- At the top there is the Live SDI Input Configuration.
.png?version=1&modificationDate=1500365872721&cacheVersion=1&api=v2&width=800&height=362)
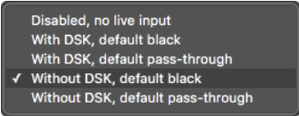
- Select one of the available Without DSK settings:
- Without DSK, default black: Black will be played out in case nothing is playing in the timeline of the UI.
- Without DSK, default pass-through: The connected signal will be played out in case nothing is playing in the timeline of the UI.
- Connect the Live Signal to SDI 2 (AJA) or SDI 1 (Blackmagic).
- Enter the input where the Live Signal is connected to.
