9.3 The just:in Channels Window
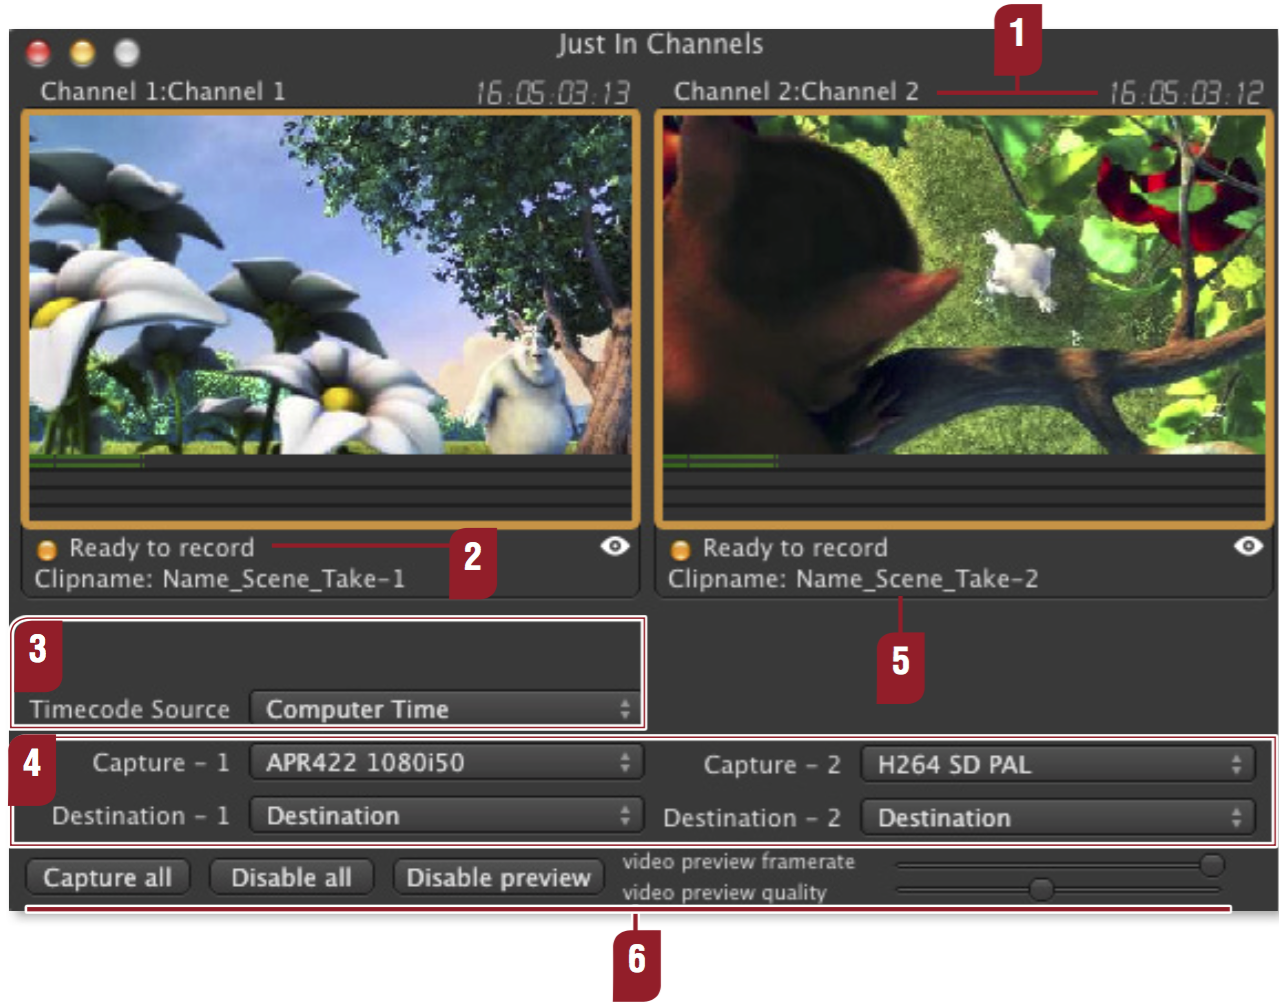
Before starting the recording process you will need to select your ingest channels. This is done by opening the "Just In Channels" from the Window menu ("Cmd + 2"). You should see the channels previews now. Let's have a look at the Just In Channels interface window now.
|
| Channel Number and Running Timecode |
| Record / Ready to record Info LED: Shows whether the channel is currently recording (red) or ready for record (yellow). | |
| Timecode Source: Choose between Computer Time and Audio In. | |
| Capture and Destination preset selectors for Capture – 1 and Capture – 2: live:cut can record on 2 different capture instances at once. You can select the appropriate presets here. | |
| Filename: Name of the file. | |
| Capture all, Disable all and Disable preview: Selects / Deselects all channels. Disables the preview. Alternatively you can change both the video preview framerate and the video preview quality to save network bandwidth and CPU. |


|
| Eye Icon: Takes you directly to the defined High-Res file path. |
| Audio Preview: Clicking in the audio bar of the desired channel will activate the audio preview. Remember to enter a dedicated Audio Preview Port in the Just In Con guration preference panel. |