live:cut v1.4 Getting Started
| Install the driver of choice (AJA or BMD; no driver required for Deltacast). |
| Make sure you're running OS X 10.9.5/10.10.5/10.11 or higher. Double-click on the DMG installer and click Agree to accept the license agreement. To install just:in, drag and drop the application icon onto the Applications folder. ToolsOnAir GPI Box Install the ToolsOnAir GPI Box driver, so that you can connect to a vision mixer or switcher other than a Blackmagic Design ATEM. You can find this driver in the just:in installation disk image in the folder "Additional Content/Service USB Drivers". |
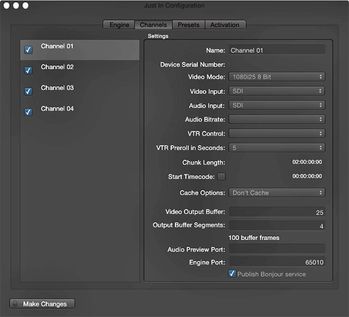
| Before you can run the live:cut GUI, you will need to configure the desired parameters in the Just In Configuration preference panel within the Just In Engine QuickTime application. To do so please navigate to the "/Applications/LiveCut" folder and double-click on the Just In Engine QuickTime application. The Just In Configuration preference panel will automatically open:
|
| Create a new capture (PAL, NTSC, HD or Custom) and a destination preset.
|
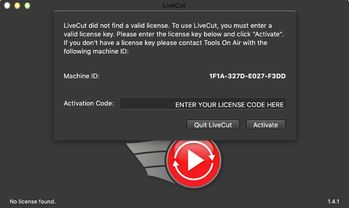
| In order to activate your live:cut system you need to activate both – the Just In Engine QuickTime engine and the live:cut GUI application. Please contact ToolsOnAir to get your activation codes (either temporary or perpetual) by providing your Machine ID. You can find your Machine ID by clicking on the Activation tab of the Just In Configuration preference panel. Enter the activation code for the Just In Engine QuickTime engine first, press the Enter key to commit your entry and restart the Just In Engine QuickTime application. Once restarted the Just In Engine QuickTime engine window will display the activated channel(s). After that run the live:cut application (same location as the engine) and enter your activation code by following the same procedure as with the engine. |
| Once the activation code has been entered, the live:cut GUI will allow to enter the appropriate Name, Scene and Take information. Press the Done button to start with the live:cut configuration. |
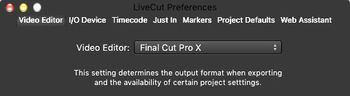
| Select Preferences (cmd + comma) from the live:cut menu and click on the Video Editor tab to select your preferred NLE. Please keep in mind that Apple Final Cut Pro 7 needs to be running before doing your first XML export. |
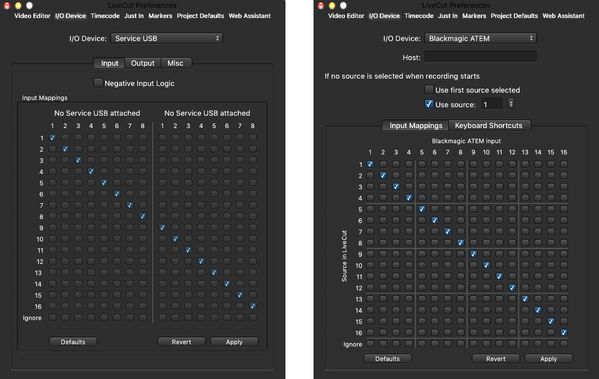
| Next click on the I/O Device tab and select either Service USB (if you're using a traditional vision mixer or switcher) or Blackmagic ATEM. When using a Blackmagic ATEM switcher, please enter the IP Address in order to be able to connect to the device. Once done, close the LiveCut Preferences window.
|
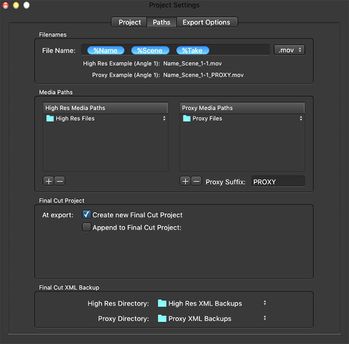
| Now open the Settings window (cmd + p) from the Projects menu and click on the Paths tab. In the Media Paths section choose the same destination path that you've set previously in the just:in configuration preference panel. This step is VERY important: remember to select the container (mov or mxf). In this Getting Started Guide we will use the mov-container. You can disregard all other settings for now. |
| Now that you're done with the basic configuration, choose Save settings... (cmd + s) from the Project menu to save your configuration settings. Restart the live:cut GUI. |
| Congratulations! You are now ready to start your first multi-camera production with your live:cut system. One last setting before we start: select Open after Export from the Projects menu. By doing so live:cut will automatically trigger your NLE of choice to start and import the transformed XML. Click on the Record button to initiate the recording process and start logging the GPI trigger events from the switcher. Once done with the recording, click on the Stop button to tell the engine to terminate the recording session. live:cut will now convert the EDL into a readable and importable XML file. |