This chapter explain the just:in user interface based on an already connected Channel. |

Main Window
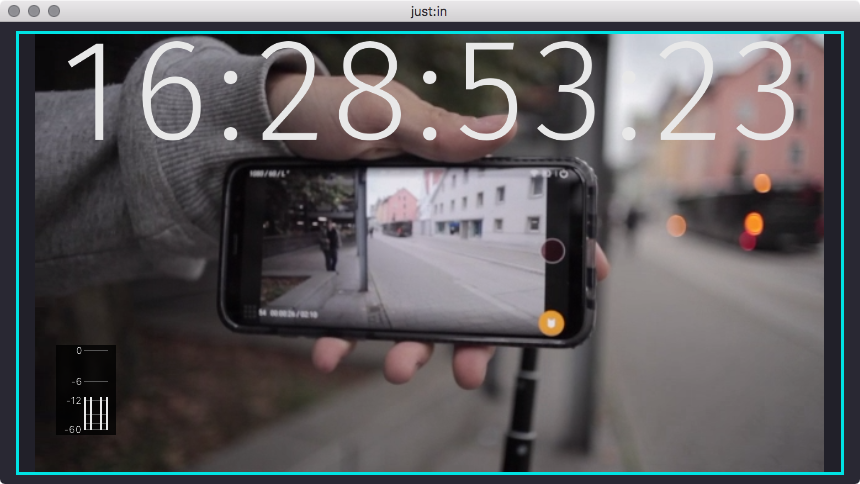
The Main Window shows the Preview of a Channel. By default the Timecode is displayed at the top and the Audio Bars are displayed in the lower left.

Accessing the Settings
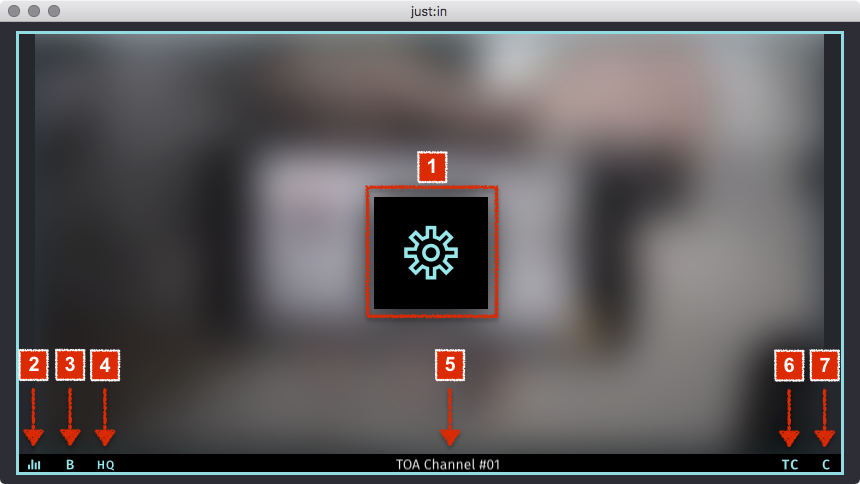
The Settings show up as soon as you hover over the Preview of a Channel.

- Inspector Button: This button opens the Inspector view (command + I).
- Show/Hide Audio Bars.
- Enable/Disable the Buffer Status.
- Enable/Disable High Quality Preview.
- Status: Click to switch between Channel Name, IP-Address & Port and Name of the Recording.
- Timecode Mode: Click to select the Timecode Mode.
- Recording Mode: Click to select the Recording Mode.
Timecode Modes
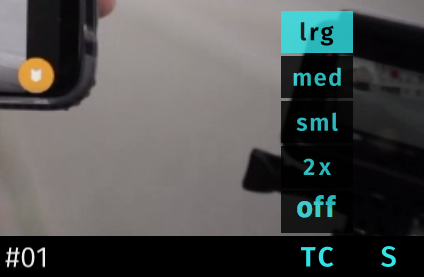
You can choose between following Timecode Modes.
- lrg: Large.
- med: Medium.
- sml: Small.
- 2x: Display the current Timecode in the top left corner and the elapsed time during Recording in the top right corner.
- off: Hide the Timecode.

Recording Modes
This is only an overview of the available Recording Modes. Refer to the chapter Capturing (just:in v2.0) for further information.
- C: Crash Recording. Record Video signals on the fly.
- S: Scheduled Recording. Record Clips based on Calendar Events in the local Apple Calendar of the machine running just:in Engine.

Preferences
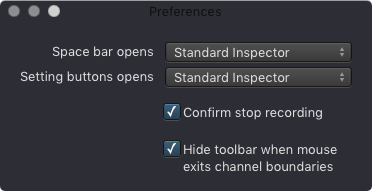
You can access the just:in user interface Preferences by using the keyboard shortcut command + comma.

- Space bar opens: select whether the Standard or the Fullscreen Inspector will be shown when pressing the spacebar on a selected Channel.
- Settings button opens: select whether the Standard or the Fullscreen Inspector will be shown when pressing the Settings button.
- Confirm stop recording: when enabled a Recording can only be stopped by pressing the Record button twice.
- Hide toolbar: when enabled the Toolbar at the bottom of each Channel View hides automatically as soon as the appropriate Channel View loses focus.


