This chapter explain the just:in user interface based on an already connected Channel. You will learn how to connect to a Channel in the next chapter. |

Main Window
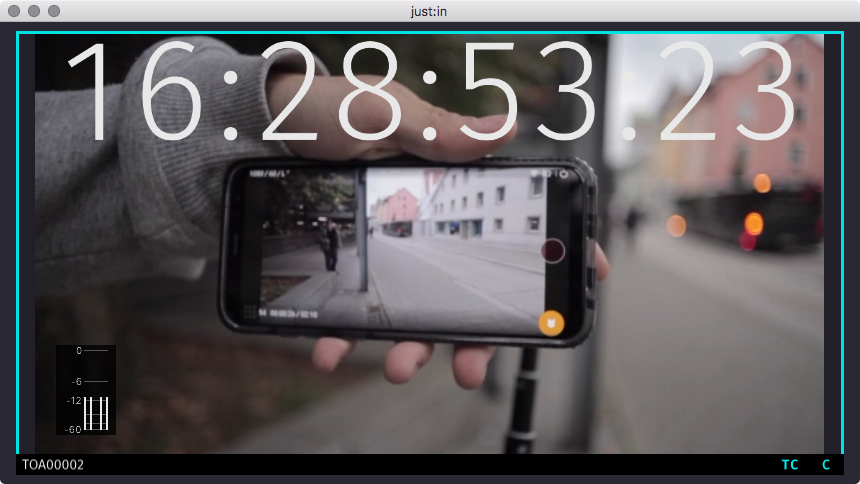
The Main Window shows the Signal which is currently received by the Channel. The various overlays (Timecode, Audio Bars…) are shown depending on the settings defined in the Preferences (see below). By default all overlays – except for the Buffer Status – are shown.

Main Window – Detail
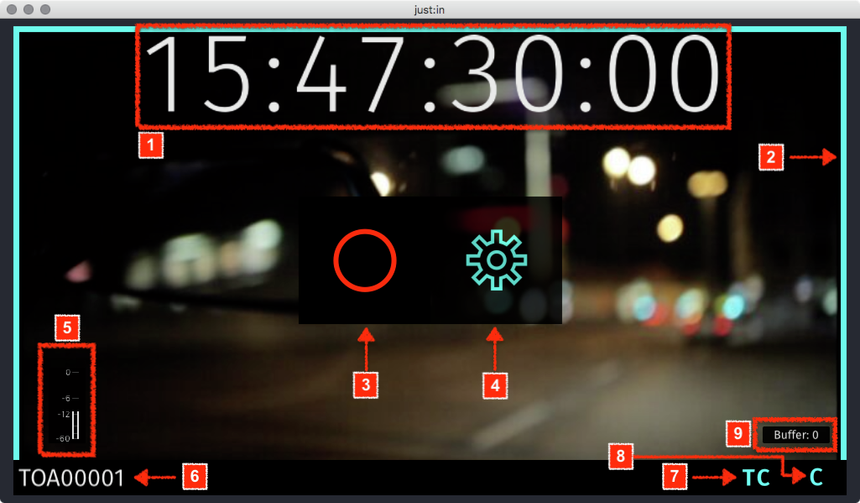
This figure shows all elements of the Channel Preview, it may look different on your system.

- Timecode: displays the Timecode depending on the selected Timecode mode (see below).
- Channel Preview Border:
- Turquoise border: when you click on a Channel Preview it gets a turquoise border which means it's selected. You may select multiple Channel Previews by holding the command key. This is useful if you want to change the Capture settings of multiple Channels at once.
- Red border: indicates that a Recording is in progress on the particular Channel.
- Red/Turquoise border: the Channel is selected and a Recording is in progress on the particular Channel.
- Record Button (command + R): this button shows up as soon as you hover over a Channel. Press this button to start the Recording on the particular Channel.
- Please note that this button only shows up after selecting a valid Capture and Destination Preset in the Inspector. Refer to the just:in Engine configuration chapter for further details on Presets.
- If the Record button disappears frequently: lower the resolution and/or framerate in the just:in Engine Channel Preview Options.
- Inspector Button (command + I): this button shows up as soon as you hover over a Channel. Press this button to open the Inspector of the particular Channel.
- If multiple Channels are selected, the changes made in the Inspector are valid for all selected Channels.
- Audio Bars: shows Audio levels.
- Channel Info: click to switch between Channel Name, IP-Address & Port or Name of the current Recording.
- Timecode Mode: click to select the Timecode Mode (see below).
- Recording Mode: click to select the Recording Mode (see below).
- Channel Buffer: displays the currently buffered frames (if any) of the particular Channel. As long as the Channel Buffer is lower than 50, there is no need to worry.
Timecode Modes
You can choose between following Timecode Modes.
- t/n: Displays current Timecode in the top left corner and the Channel Name in the top right corner. The elapsed time can be displayed by clicking on the current Timecode.
- lrg: Large.
- med: Medium.
- sml: Small.
- 2x: Display the current Timecode in the top left corner and the elapsed time during Recording in the top right corner.
- off: Hide the Timecode for this particular Channel. All other Channels will be not affected.

Recording Modes
This is only an overview of the available Recording Modes. Refer to the chapter Capture Modes (just:in v2.5) for further information.
- C: Crash Recording. Record Video signals on the fly.
- S: Scheduled Recording. Record Clips based on Calendar Events in the local Apple Calendar of the machine running just:in Engine.
- B: Batch Recording. Record a predefined batch list of Clips from a connected VTR deck over the RS-422 serial protocol.

Preferences
You can access the just:in user interface Preferences in the menu Just In → Preferences or by using the keyboard shortcut command + comma.
General Preferences

- Confirm stop recording: when enabled a Recording can only be stopped by pressing the Record button a second time within 5 seconds.
- Recording Border Thickness: defines the thickness of the border of a recording Channel. Increase the size to identify recording Channels more easily.
Mouse Behaviour Preferences
You can define which elements will be shown when entering or exiting a Channel Preview.

- Mouse Enter Action: select whether the particular element will be shown or hidden when the mouse is hovering over a Channel Preview.
- Mouse Exit Action: select whether the particular element will be shown or hidden when the mouse is not hovering over a Channel Preview.
All elements but the Buffer status are shown by default. |


