Table of Contents
1. just:store Hardware Overview
- Unpack the just:store system.
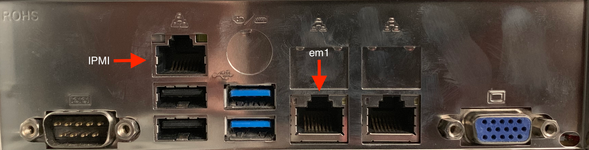
- On the back of the just:store system connect the IPMI port and the Network port, as shown in this figure.
- Connect the power supplies.
- Power on the just:store system.
- Shortly after the just:store system has started the em1 Network port will get an IP Adress over DHCP.
The Intelligent Platform Management Interface (IPMI) is a set of computer interface specifications for an autonomous computer subsystem that provides management and monitoring capabilities independently of the host system's CPU and operating system.
2. Installation of the just:store Client Software on macOS
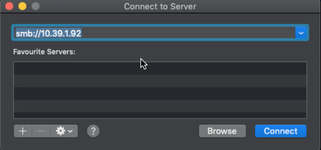
The just:store system comes with the preconfigured IP address 10.39.1.92. Make sure that this address is free on your network.
- Make sure the just:store system is running and connected to a properly configured network.
- On the client machine make sure you are in the macOS Finder.
- Press command + K on your keyboard to open up the Connect to Server window.
- Enter the IP Adress of the just:store system and click Connect.
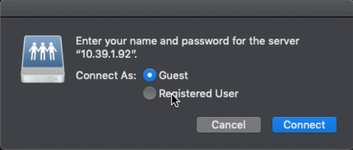
- Accept the dialog.

- Select Connect As: Guest and press Connect
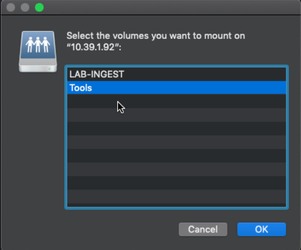
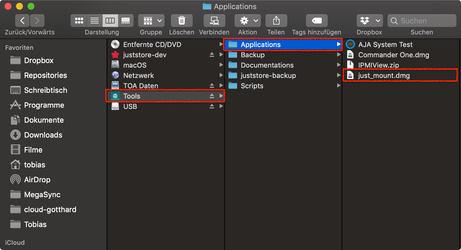
- Select the Tools sharepoint and press the OK button.
- The Tools sharepoint should now be mounted. On the sharepoint go to the folder Applications and open the just_mount disk image.
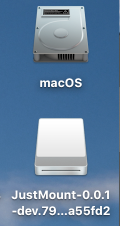
- The disk image appears on the Desktop and in the sidebar of any macOS Finder window.
- Drop the Just Mount application onto the Applications folder.
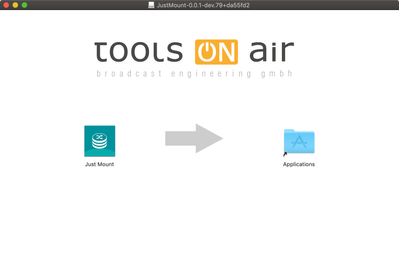
- Eject the disk image afterwards.