You can add, remove and change capture presets of a given engine, when the engine is selected in the list view above. All available capture presets will be displayed in the Capture Preset list.
...
![]()

Overview
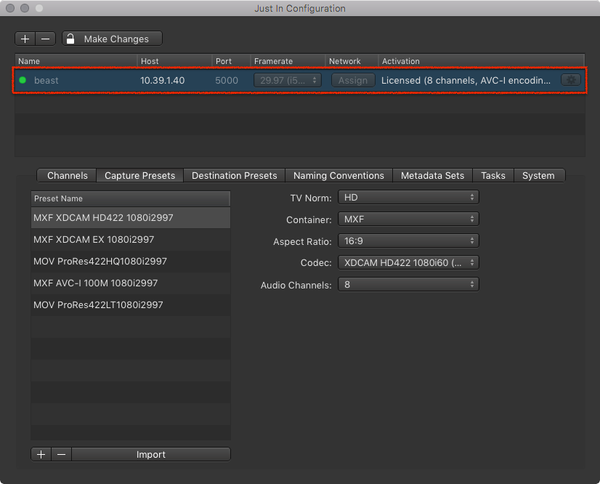
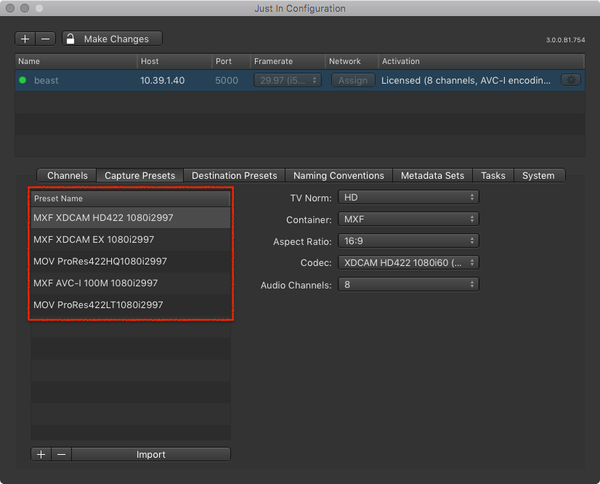
On the left you can see all created capture presets for the selected engine.
| Info |
|---|
Please beware that you will only see capture presets of an particular engine, if the engine is selected in the list above. |
| Info |
|---|
Please beware that you can also import already existing just:in mac presets by using the Import-Button. |
...


...
Add Capture Presets
A new capture preset can be created in two ways. Either you can create a completely new preset, or you can create a new preset based on an existing preset.
...

Add Capture Presets
...
Capture Presets define how a Recording will be done (codec, container, resolution…). Before you can do Recordings with the just:in user interface you need to create one or multiple Capture Presets. After defining Presets you can quickly access them in the just:in User Interface. This speeds up the Recording process and helps keeping things organized.
| Info |
|---|
To make any changes you need to click on the Make Changes button in the upper left and enter the admin password. |
Table of Contents
...
| Table of Contents |
|---|
...
Overview
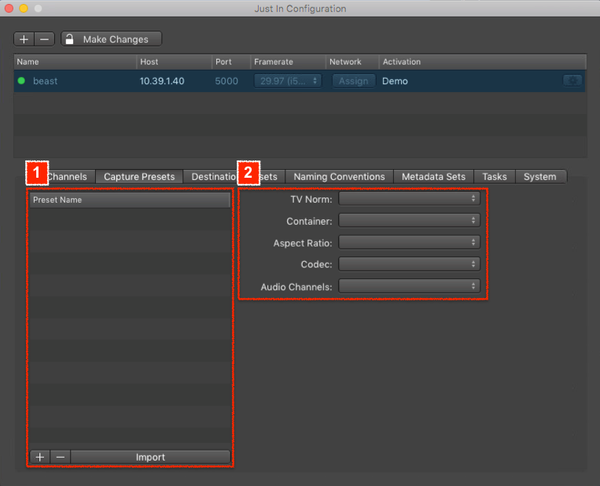
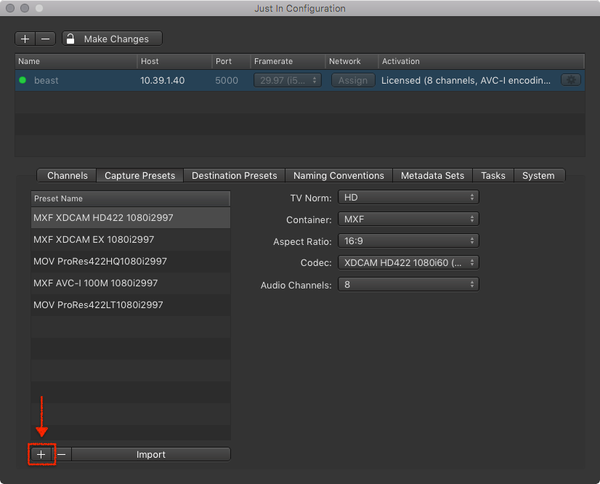
- Capture Preset List: shows all available Capture Presets. Use the buttons below to add, remove and import Presets.
- Capture Preset Configuration: allows you to define your Capture Preset.
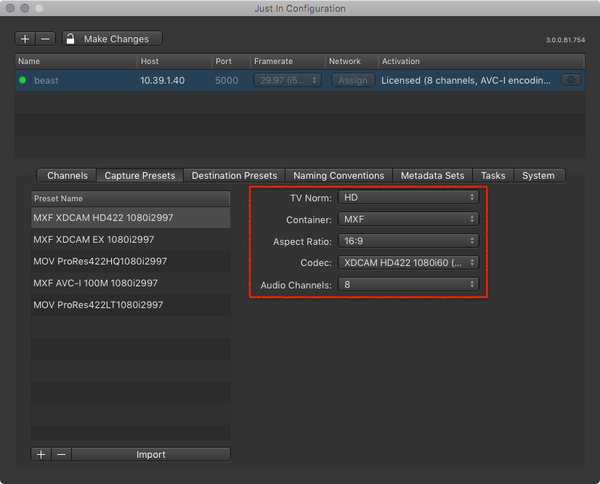
- TV Norm: select the desired TV Norm.
- Container: select the desired Container.
- Aspect Ratio: select the desired aspect ratio.
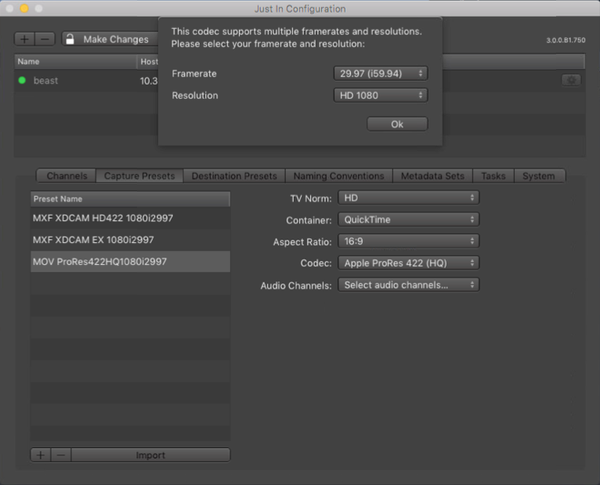
- Codec: select the desired Codec. After selecting the Codec you may also be asked for the Framerate and Resolution.
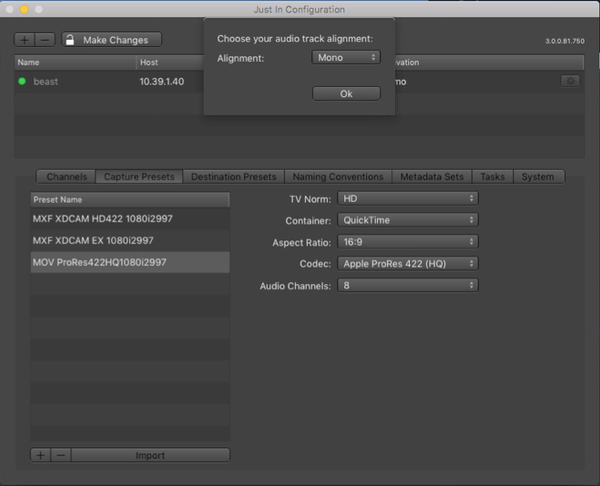
- Audio Channels: select the number of Audio Channels. After selecting the number of Audio Channels you may also be asked for the Audio Track Alignment (Mono or Stereo).
Adding a Capture Preset
- In the Engine List select the Engine.
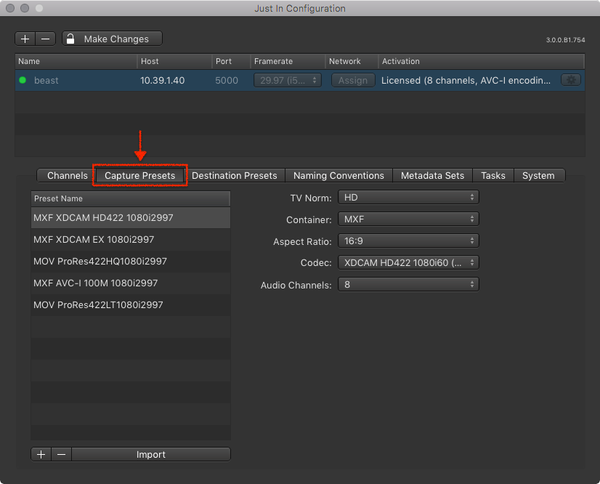
- Click on the Capture Presets tab.
- Below the Capture Preset List press the plus button to add a Capture Preset.
- A dialog appears asking you for the Capture Preset Name. Enter the Capture Preset Name and press the Create button.
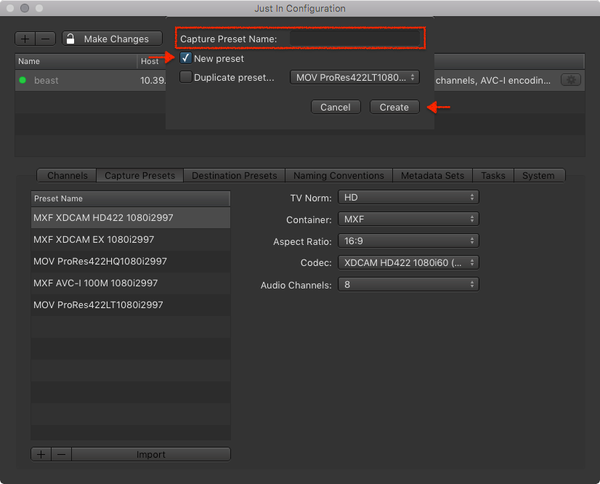
- Configure the Capture Preset. It will be saved automatically after all attributes are defined. You may change the settings of a Capture Preset at any time.
Duplicating a Capture Preset
- In the Engine List select the Engine.
- Click on the Capture Presets tab.
- Below the Engine List press the plus button to duplicate an existing Capture Preset.
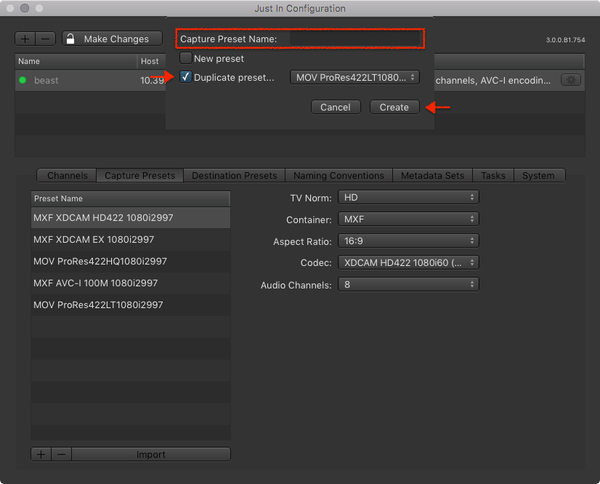
- A dialog appears asking you for the Capture Preset Name.
- Enter the Capture Preset Name, activate the Duplicate Preset checkbox, select the Capture Preset you want to duplicate in the drop down menu and then press the Create button.
- Configure the Capture Preset. It will be saved automatically after all attributes are
...
- defined. You may change the settings of a
...
- Capture Preset at any time
...

...
Edit existing Capture Presets
You can easily edit existing Presets by just selecting the Preset within the list and then simply change the attributes on the right. You can also change the name by just double-clicking on the name. To add or delete a preset, just use the buttons below.
...
- .
Editing an existing Capture Preset
- In the Engine List select the Engine.
- Click on the Capture Presets tab.
- In the Capture Preset List select the Capture Preset you want to edit.
- Edit the Capture Preset. Changes are saved automatically.
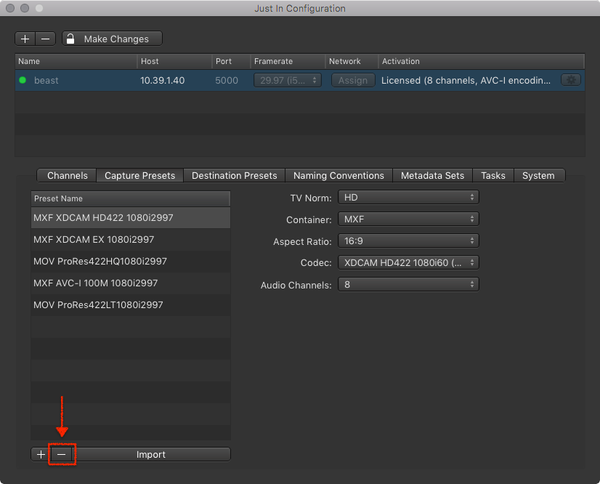
Removing a Capture Preset
- In the Engine List select the Engine.
- Click on the Capture Presets tab.
- In the Capture Preset List select the Capture Preset you want to remove.
- Below the Capture Preset List press the minus button to remove the selected Capture Preset.
Importing a Capture Preset
You can import Capture Presets which have been created in just:in Engine Mac.
- In the Engine List select the Engine.
- Click on the Capture Presets tab.
- Below the Capture Presets List press the Import button.
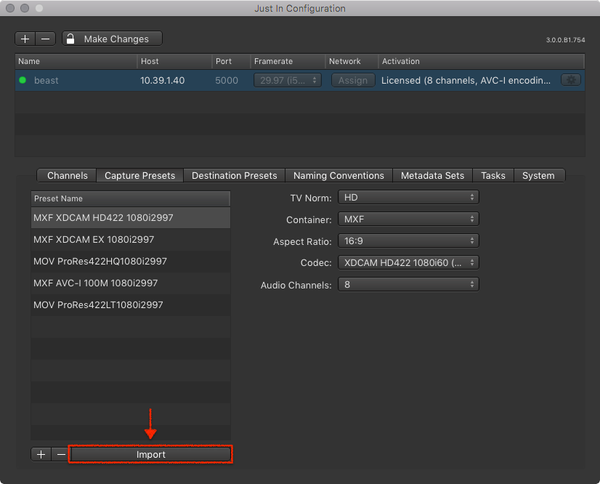
- Select the Capture Preset you want to import.
Apple ProRes
When creating
...
an Apple ProRes-based Capture Preset you
...
need to select the Framerate and Resolution.
Audio Channels and Audio Alignment
You can choose between 2, 4, 8 and 16
...
Audio Channels for every Capture Preset. Some configurations may also require an Audio Alignment setting.