...
| Info |
|---|
Show or hide Workbench columns using the View menu. You can also rearrange and change the width of the columns by moving the elements in the header area. |
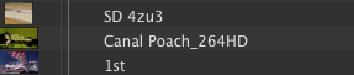
Item Color
The color for each item is also shown in a column in the Workbench (if this column is enabled). When dragging and dropping items from the Library, the Finder color (if defined) will automatically be set for the item and shown in the Workbench. The color can also be used to deactivate the infinite graphics. Please also refer to chapter 5.9 Inspector.

Warnings
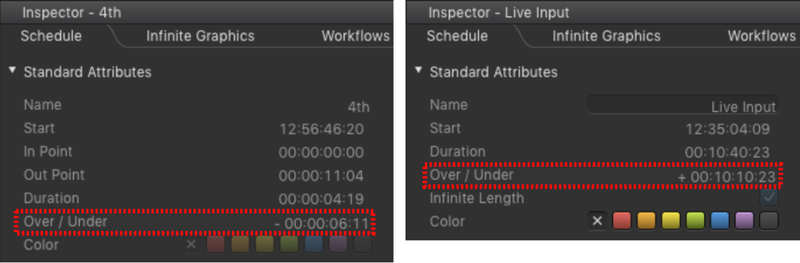
If the length of a Video/Live Clip has been changed by clicking on the Jump to Next Clip button, a small warning symbol ![]() will be shown. In addition to this the real length and the planned length is shown in the Inspector – as seen in the screenshots.
will be shown. In addition to this the real length and the planned length is shown in the Inspector – as seen in the screenshots.
- Video (left): A Video can only be shortened and therefore only a negative value will be shown.
- Infinite Live Event (right): An infinite live event can be played out shorter or longer than originally scheduled. In case the event has been ended before it reached the scheduled out point, a negative value will be shown. In case the event has been ended after it reached the scheduled out point, a positive value will be shown.
Sync Points
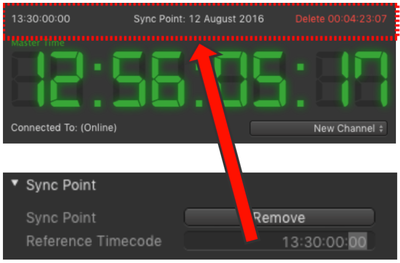
The sync point icon  is shown if there has been a sync point defined for this element. A sync point is like a desired start time, where the offset between the real start time and the desired start time is shown in the control area.
Adding a Sync Point
- Select the element you would like to define a sync point for in the Video Layer.
- Go to the Inspector and look for the Sync Point section.
- Click on Add.
- Enter the time you would like to have the element starting.
| Info |
|---|
Setting a sync point does not change the real start time of the element, but it helps the operator to adjust the rundown, so that the element starts as accurately as possible. |
Aspect Ratio Color Coding

- Yellow: Aspect ratio has been corrected to match the engine's aspect ratio.
- White: The aspect ratio of the Video and the engine is the same.
- Red: Aspect ratio has been changed and does not match the engine's aspect ratio anymore.
Codec Color Coding
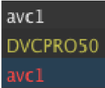
- White: Field order matches your engine's field order.
- Yellow: Field order has been changed automatically by just:play to match the engine's field order.
- Red: Field order has been changed manually by the operator but does not match the engine's field order anymore.
...
| Info |
|---|
Technically it is not possible to detect the field order used for a Video. So we assume that all Videos are using upper field first – except all NTSC standard definition Videos and all PAL Videos which have been compressed using a DV codec. |
Item Markup depending on the Mode of the User Interface
If the UI is in Master Time Mode the Workbench shows the current status of the playout.
If the UI is in Edit Mode the Workbench "simulates" the clips' states accordingly to the CTI position. These are not the clips' states of the real playout. Remember that only those elements which are loaded in the layer selected in the Timeline will be shown here.
Past Items

All items where the out-point is in the past of the CTI are grayed out to show that they have been played out already. Also the next Video going on air is grayed out, once it has been loaded into the buffer. Such items cannot be changed or removed any more.
On-Air Items

The name of the item which is currently on air is shown in green.
Scheduled Items
All items where the in-point has not started are shown in white. The item itself and all attributes can be changed.
Placeholder, Gap and Live Event Items
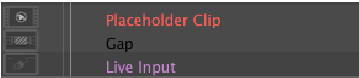
These three items are not related to any real media but can be scheduled like such.
- Placeholders are shown in red.
- Gaps are shown in black.
- Live events are shown in magenta.
Selected Items
Selected items are highlighted in blue. To select an item:
...