| Table of Contents |
|---|
...
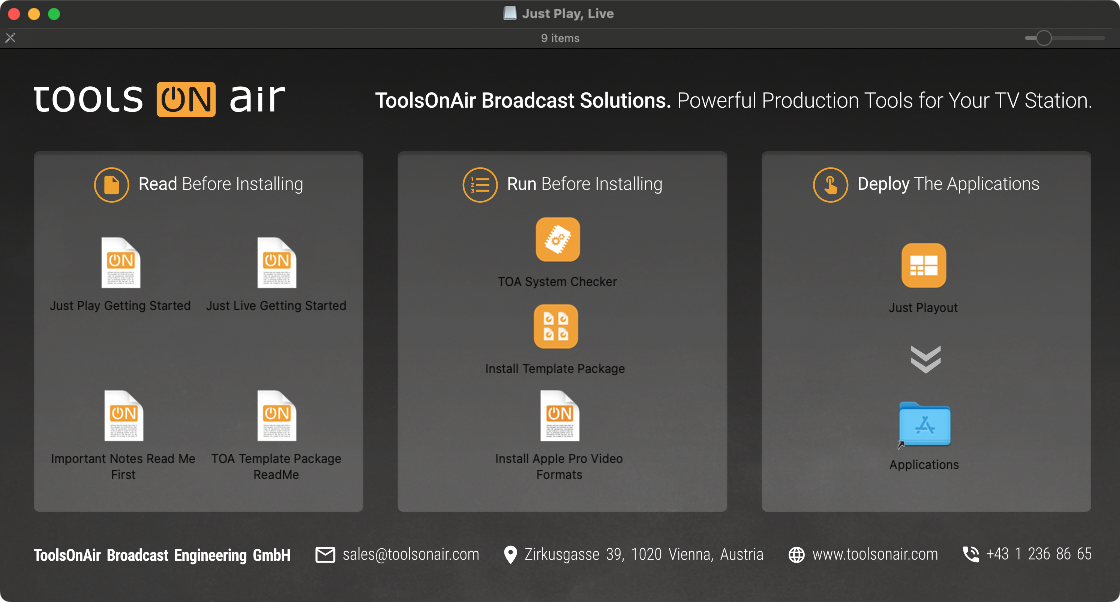
Drag the Just Playout folder from the disk image to the Applications folder. This will install all relevant playout software applications.
Eject the disk image afterwards (“Command-EE”).
Open a Finder window and navigate to the Just Playout folder inside your Applications folder.
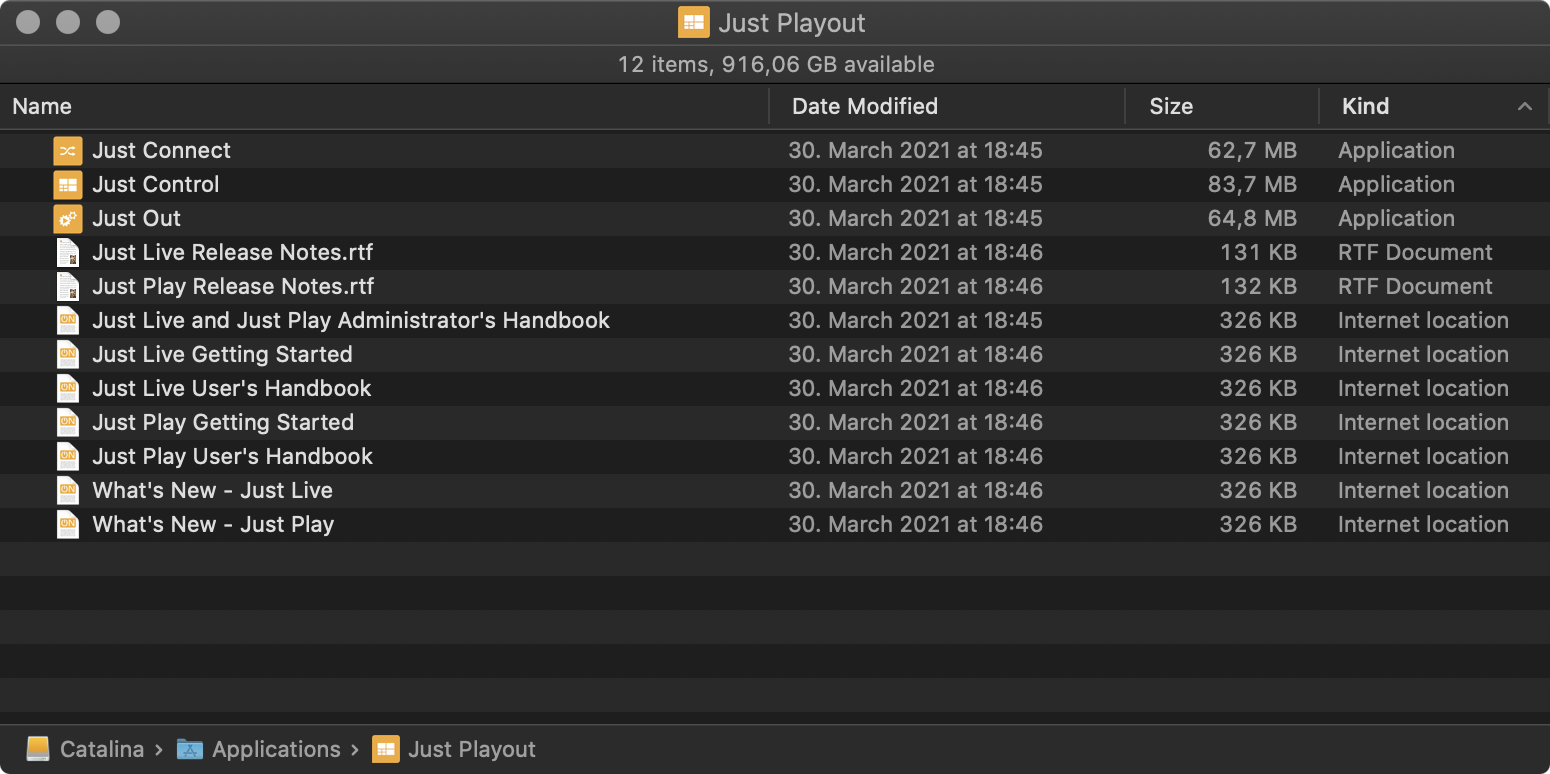
Just Out provides the final output (Virtual, SDI, or NDI® stream). It renders the frames in realtime either on the host GPU (Graphics) or CPU (video file decoding) and should never be quit during playout operations. For more information, please visit: 8. Just Out (v.5.x)
Just Connect acts like a channel manager, receiving and distributing all the information related to a playout channel. It interconnects to all Just Out engine(s) and Just Control user interface(s) which are related to a particular channel managed by Just Connect. For more information, please visit: 9. Just Connect (v.5.x)
Just Control is the unified user interface for all ToolsOnAir applications. During the setup, the administrator can define which one of the two available solutions/user interfaces, namely just:live or just:play should be used for a specific channel. For more information about the just:live interface, please visit: just:live v.5 User Interface Manual
Add (Drag & Drop) the applications Just Out, Just Connect, and Just Control to your macOS Dock for faster access.
...
Start the Just Out and Just Connect applications and confirm/apply all system-related requests.
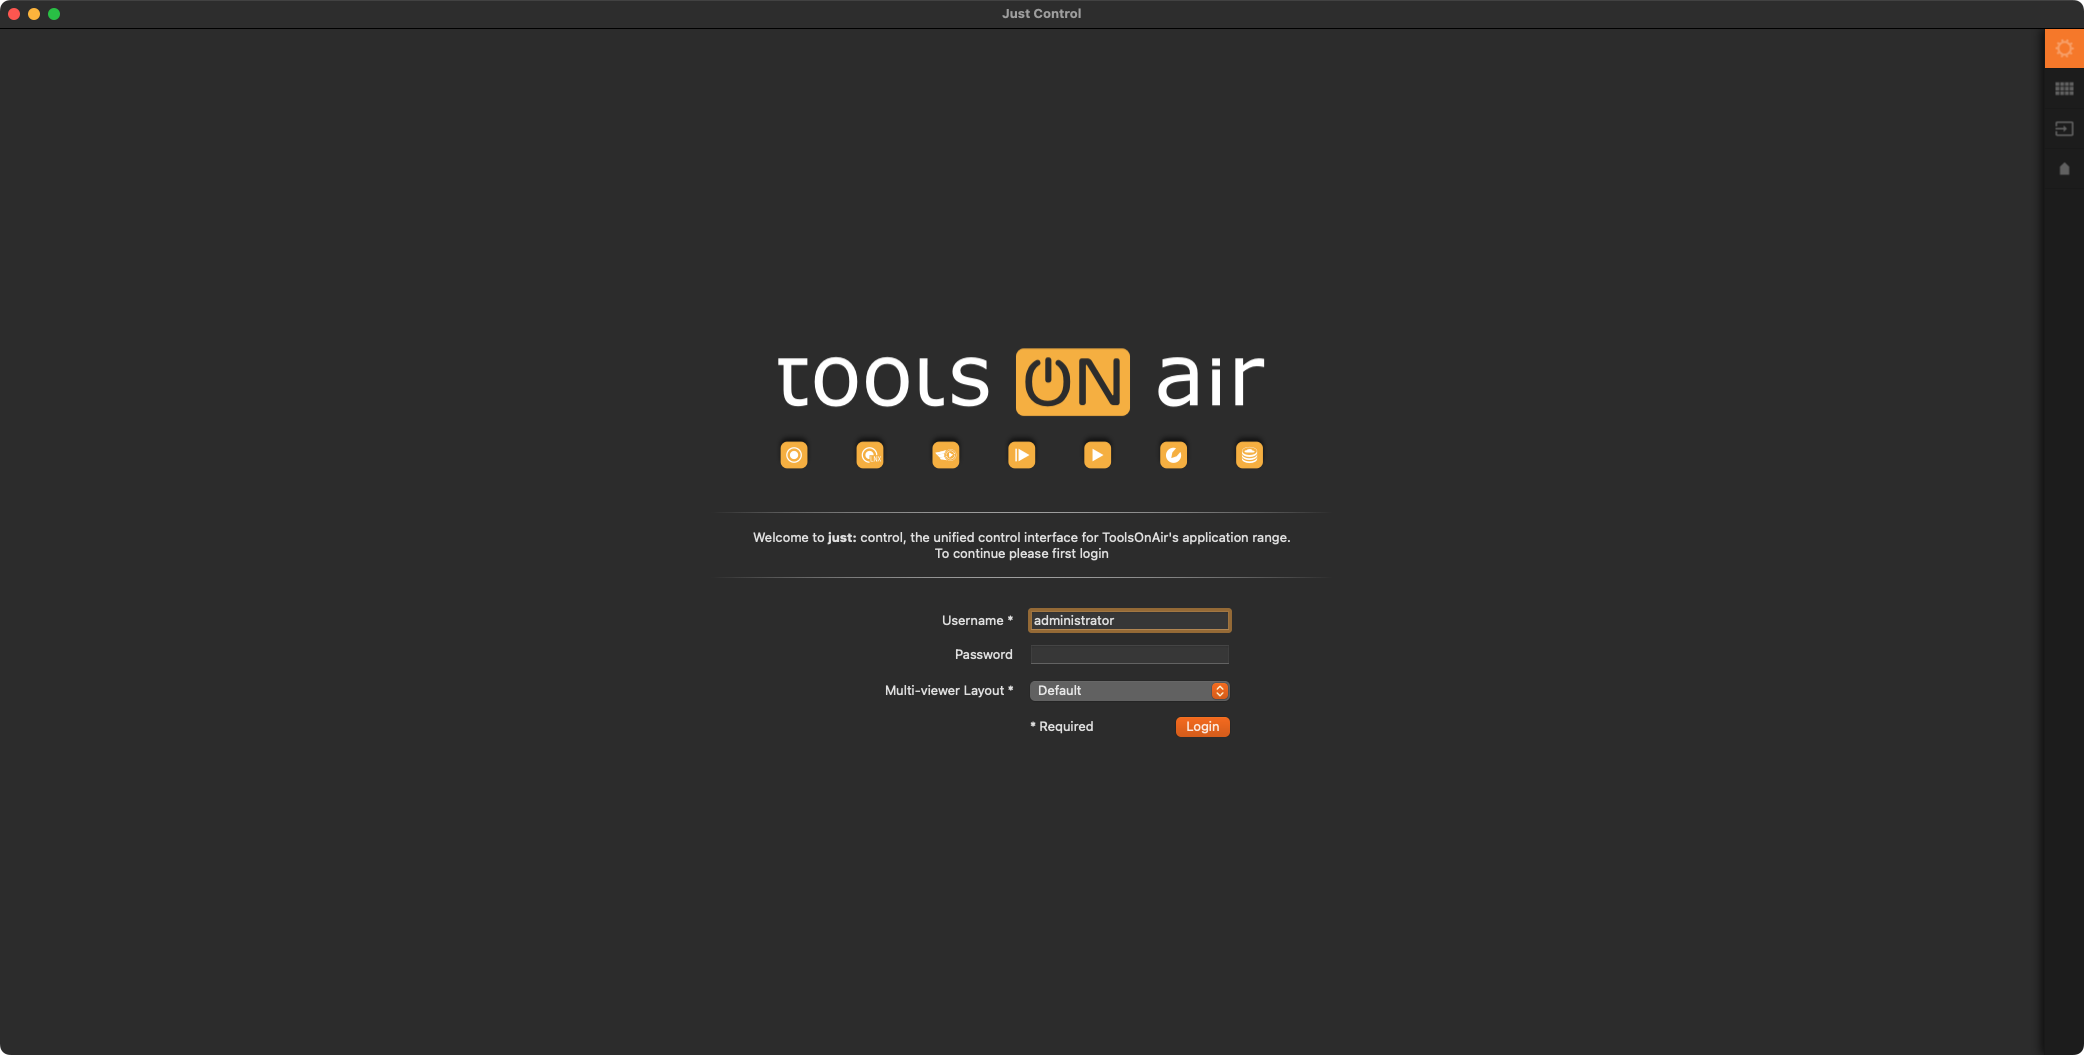
Start the Just Control application, which will automatically display the User Login window. We recommend keeping the defined username for now.
Click on the Login “Login” button.
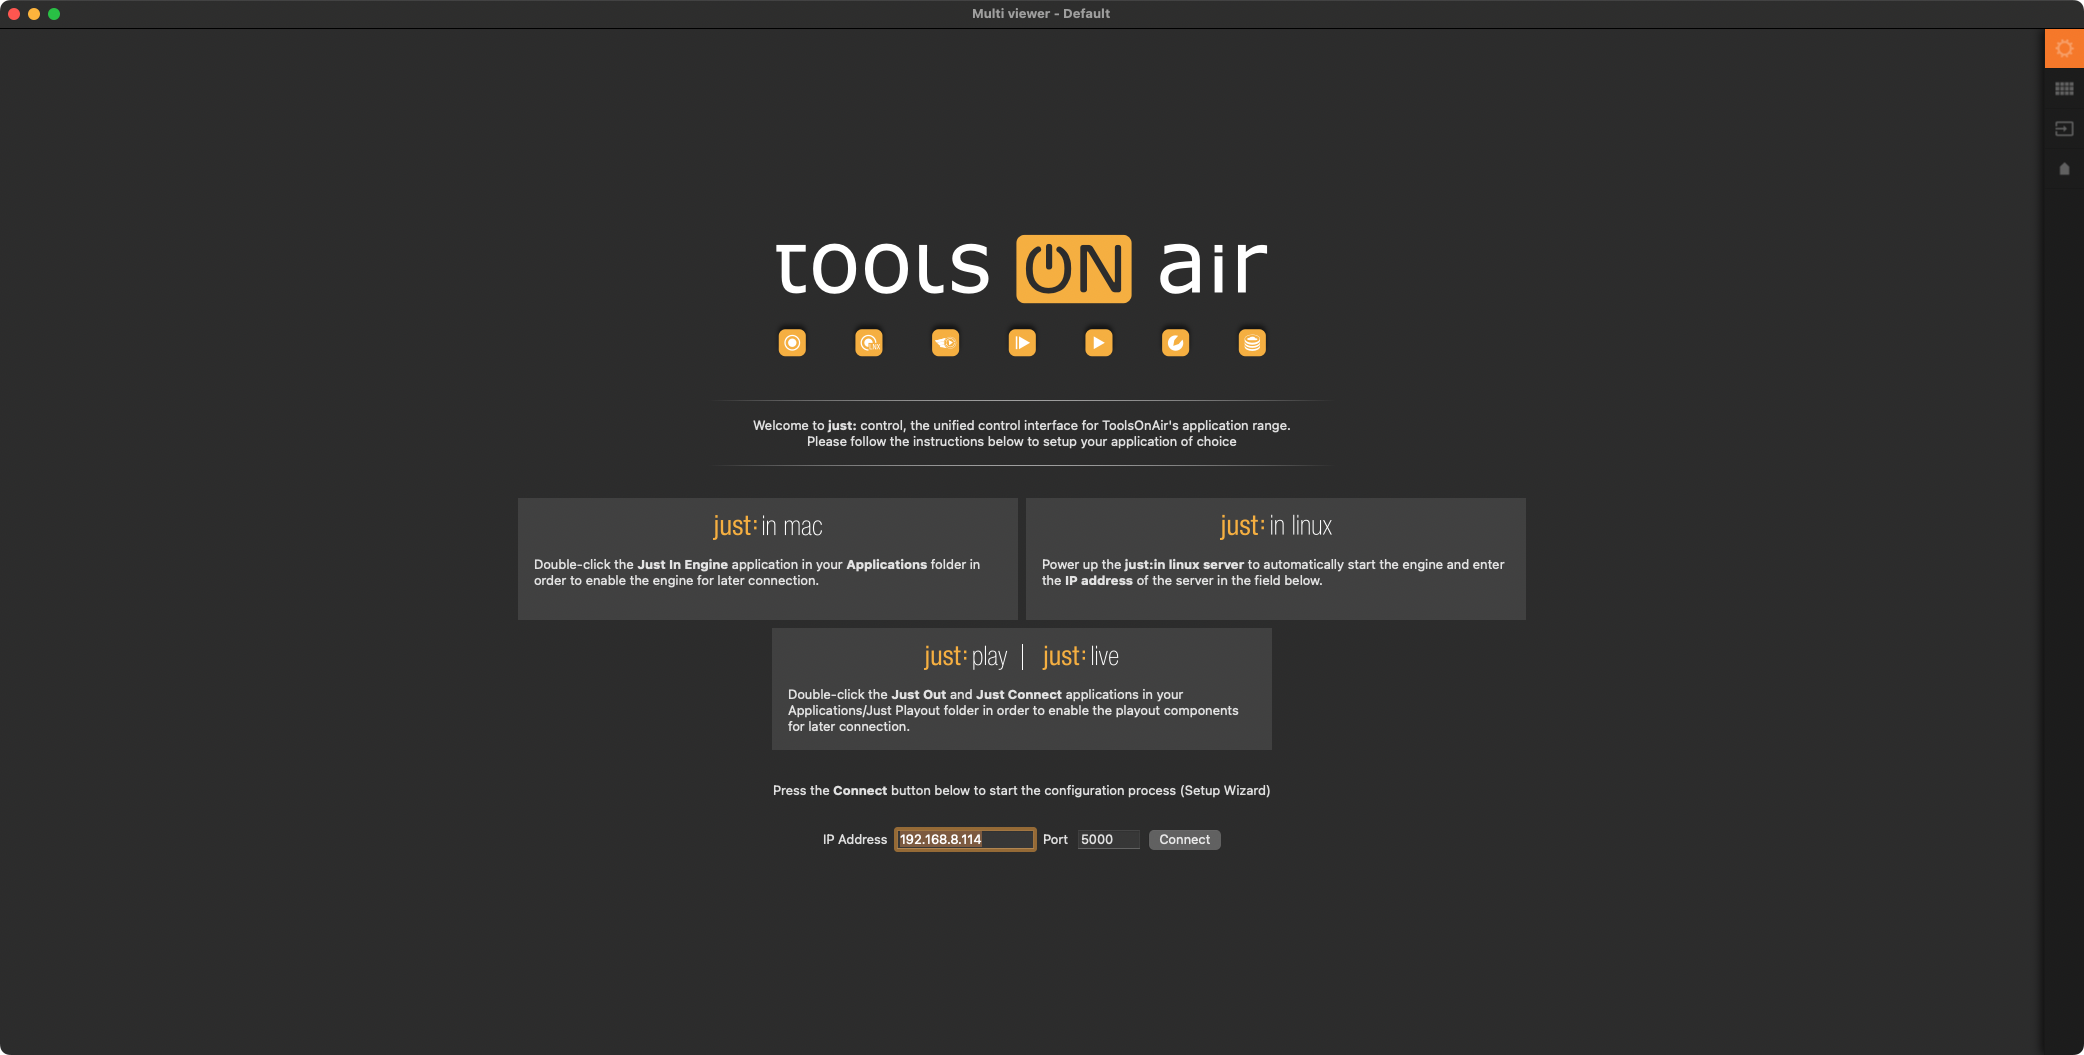
Once the Just Out and Just Connect applications have been started (as described in step 1) and you want to run all applications on one machine, make sure to enter the IP Address “127.0.0.1”, keeping the same Channel Port Number (5000), before clicking on the “Connect” button. This allows you to test and configure your setup independent of your network infrastructure. For final production/On-Air setups, we recommend using the IP Address provided by your network administrator.
Make sure the option New Channel is selected, and enter the name of the Channel into the “New Channel” name field.
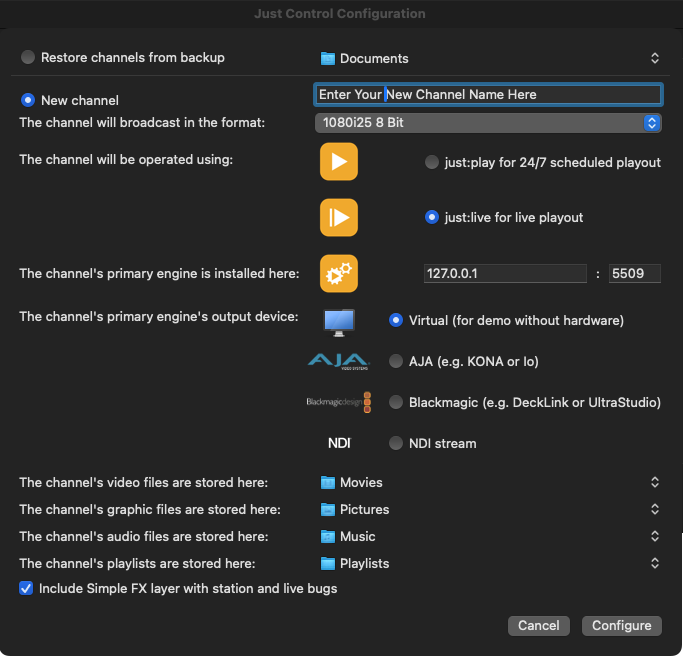
Select the Format you would like to use for broadcast (Example: 1080i25 8 Bit).
Select the option just:live for live playout.
When running Just Out, Just Connect, and Just Control on the same machine, please enter the IP Address “127.0.0.1” under the section “The channel's primary engine is installed here” to ensure proper testing operations. Keep the same Engine Port Number (5509).
If there is a dedicated Video device, select AJA or Blackmagic, otherwise, keep the Virtual option selected.
Change the Repository Folders if desired. The default Repositories are:
Video files:
/Users/yourUserName/VideosGraphic files:
/Users/yourUserName/PicturesAudio files:
/Users/yourUserName/MusicPlaylist files:
/Users/yourUserName/Documents/Playlists
Selecting the “Include Simple FX layer with station and live bugs” checkbox loads two TOA Demo still images automatically as Channel Station ID Bug and Live Input Bug. This feature can also be (de)activated after the initial setup, and the still images can be changed once the installation is done.
Click the “Configure” button to finish the setup. The Just Control user interface should look similar to the picture below.
...
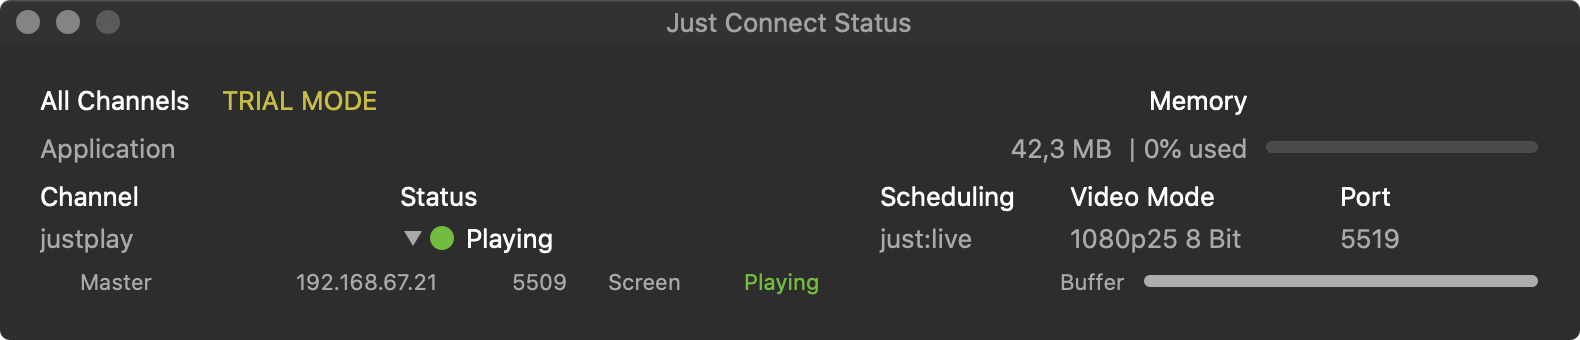
In Just Connect the Status of the Channel should be “Playing”, with a a 🟢 (Green) indicator.
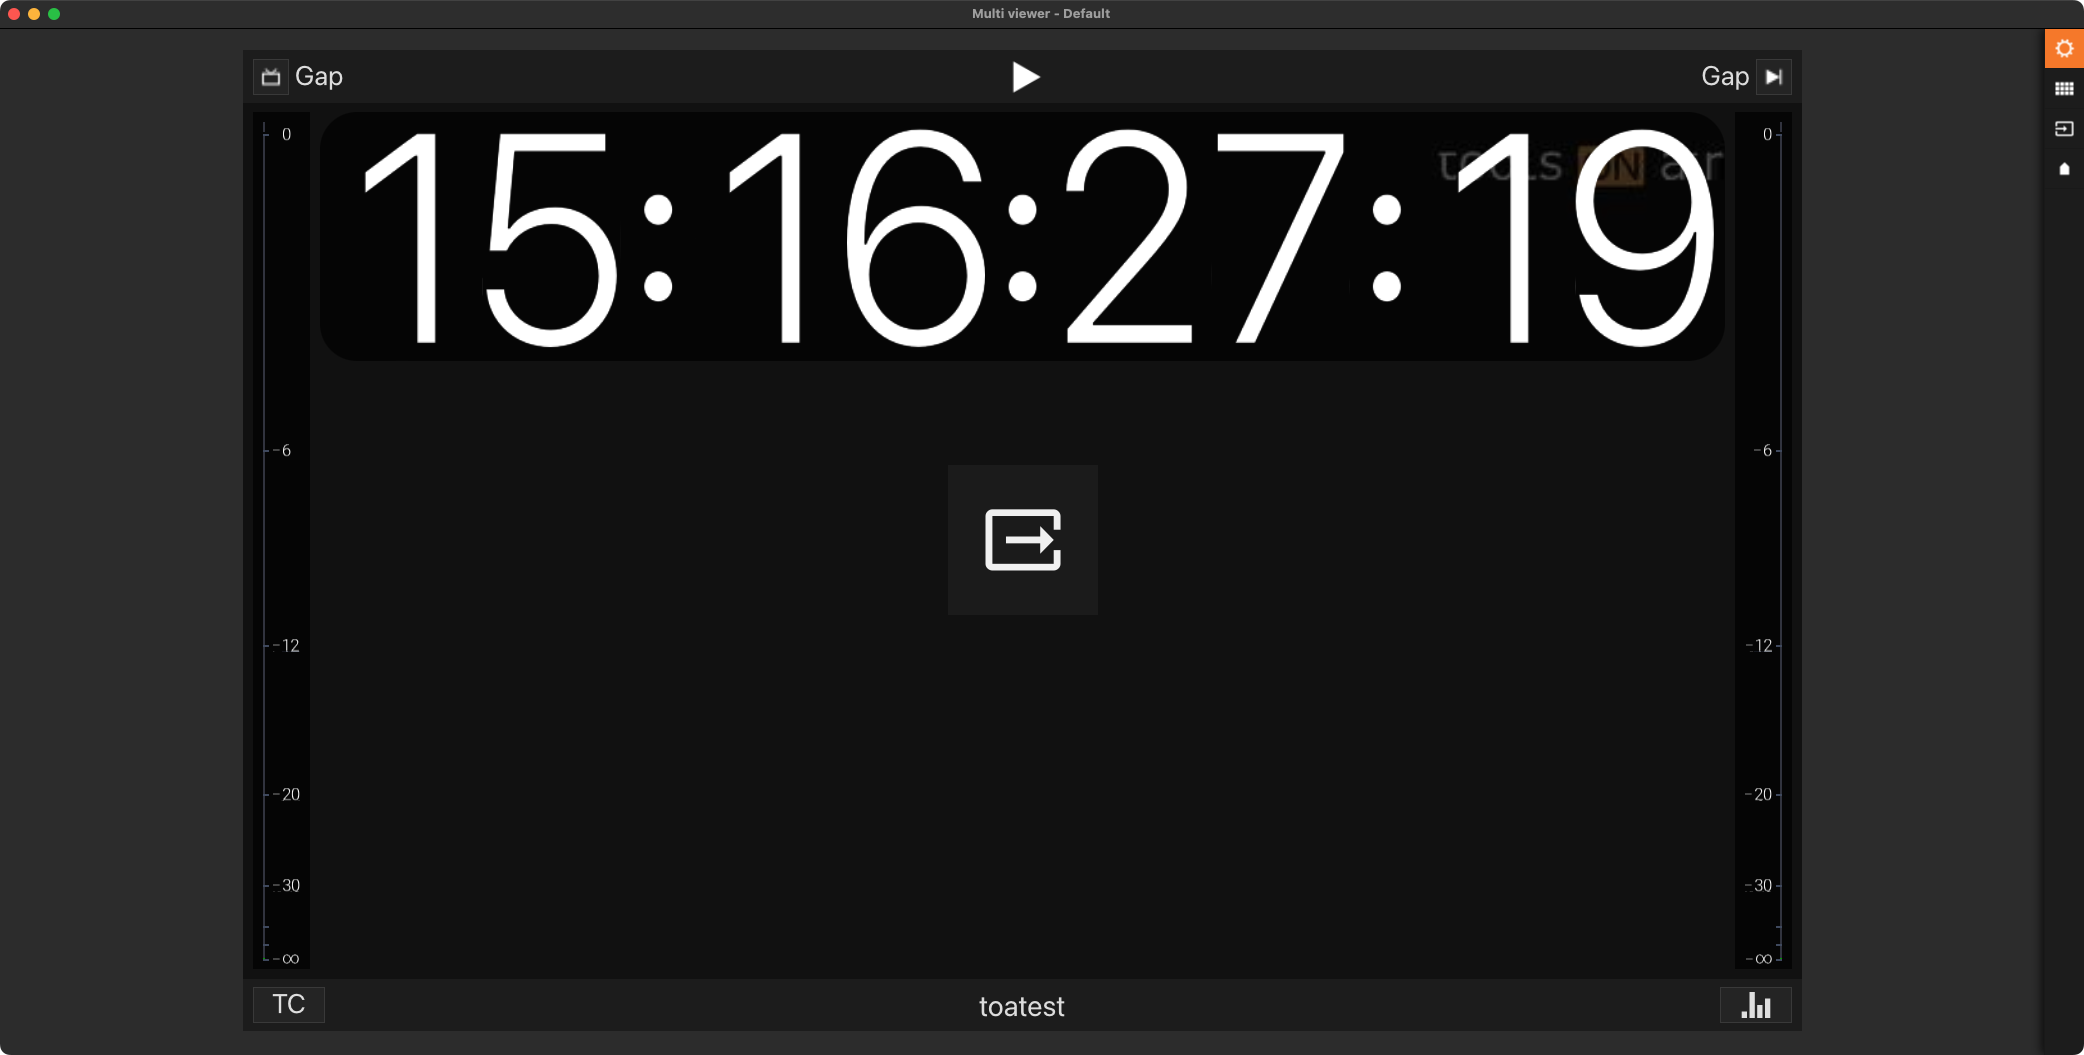
In the just:live interface, the Buffer should be higher than 50% and the CTI (Current Time Indicator) should be 🟢 (Green). The timecode in the On Air window shows the actual time.

...
| Info |
|---|
ToolsOnAir Support SystemIf you have any questions that are require supplemental information that is not covered in the User Manual, please contact us via the → ToolsOnAir Support System |