| Table of Contents |
|---|
Important: Before Installation
| Note |
|---|
Applications from ToolsOnAir are provided as a disk image (DMG). To open the disk image the Security settings of the system must be changed.
|

If you are upgrading from an older version of just:live, you might want to make sure that you have a valid v4v.4.0 x activation code for this machine before installing the new version.
1. Video Device Driver Installation
| Info |
|---|
This step is only required if you have a dedicated video device from AJA or Blackmagic Design. |
Download and install the most recent driver from the website of your video device manufacturer (AJA or Blackmagic Design).
2. Downloading the Software and preparing your System
Download Just Playout from our Online Helpdesk (free account required)The latest version of just:play is freely available forDownload via the dedicated solution page. Current customers (with account credentials) may also use the download area in the ToolsOnAir Support System.
Open the disk image, review the End User License Agreement and confirm by clicking on “Agree” to proceed. You are presented with the Installer Overview page.
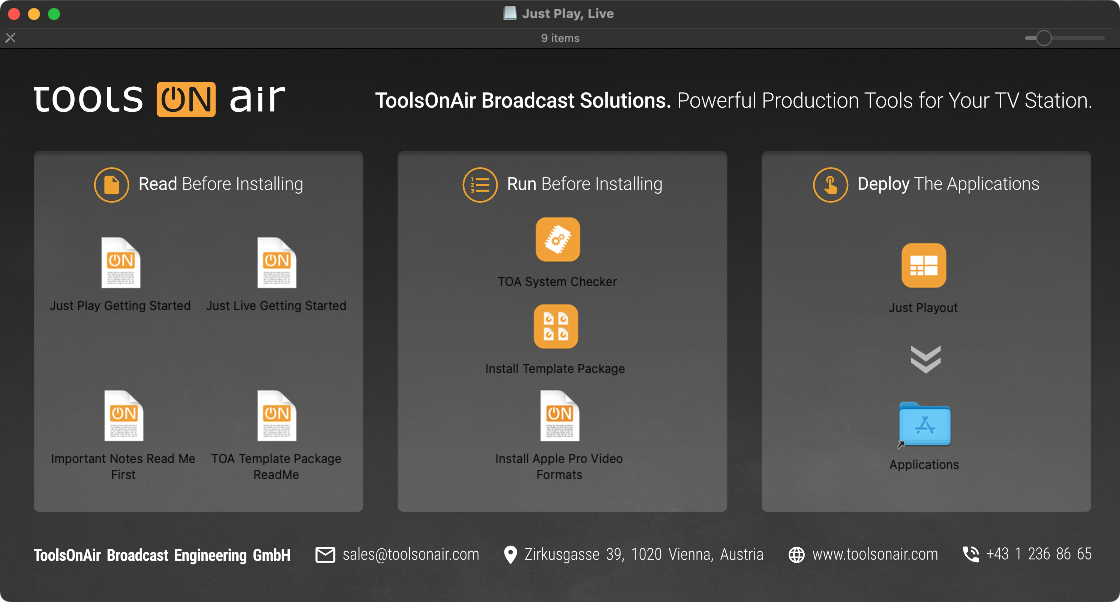
Open the file Important Review the linked documents provided in the “Read Before Installing” section, especially the “Important Notes Read Me FirstFirst” document.
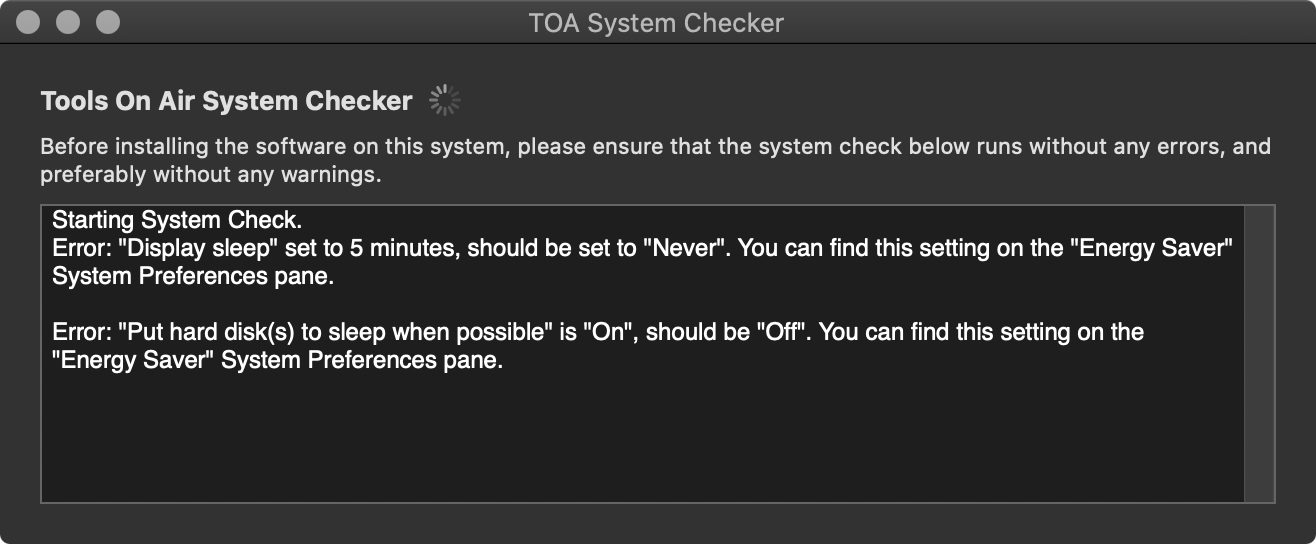
Run TOA System Checker (“Run Before Installing” section) and follow the displayed instructions. Solve all errors and warnings before continuing.

Download and install the Apple Pro Video Formats Codecs by following the link provided in the “Run Before Installing” section on every Mac running TOA applications (Just Out, Just Connect, Just Control).
3. Installation
Drag the Just Playout folder from the disk image to the Applications folder. This will install all relevant playout software applications.
Eject the disk image afterwards (Command-E).
Navigate Open a Finder window and navigate to the Just Playout folder inside of your Applications folder.
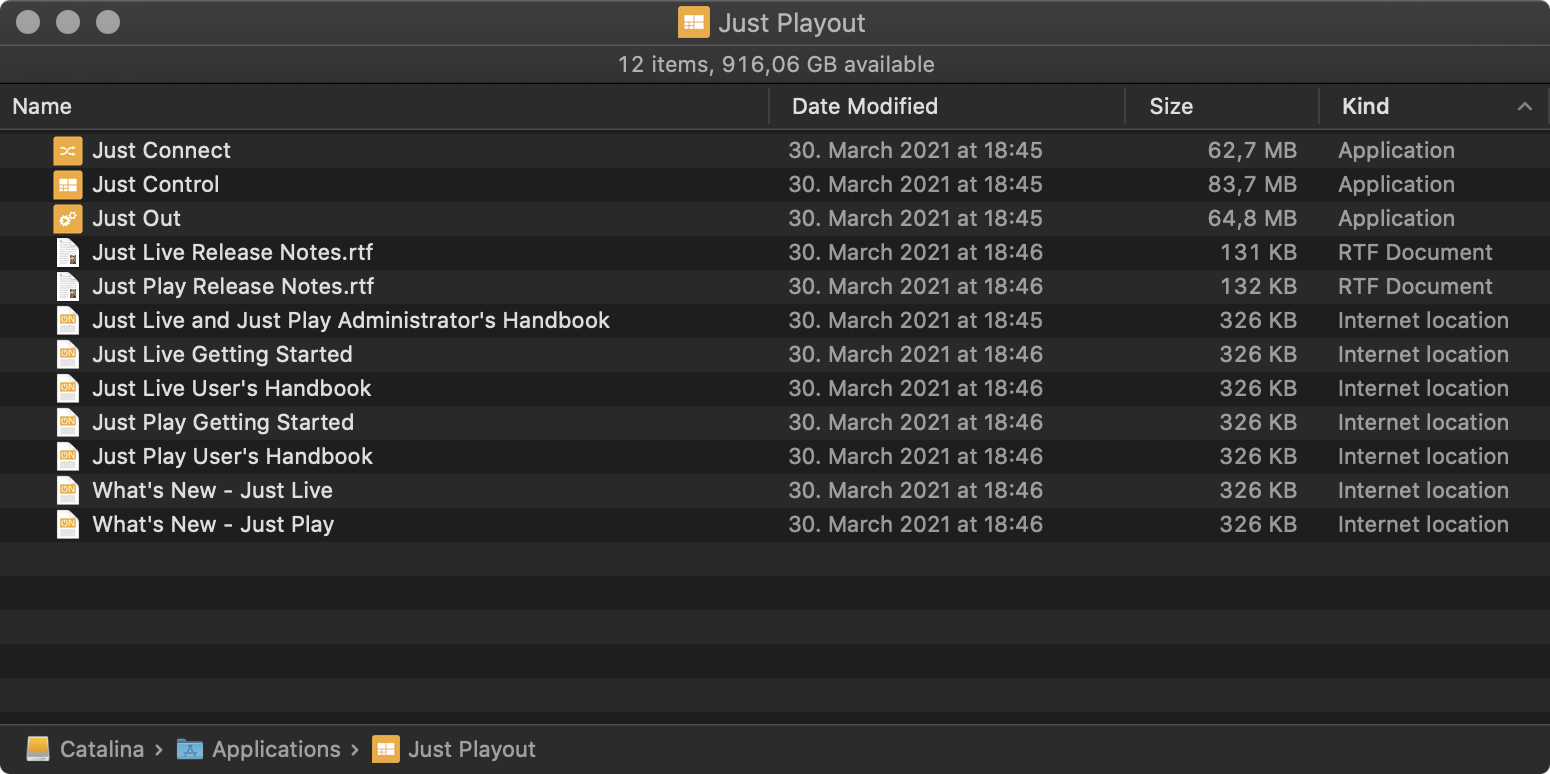
Just Out: this is the Playout Engine which does the final output and therefore should never be quitted.
Just Connect: this is the software which receives and sends information from and to the just:play user interfaces which are connected to the Channel. just:connect is also responsible for intercommunication between interface(s) and just:out Playout Engine(s).
Just Control: this is the graphical user interface which allows you to prepare a time based rundown, which will then be played out automatically.
provides the final output (Virtual or SDI). It renders the frames in realtime either on the host GPU (Graphics) or CPU (video file decoding) and should never be quit during playout operations. For more information, please visit: 8. Just Out (v.4.0)
Just Connect acts like a database by receiving and sending all the information related to a channel. It interconnects to all Just Out engine(s) and Just Control user interface(s) which are related to a particular channel managed by Just Connect. For more information, please visit: 9. Just Connect (v4.0)
Just Control: is the unified user interface for all ToolsOnAir applications. During the setup, the administrator can define which one of the two available solutions/user interfaces namely just:live or just:play should be used for a certain channel. For more information about the just:play interface, please visit: https://toolsonair.atlassian.net/wiki/spaces/TST/pages/3355548791/just+play+v4+User+Interface+Manual
Add (Drag & Drop) the applications Just Out, Just Connect and Just Control to your Dock.
4. Configuration
| Info |
|---|
We assume that – in this scenario – just:out, just:connect and just:control are all running To perform an easy and straightforward starting setup we recommend running Just Out, Just Connect and Just Control on the same machine (Mac). For more information about advanced setups with multiple machines distributed over the network, please refer to the Playout v4 Administrator Manual. 6. Setup Variants (v4.0) |
Start Just Out and Just Connect and confirm/apply all system related requests.
Start Just Control which will automatically display the User Login window. We recommend keeping the defined username user name for now.
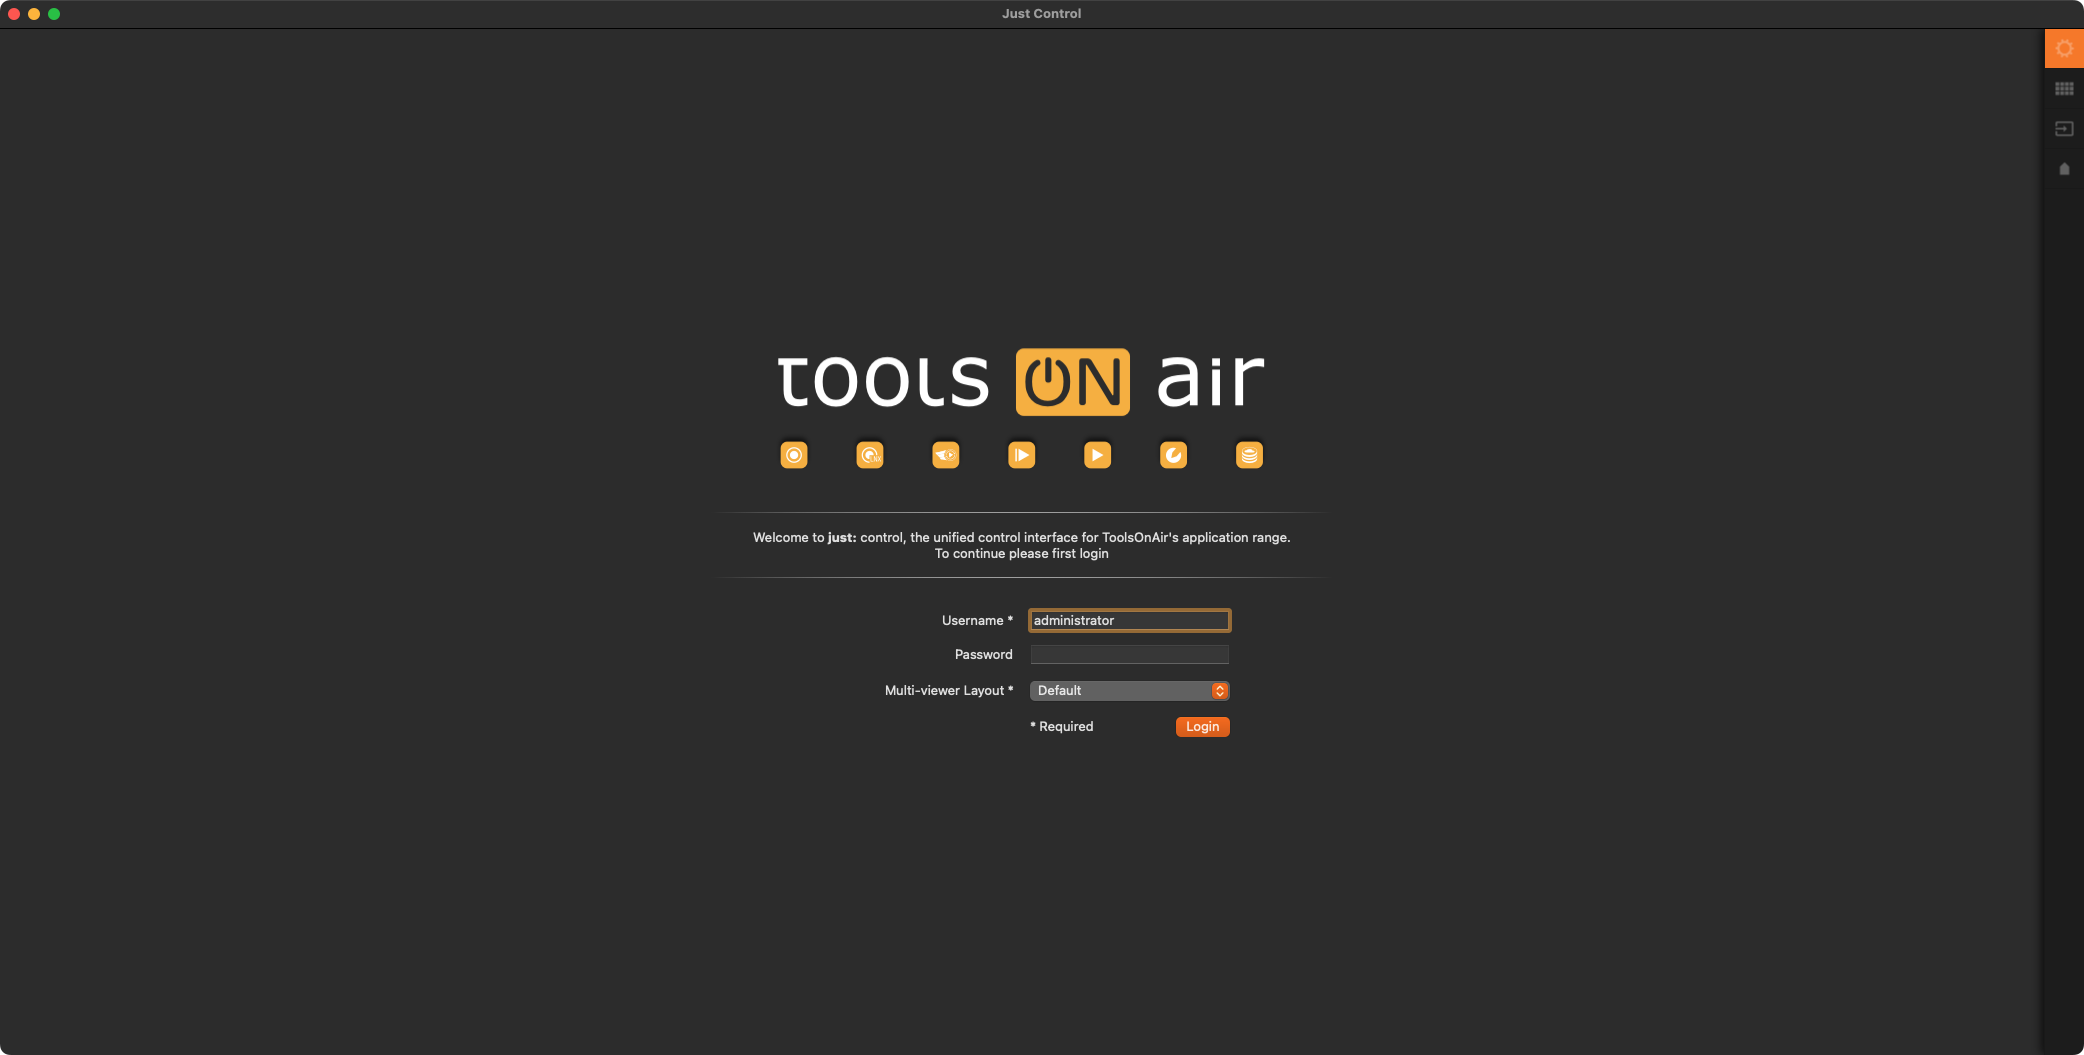
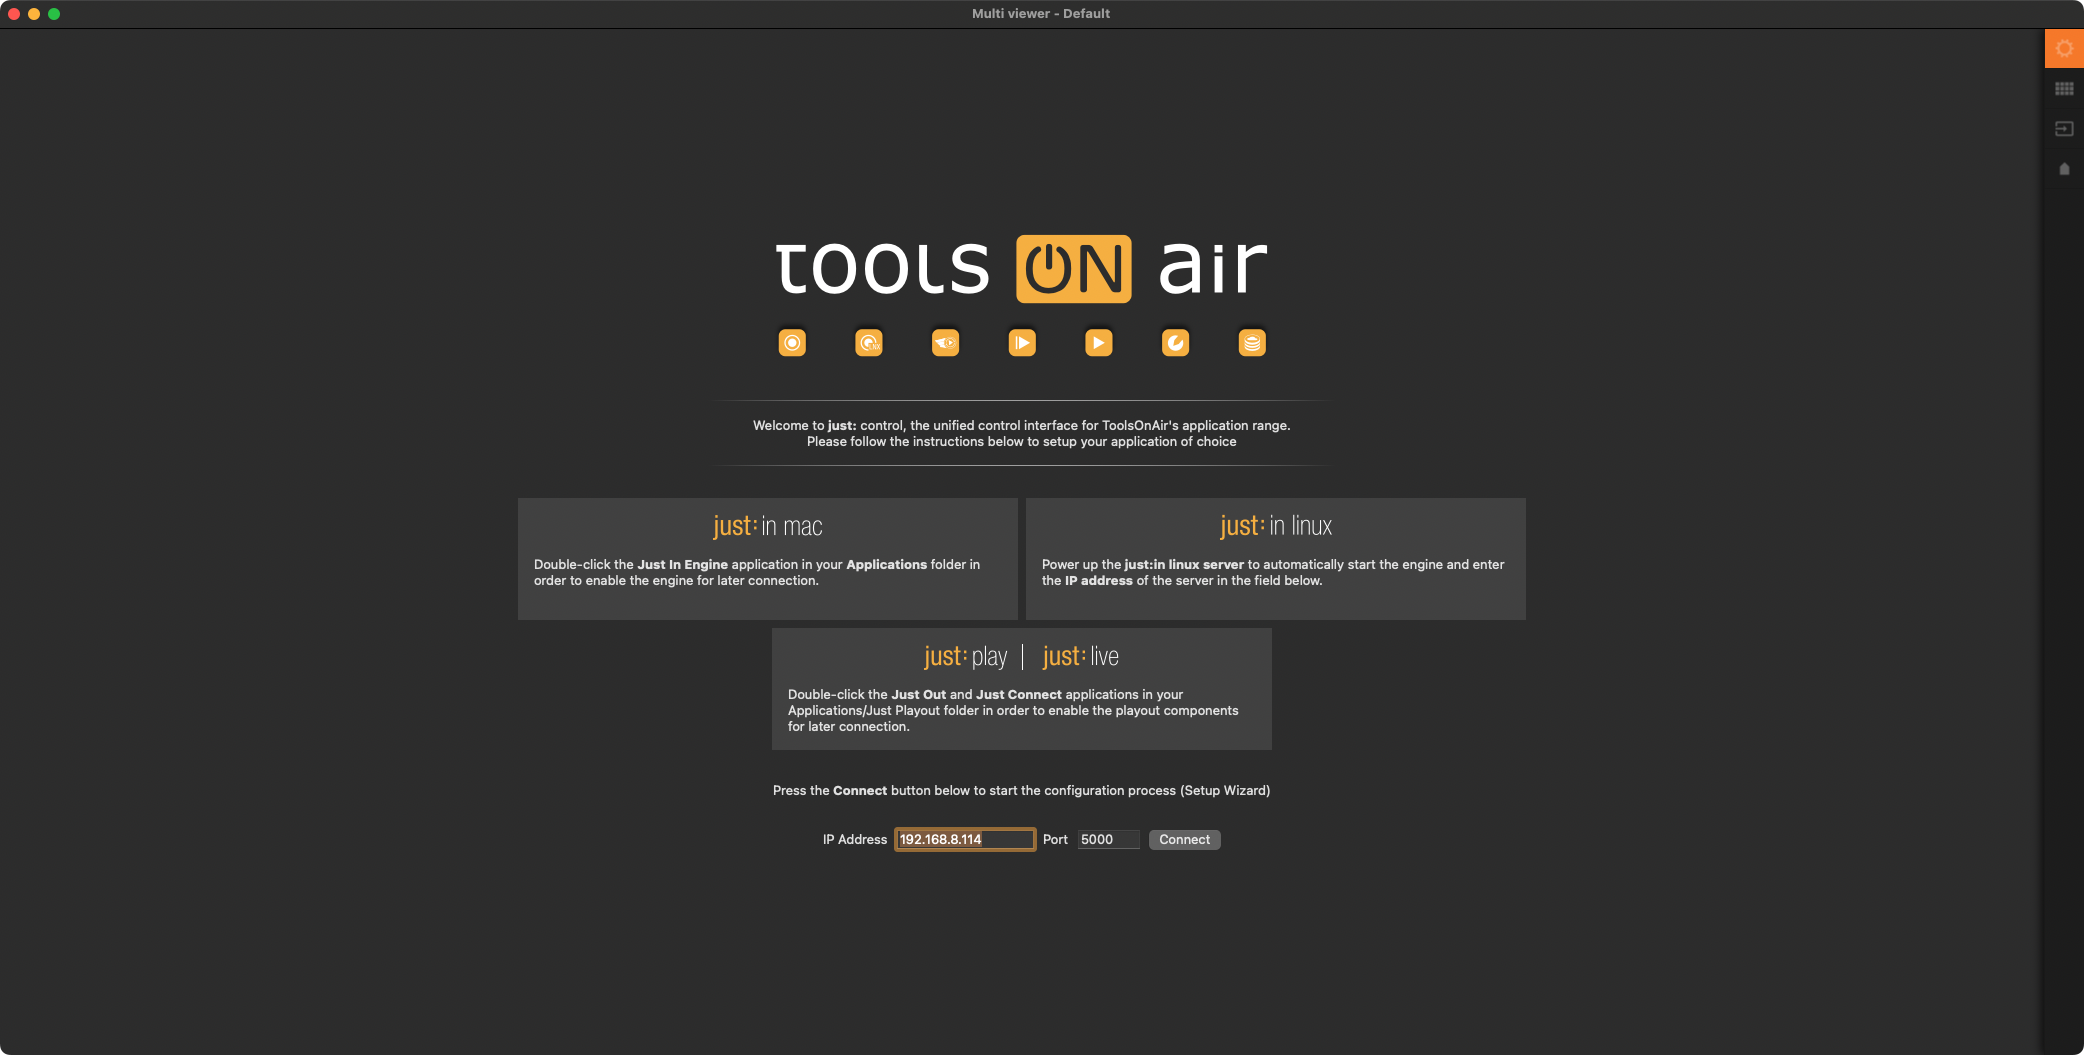
Click on the Login button.We
assume that Once Just Out and Just Connect have been started (as described in step 1) . Click on the Connect button.and you want to run all applications on one machine, make sure to enter the IP-Address “127.0.0.1”, keeping the same Channel Port Number (5000), before clicking on the “Connect” button. This allows you to test and configure your setup independent from your network infrastructure. For final production/On-Air setups, we recommend using the IP-Address provided by your network administrator.
Make sure the option New Channel is selected and enter the name of the Channel into the Channel's name field.
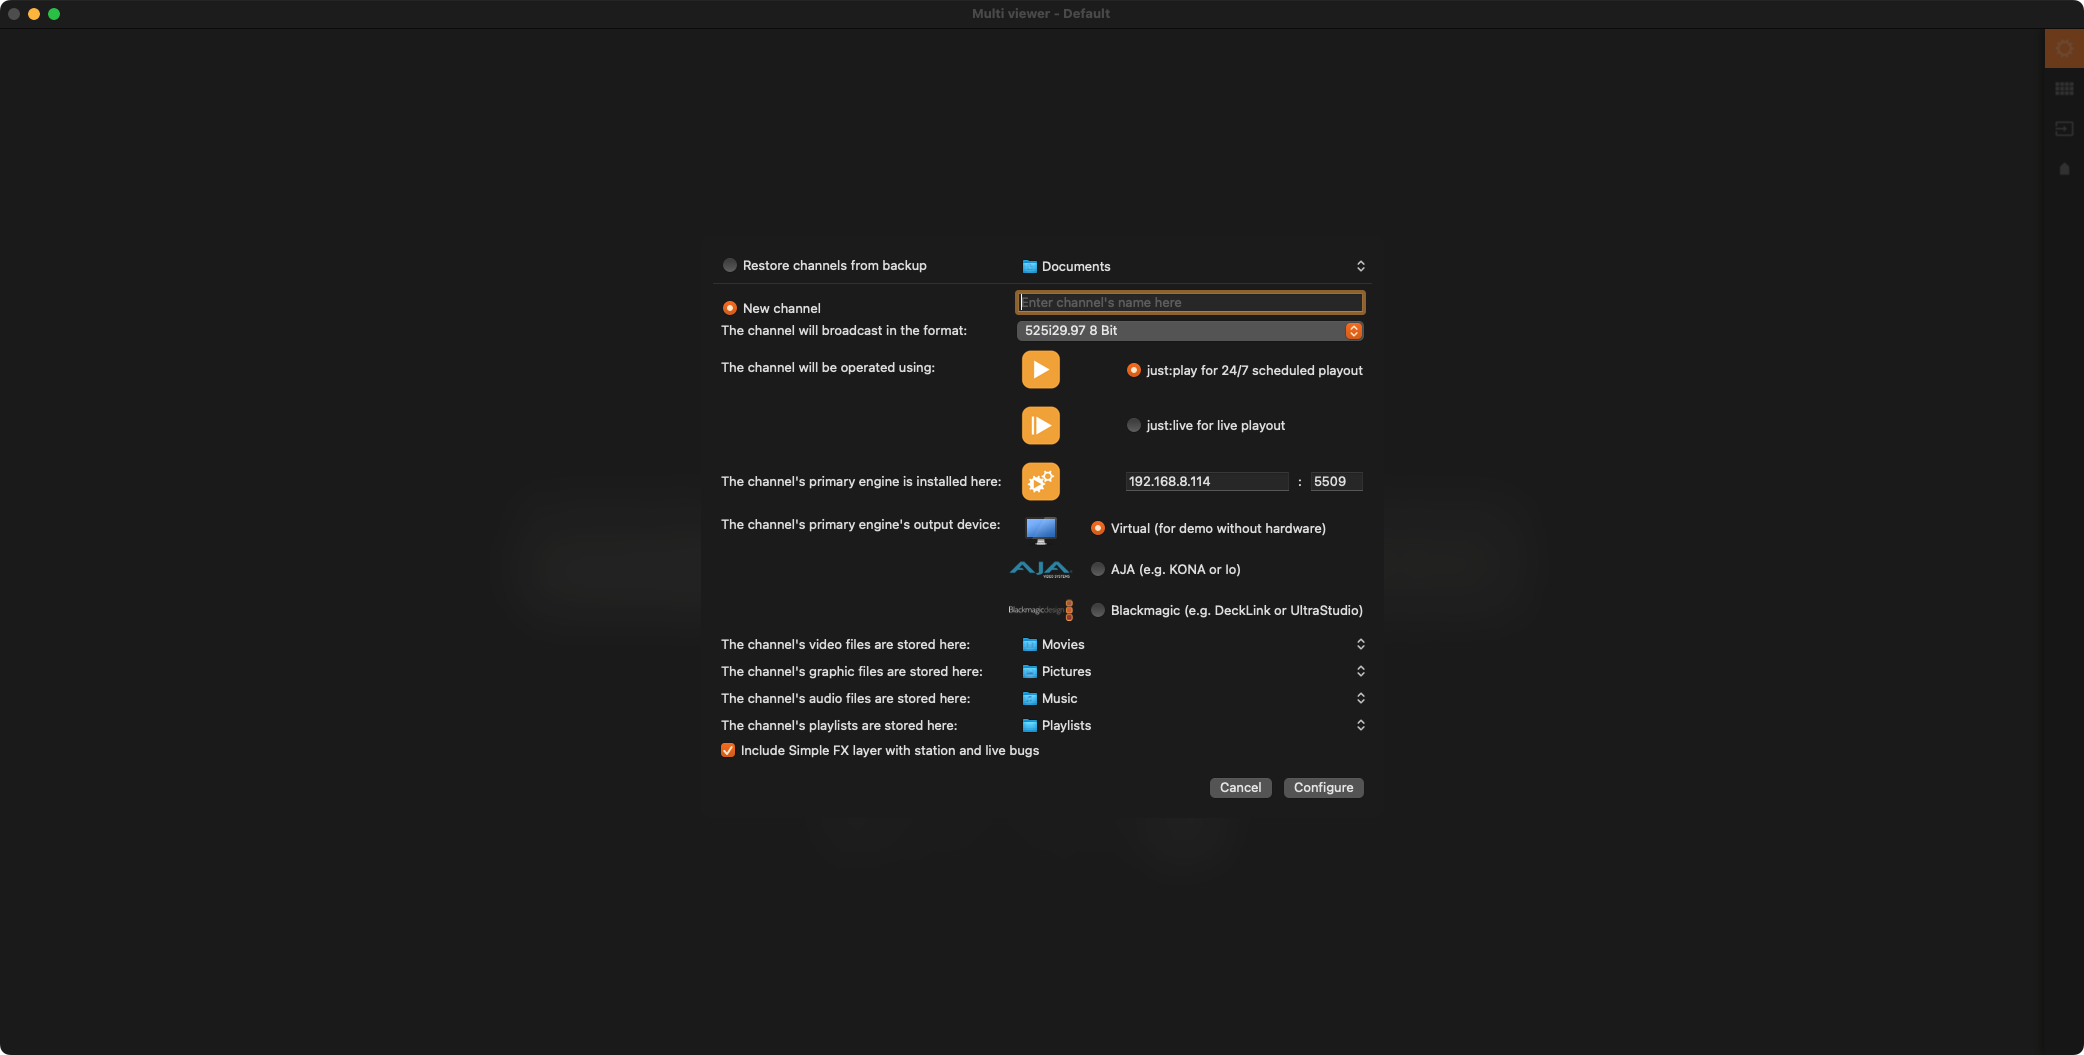
Select the Format you would like to use for broadcast.
Activate Select the option just:play for 24/7 scheduled playout.
When running Just Out, Just Connect, Just Control on the same machine, please enter the IP-Address “127.0.0.1” under the section “The channel's primary engine is installed here” to ensure proper testing operations. Keep the same Engine Port Number (5509).
If there is a dedicated Video device, select AJA or Blackmagic, otherwise keep the Virtual option selected.
Change the Repository Folders if desired. The default Repositories are:
Video files:
/Users/yourUserName/VideosGraphic files:
/Users/yourUserName/PicturesAudio files:
/Users/yourUserName/MusicPlaylist files:
/Users/yourUserName/Documents/Playlists
Activating the “Include “Include Simple FX layer with station and live bugs” bugs” checkbox loads two (2) TOA-Demo still images automatically as channel bug and for live eventsinput. This feature can also be (de)activated after the initial setup and the still images can be changed once the installation is done.
Click the Configurethe “Configure” button to finish the setup. The Just Control user interface should look similar to the figure picture below.
| Warning |
|---|
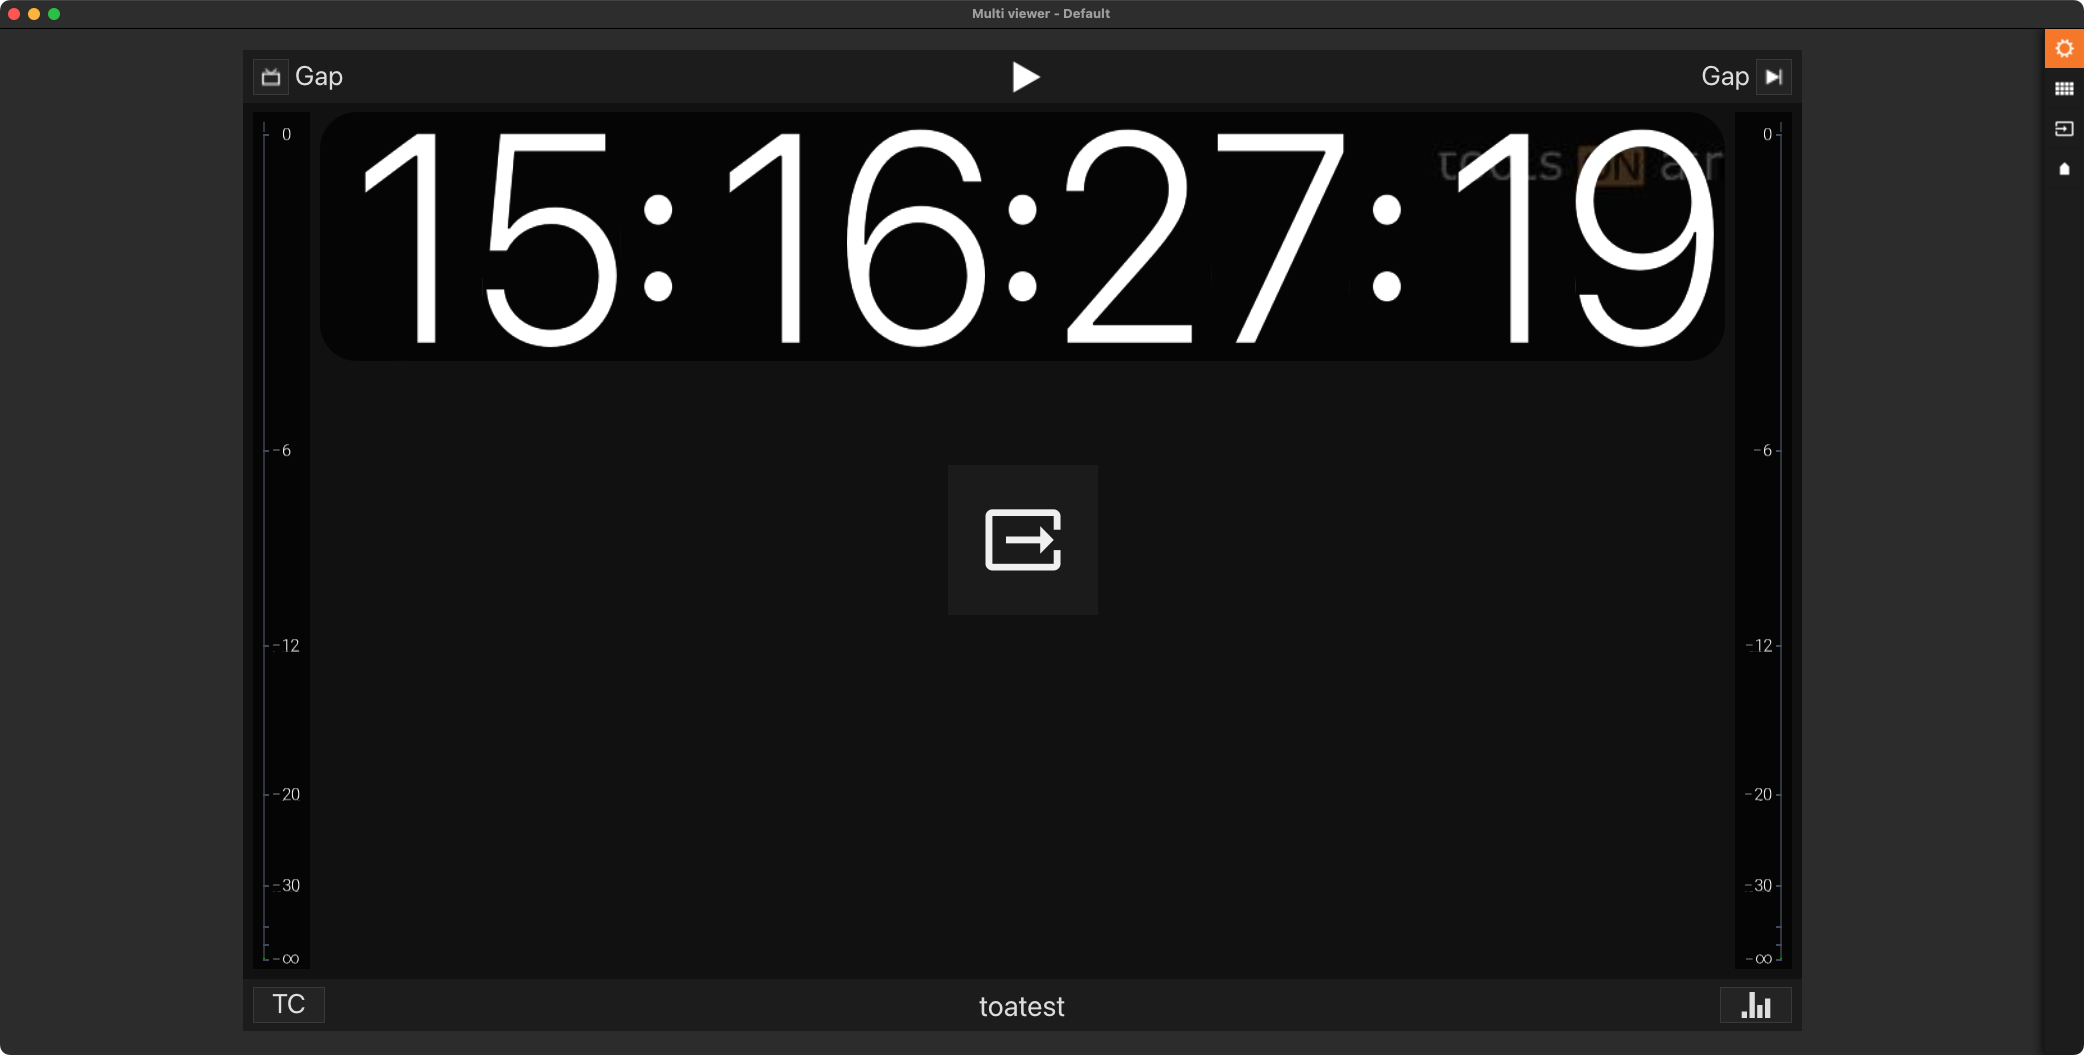
If the user interface does not look like seen displayed differs from the picture above, please follow the steps below.: |
In the sidebar, click on the Connections icon.
Drag the previously created Channel from the Connections list onto the empty viewer area.
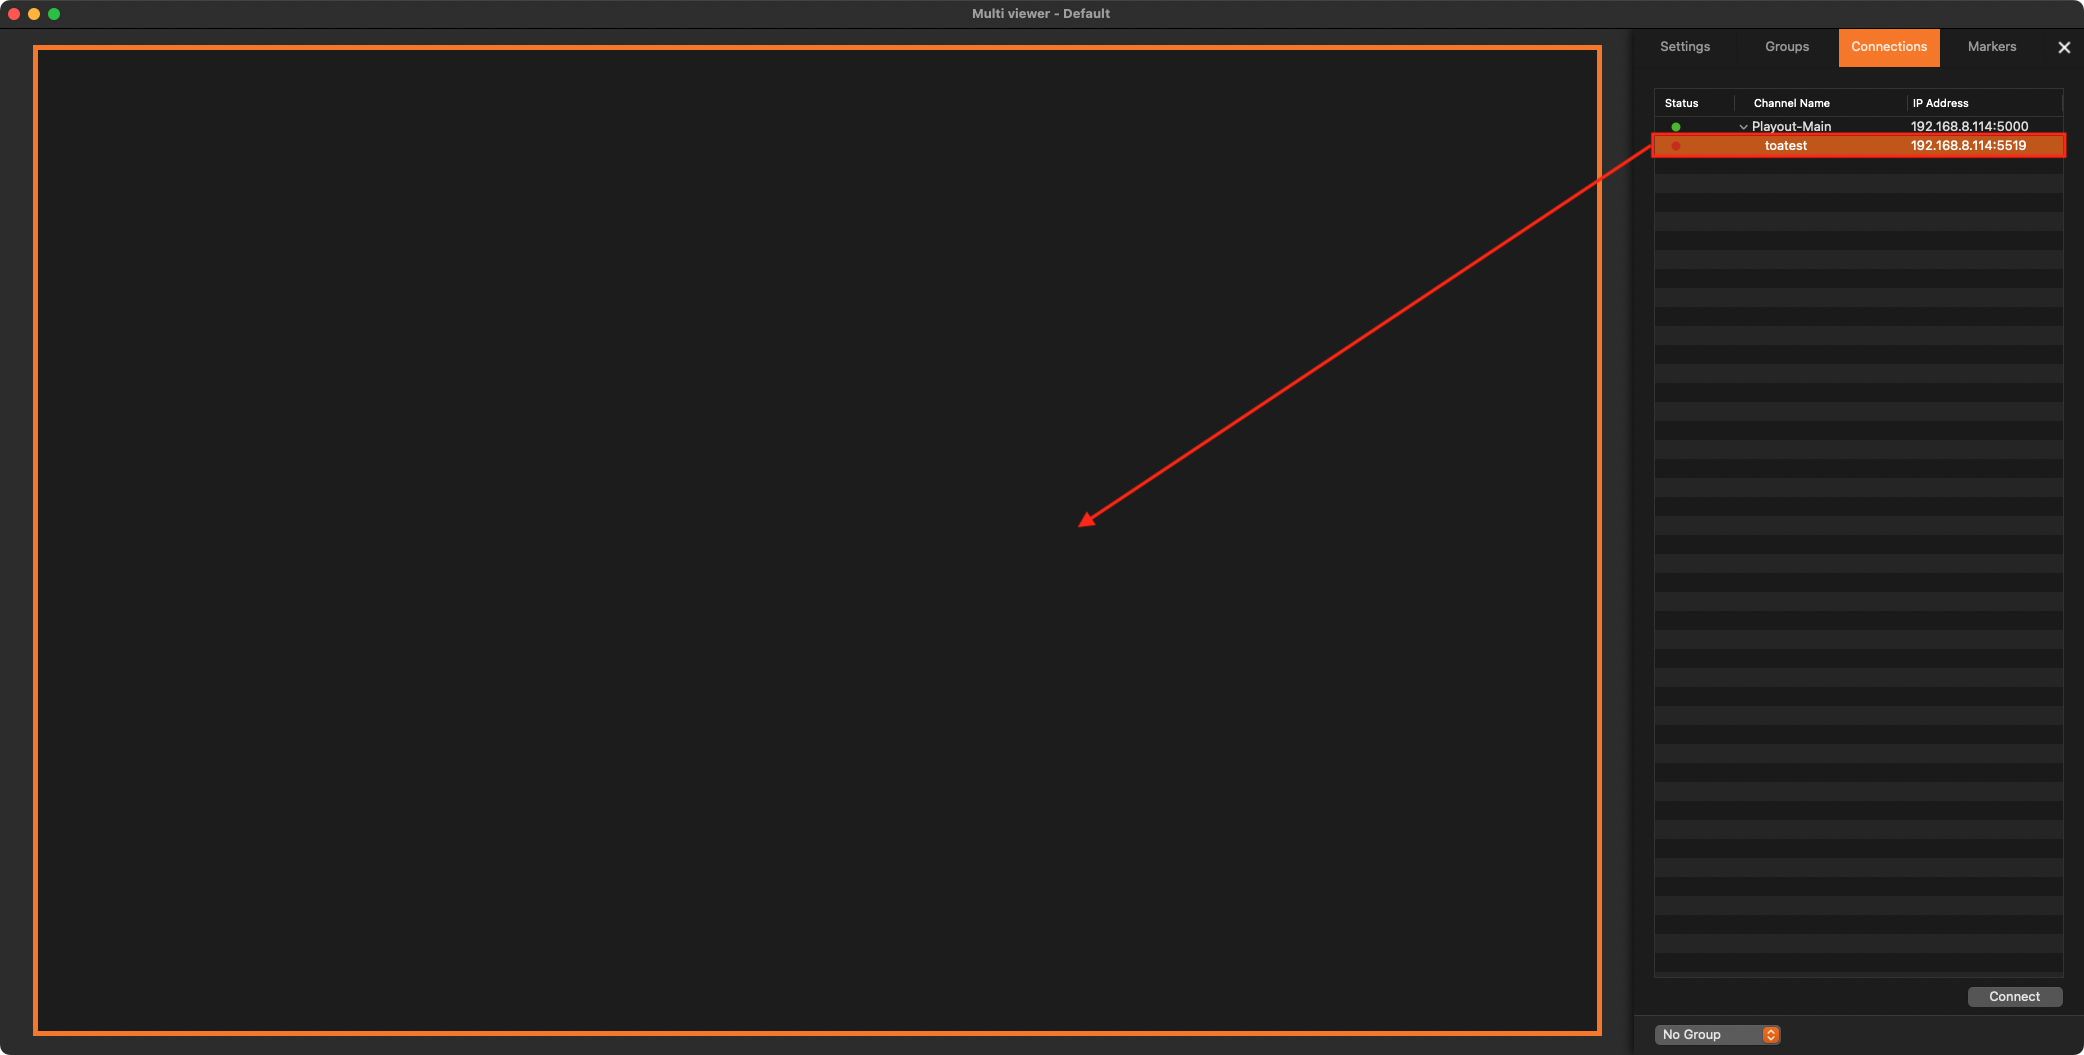
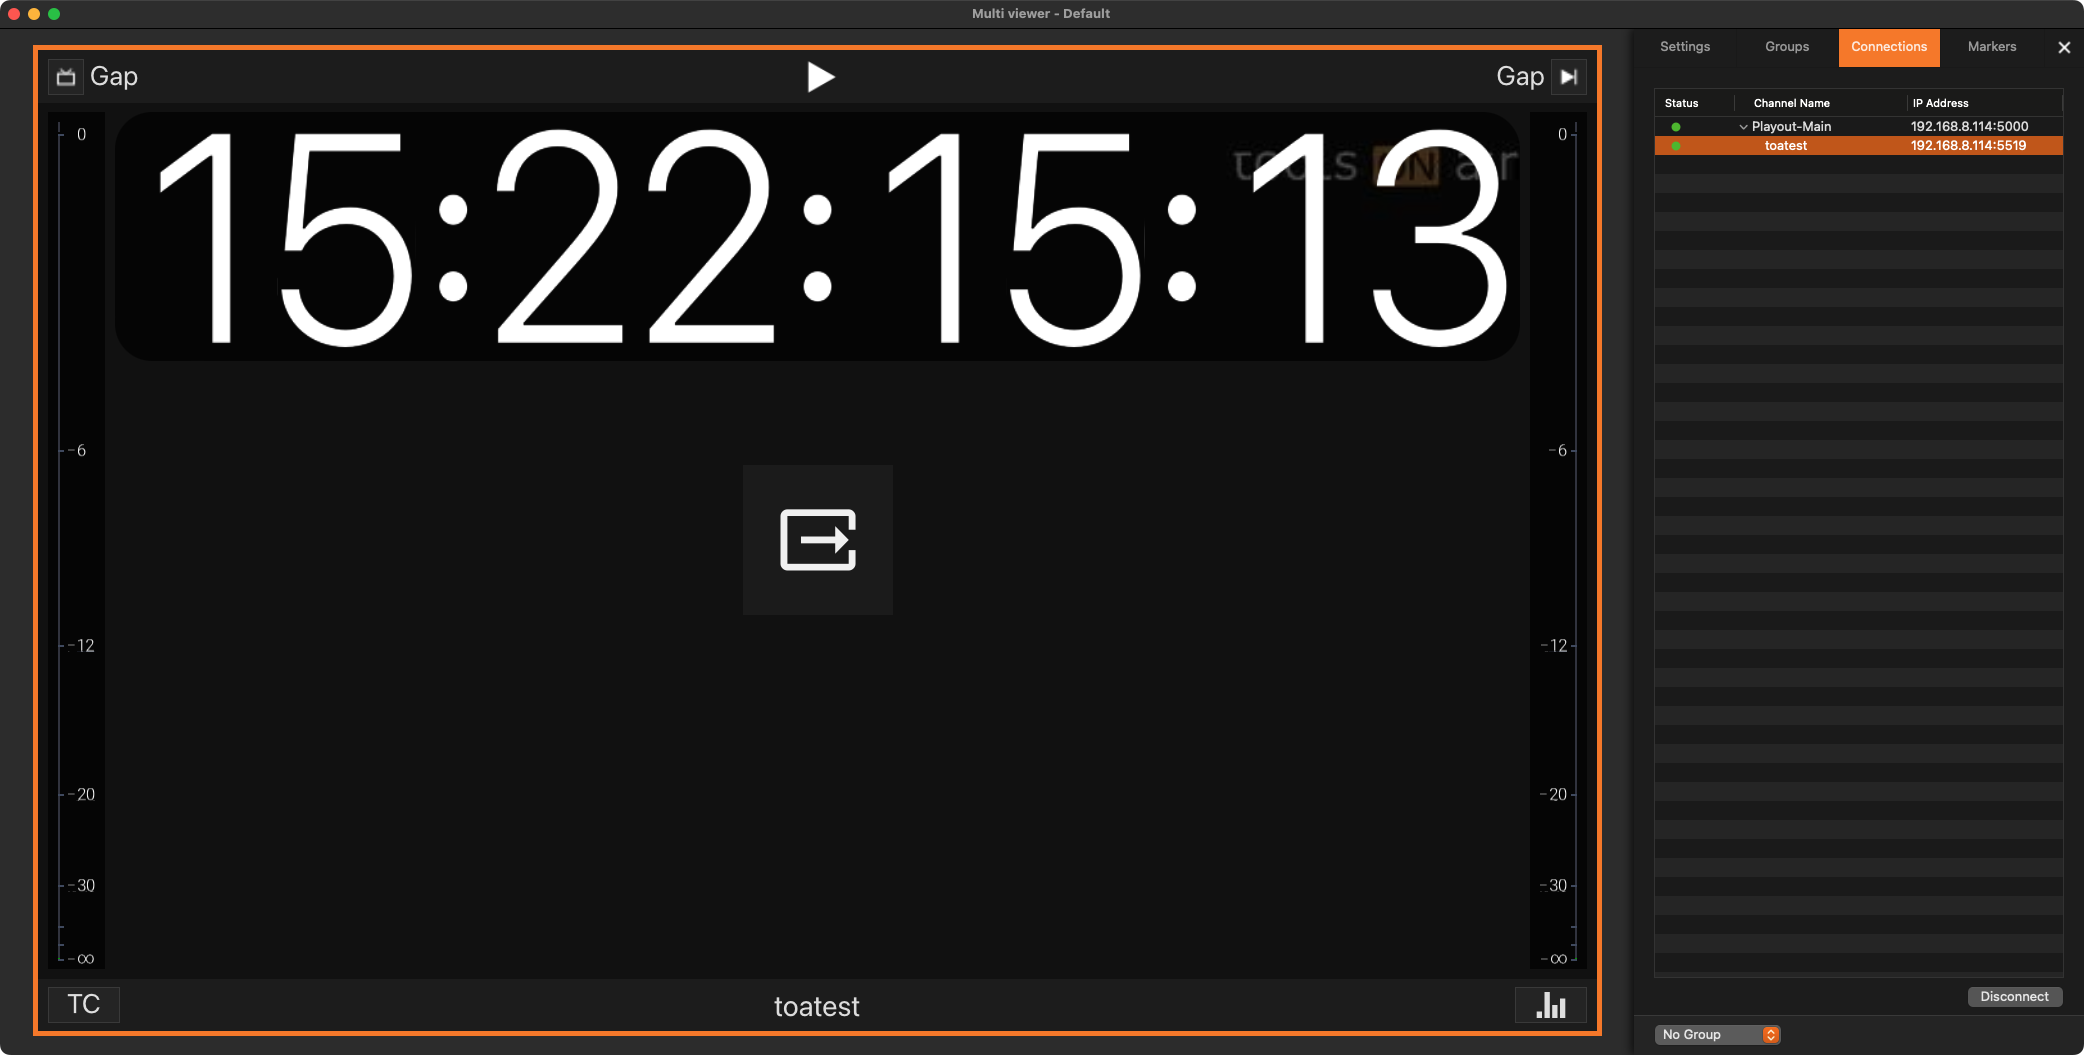
The connection should now be established, and Just Control looks similar as shown in this screenshot.
5. Accessing the just:play User Interface
Click the button in the middle of the viewer to open the just:play user interface.
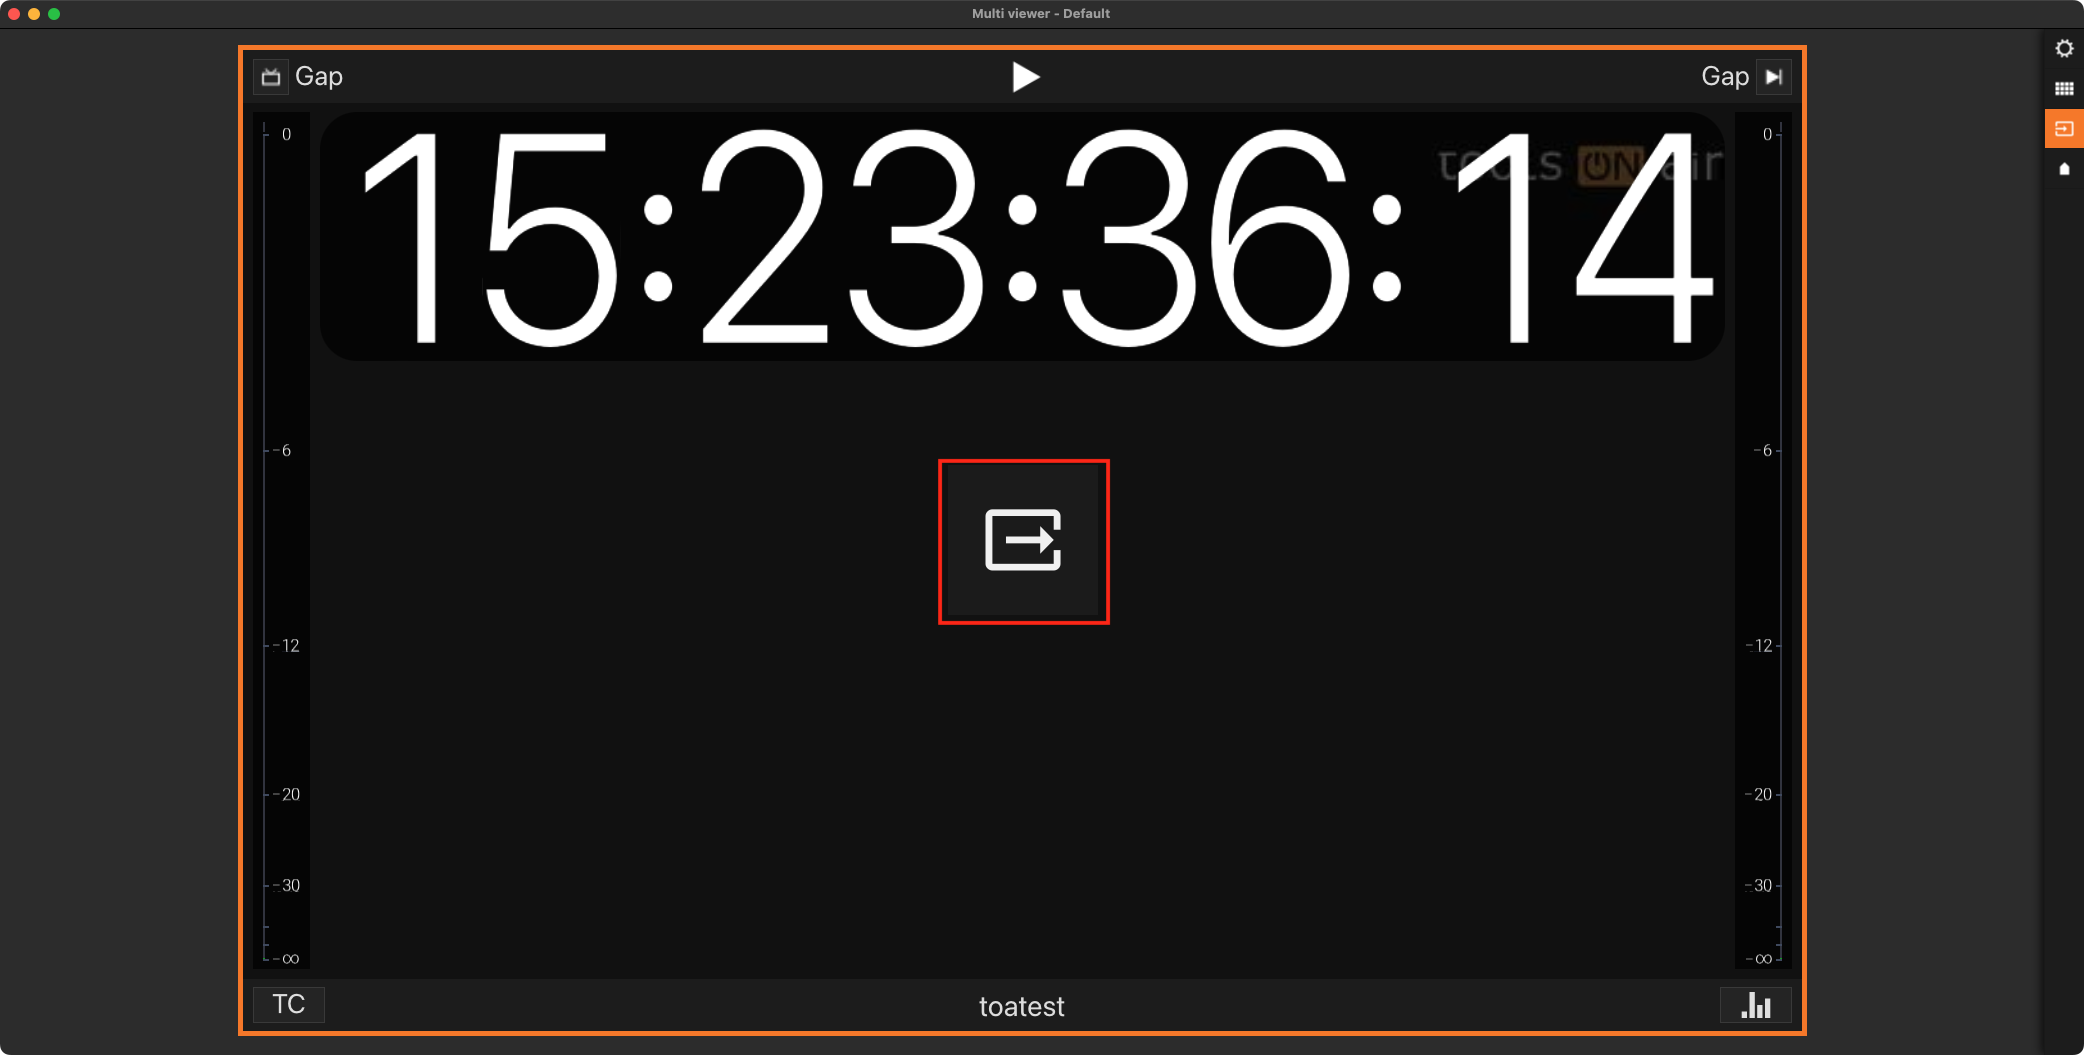
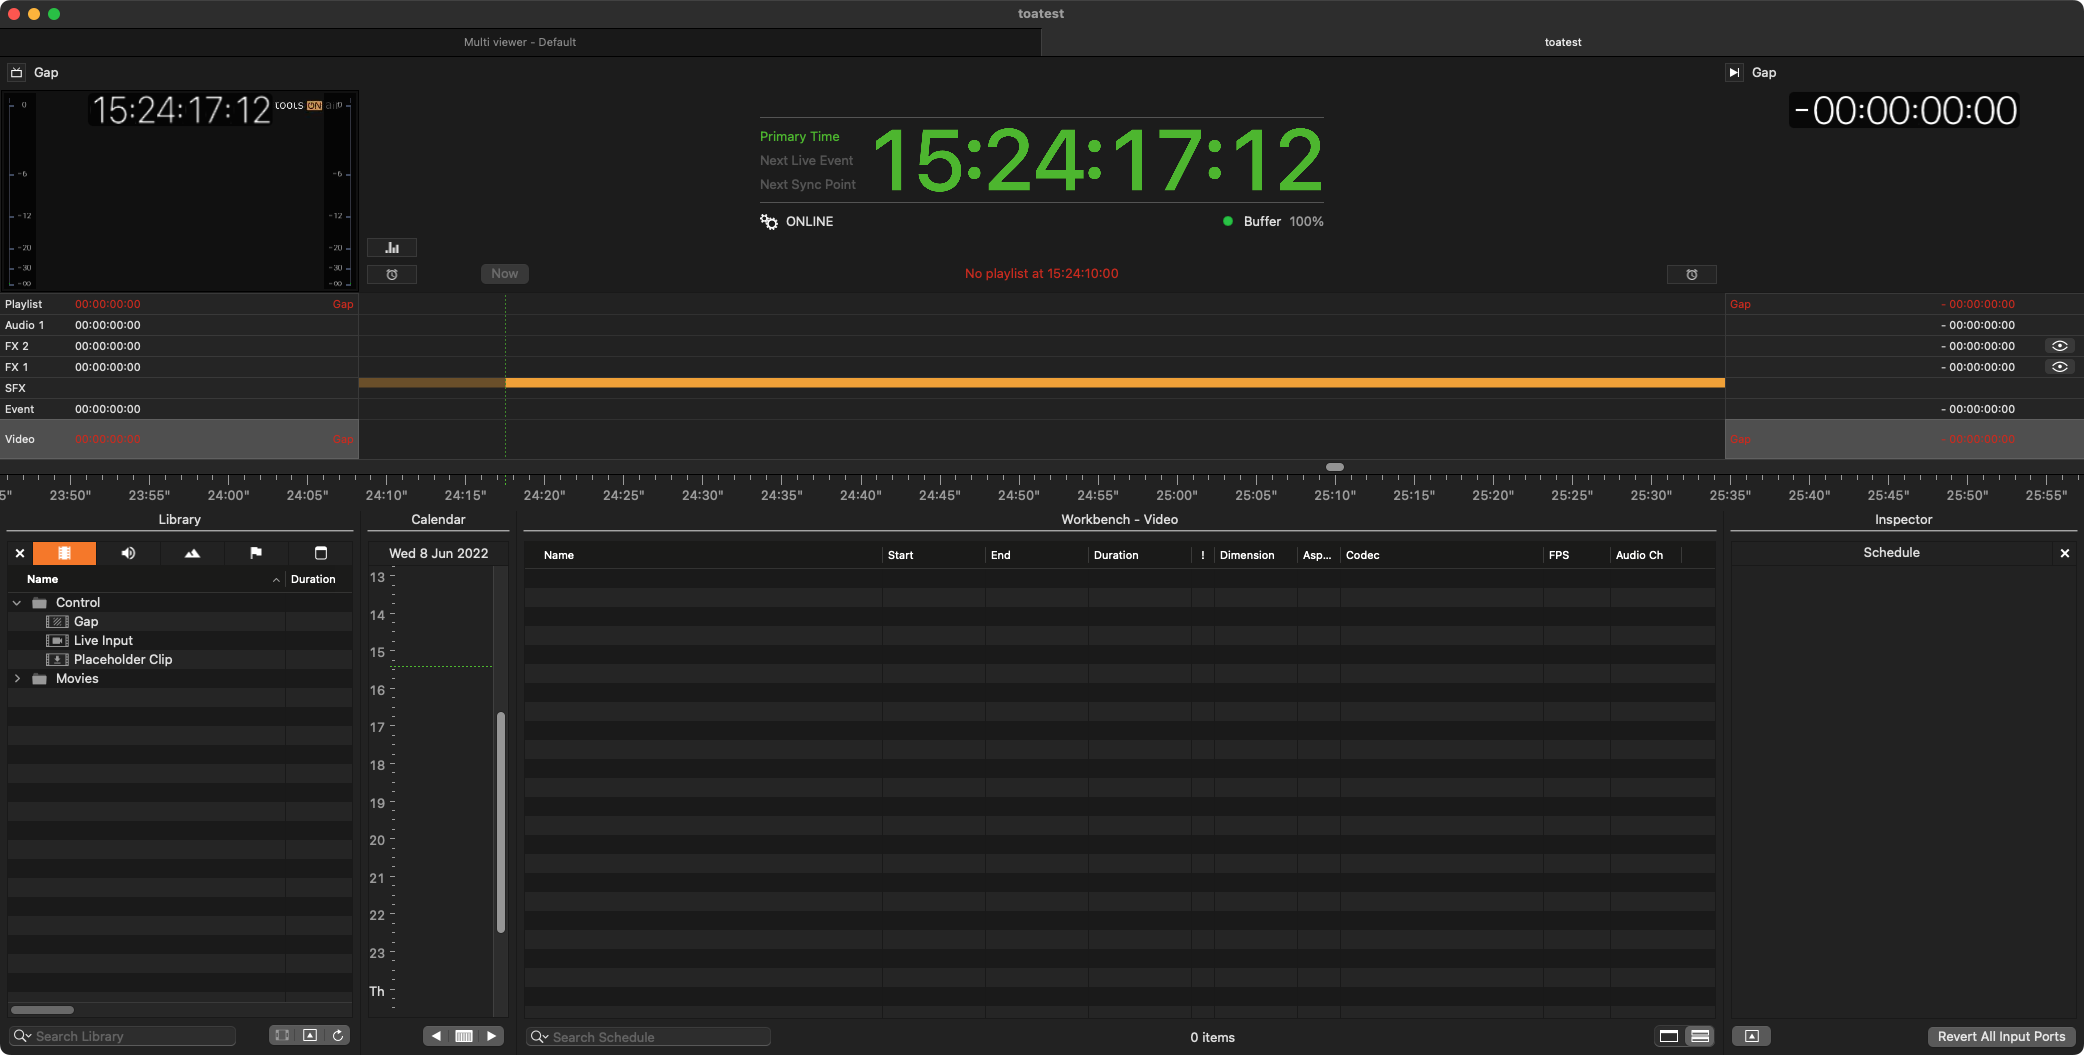
The just:play user interface will now be showndisplayed.
6. Verify your Channel is working properly
It may take several seconds before the Channel is running.
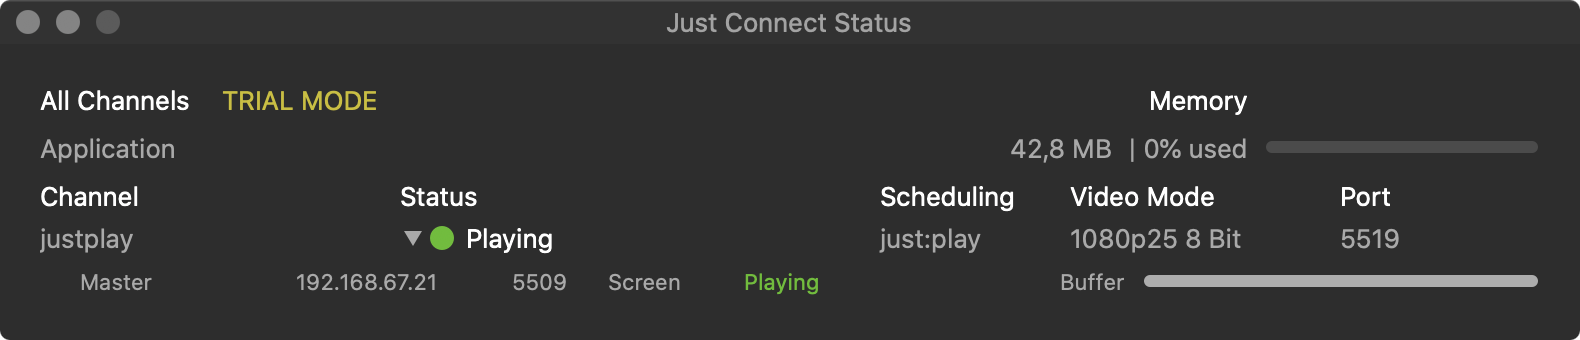
In Just Connect the Status of the Channel should be Playing, with a green lightGreen light.
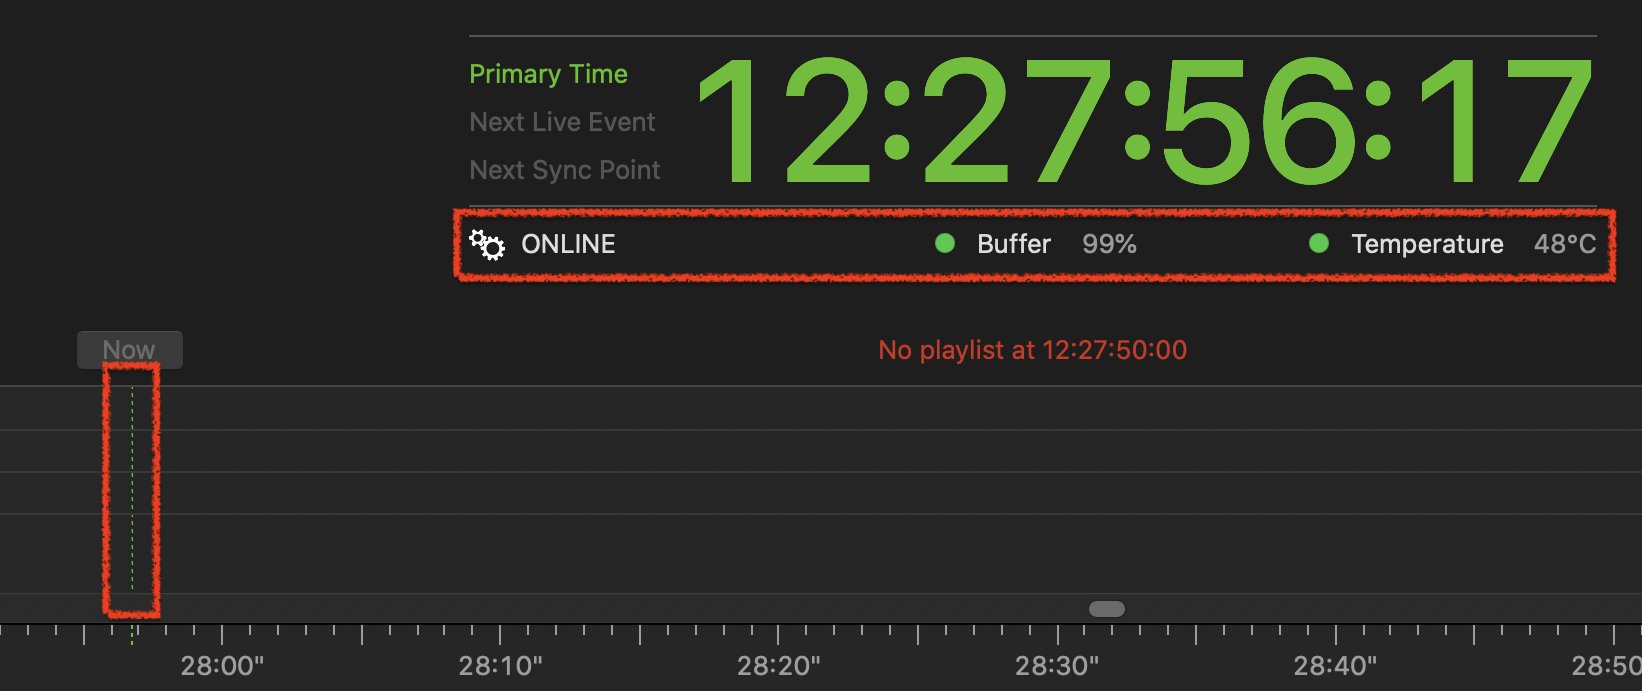
In Just Play the Buffer should be higher than 50% and the CTI (Current Time Indicator) should be green Green.
7. Read the User Manual
You can find it here or in the Help menu of just:play.
| Info |
|---|
ToolsOnAir Online HelpdeskIf there are questions which aren't answered If you have any questions that are not covered in the User Manual, please visit contact us via the → ToolsOnAir Helpdesk.Support System |