| Warning |
|---|
Before proceeding you must stop the channel by deactivating the checkbox in front of it. Stopping the channel will also stop the Just Out engine and therefore the final output. |
After using the New Channel Wizard an engine is automatically created and added to all Layers of the Channel. But , but there can be situations where you would like to:
...
To make this work, a new engine has to be made and added to a Layer.
Adding a New Engine
Stop the desired Channel by deactivating the checkbox in front of it. Stopping a Channel will also stop the Just Out engine and therefore the final output.
Select the Channel which you would like to add a new engine to, in the Devices & Channels window Channels list.
Activate Click on the Layers & Engines tab tab.
If needed click on New Layer to add a new Layer to the Channel.
Click on Select engine… or click on an existing engine.
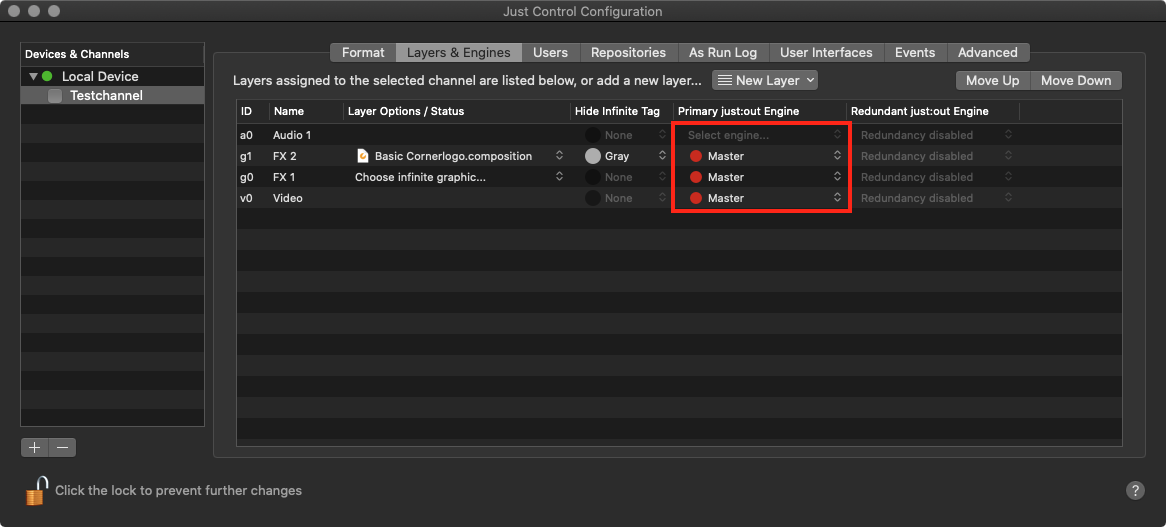
Select "New Engine" to generate a new Engine.
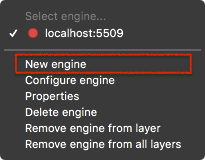
The Engine Wizard opens to setup the new engine according to your needs.
Configuring an Engine
After selecting a New engine, this window appears. It allows you to define the Engine Attributes, the Preview quality and optionally, to define Repositories just for this particular engine.
...
1. Network: Define how the new engine can be accessed via the network.
...
On the desired Layer, open the drop-down menu in the column Primary just:out Engine and select New engine.
Configure the engine accordingly to your needs (see Engine Configuration below).
Activate the checkbox in front of the Channel to start it again and to take over the changes you made.
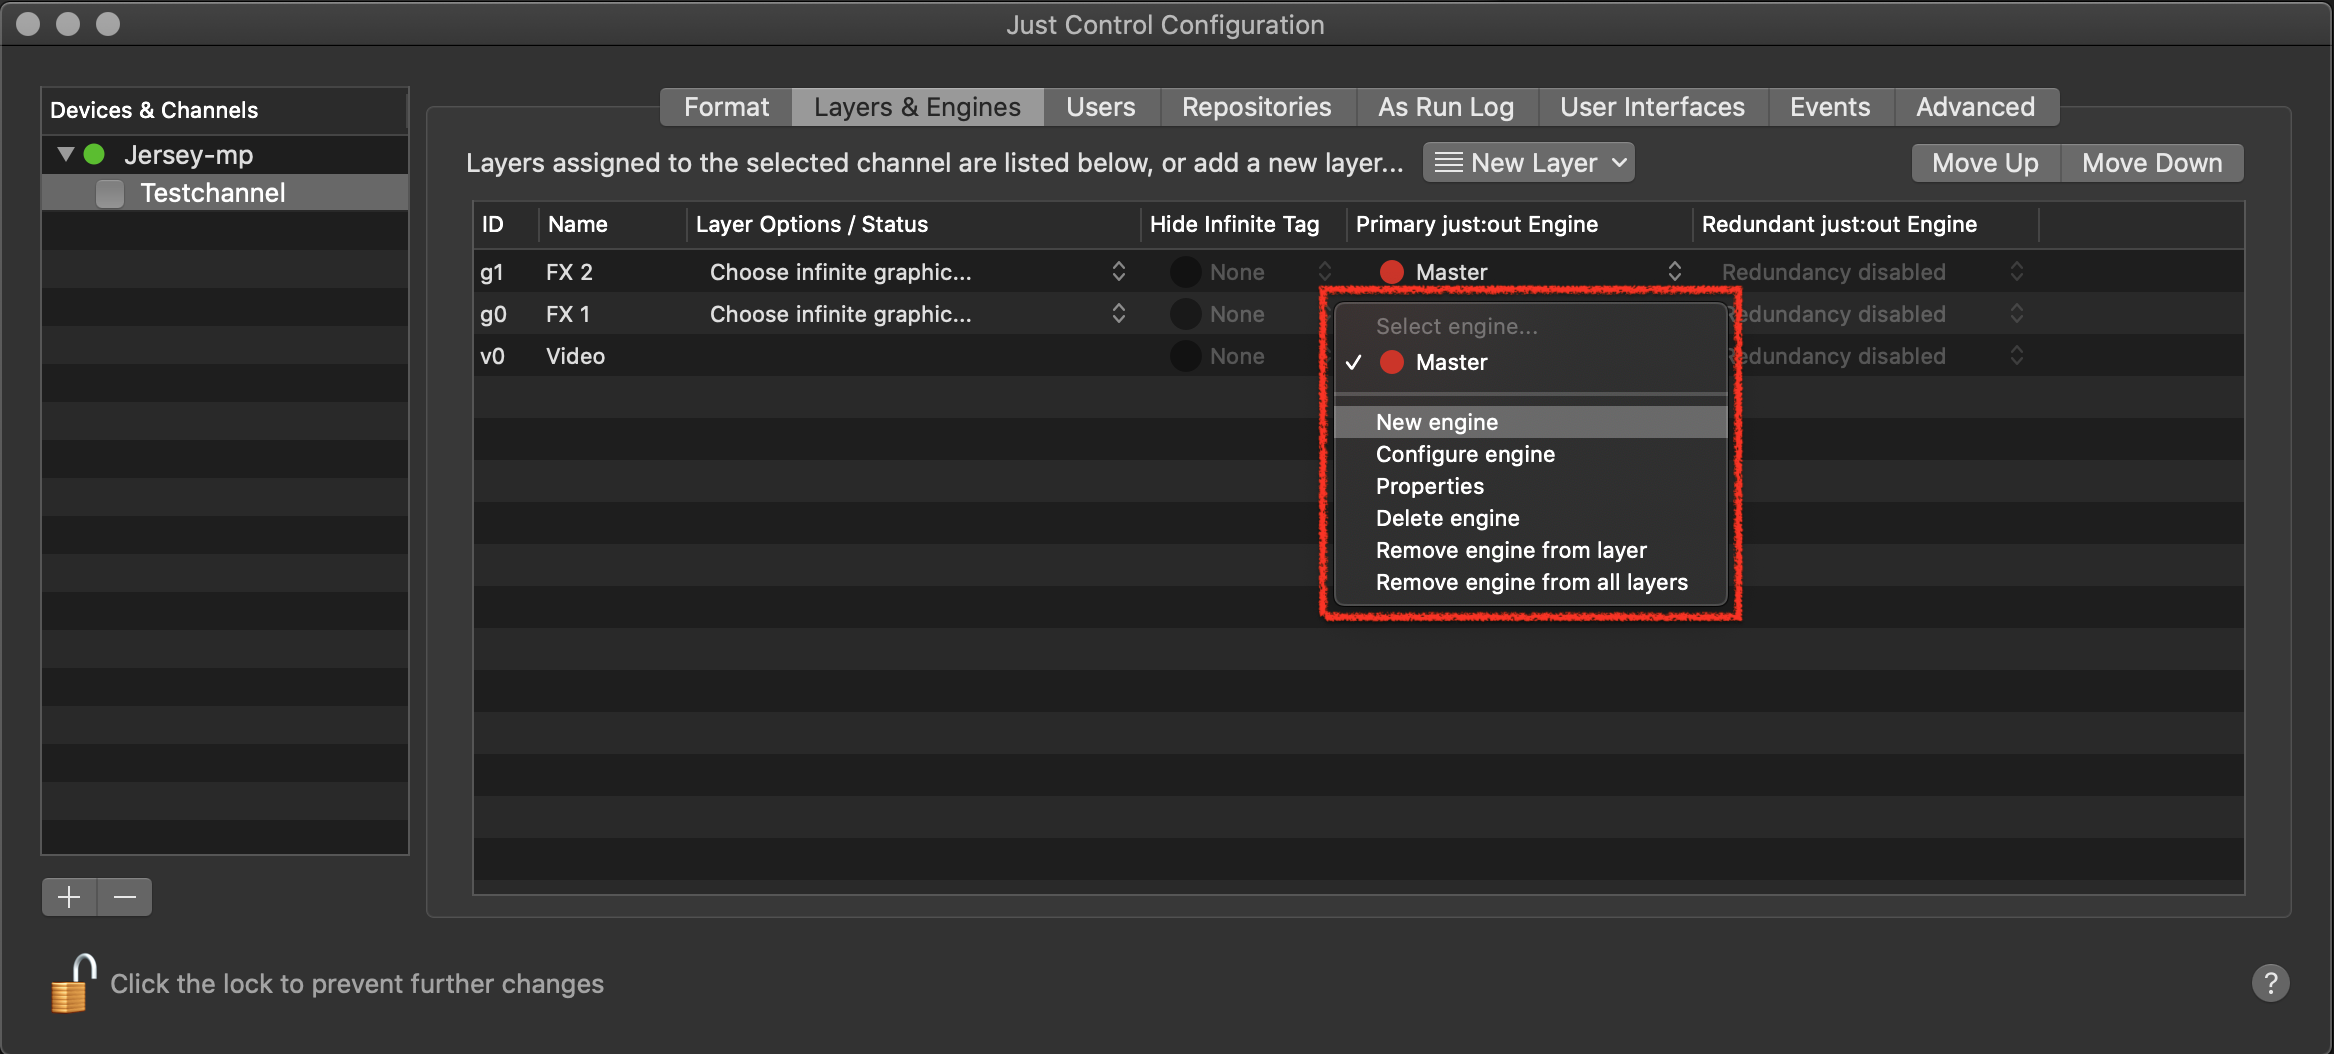
Close the configuration window and drag the Channel from the Connections tab to the Multi-viewer area.
Engine Configuration
After selecting a new engine you can configure it in this window.
...
Network: Engine network configuration.
Name: Name of the engine.
IP address:
IP address of the machine which is running
...
this engine.
Port: Port of the machine which is running this engine.
Video device & output:
...
Mode for the final video output.
Virtual:
No dedicated video hardware is available for the final output on the machine running the Just Out engine.
AJA: In case you have an AJA device installed on the machine running Just Out and you would like to use this device as output device.
Blackmagic: In case you have a Blackmagic device installed on the machine running Just Out and you would like to use this device as output device.
Video buffer: Select a higher setting if the data rate needed for playing the Video and Graphic files is high and/or the continuous data rate your storage system is low. If your storage system can deliver a very high continuous data rate and the data rate needed to play the Video and Graphics files is low, you can select a small
buffer. Buffer values above 6 seconds should be avoided, because such high buffer values put additional pressure on
the engine.
...
Preview:
...
Quality of the Preview which is shown in the user interfaces
...
.
Frame-rate: Allows you to specify the number of frames per second for the video Preview. This should never be higher than the native frame rate of the
Channel.
Resolution: This defines the number of pixels used for the Preview. Select from one of the values available.
Quality: This defines the amount of compression which is applied to the uncompressed image before it is used for the Preview.
...
Apply new engine to
Selected layer only:
...
Applies the
...
engine
...
Activate the checkbox in front of the channel to start the channel and to take over the changes you made.
...
to the selected layer only.
All non assigned layers: Applies the engine to layers which do not have an engine assigned.
All layers: Applies the engine to all available layers.