...
- Download just:live from our Online Helpdesk (free account required).
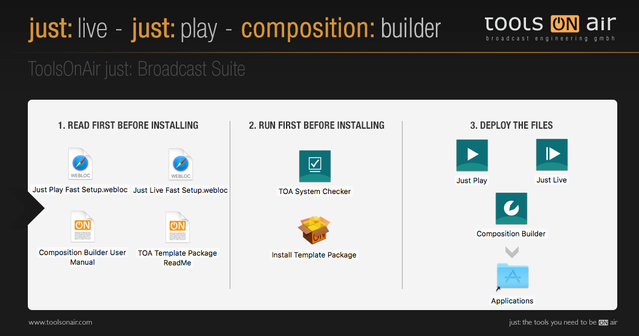
- Open the download .Run and run the TOA System Checker and follow .

- Follow the displayed instructions to in the TOA System Checker and solve all errors and warnings.
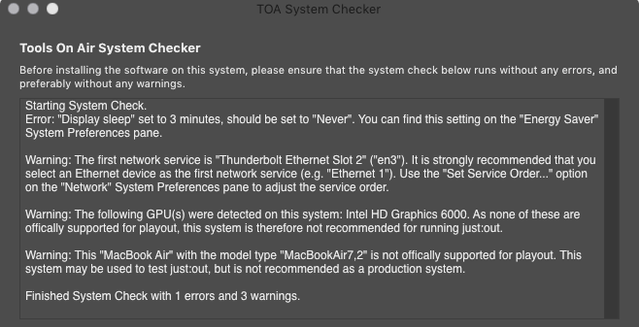
- Turn off any screen saver which might be activated in the Desktop & Screen Saver System Preferences pane.
- If you are upgrading from an older version of just:live, you might want to make sure that you have a valid v2.5 activation code for this machine before installing the new version.
...
- To install a full copy of just:live onto your machine (with all required files), drag and drop the Just Live folder from the disk image onto the Applications folder.
- After copying, eject the disk image.
- Navigate to the Just Live folder inside of your Applications folder.
- Add the applications Just Out, Just Connect and Just Live to your Dock.
...
4. Configuration
- Start the Just Connect application. It will automatically display the Setup Wizard.
- Make sure the option New Channel is selected and enter the name of your Channel into the Channel's name field.
- Select the Format you would like to use for broadcast.
- Activate the option just:live for live Playout.
- Make sure that the checkbox Single-system "local mode" Channel is activated.
- If there is a dedicated Video device, select AJA or Blackmagic, otherwise keep the Screen option selected.
- Change the Repository Folders if desired. The default Repositories are:
Video files:
/Users/yourUserName/Videos- Graphic files:
/Users/yourUserName/Pictures - Audio files:
/Users/yourUserName/Music - Workflow files:
/Users/yourUserName/Documents/Workflows - Playlist files:
/Users/yourUserName/Documents/Playlists
...