...
...
| Warning |
|---|
Before proceeding you must stop the channel by deactivating the checkbox in front of it. Stopping the channel will also stop the Just Out engine and therefore the final output. |
After using the New Channel Wizard an engine is automatically created and added to all Layers of the Channel. But there can be situations where you would like to:
Separate the Video and the Graphics playout.
Set up a redundant engine.
Add several individual playout Channels to a single just:live user interface.
To make this work, a new engine has to be made and added to a Layer.
Adding a New Engine
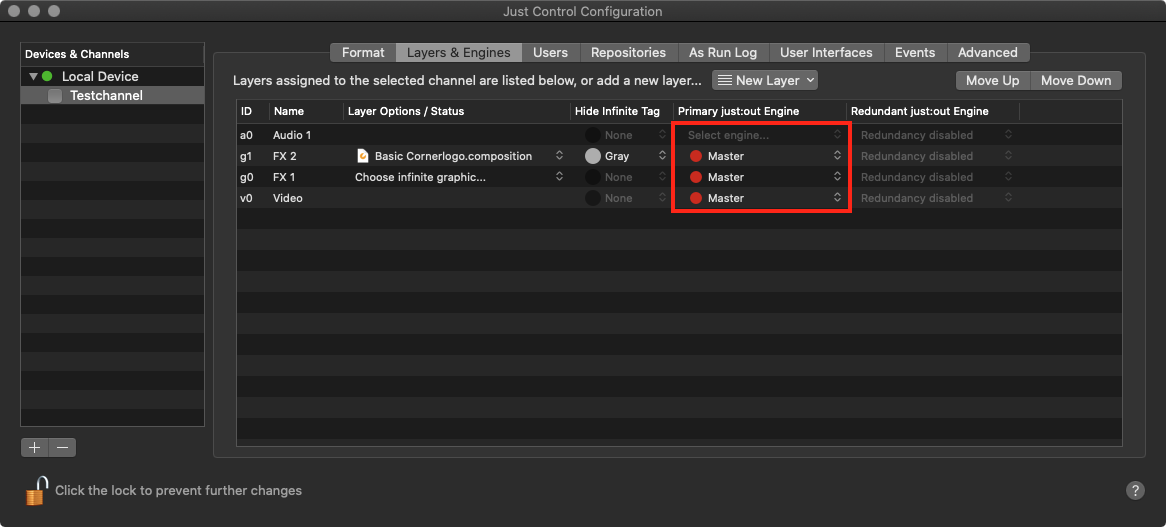
Select the Channel which you would like to add a new engine to, in the Devices & Channels window.
Activate the Layers & Engines tab.
If needed click on New Layer to add a new Layer to the Channel.
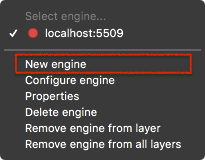
Click on Select engine… or click on an existing engine.
...
...
Select "New Engine" to generate a new Engine.
...
...
The Engine Wizard opens to setup the new engine according to your needs.
Configuring an Engine
After selecting a New engine, this window appears. It allows you to define the Engine Attributes, the Preview quality and optionally, to define Repositories just for this particular engine.
...
1. Network: Define how the new engine can be accessed via the network.
Name: Enter the name for this engine, so you can identify the engine.
IP address: Enter the IP address of the machine which is running the remote Just Out and the port which has been defined in the Just Out preferences there.
2. Video device & output: Select the hardware you'd like to use for the final output.
Virtual: If there is no Video hardware available for the final output on the machine running the Just Out engine.
AJA: In case you have an AJA device installed on the machine running Just Out and you would like to use this device as output device.
Blackmagic: In case you have a Blackmagic device installed on the machine running Just Out and you would like to use this device as output device.
Video buffer: Select a higher setting if the data rate needed for playing the Video and Graphic files is high and/or the continuous data rate your storage system is low. If your storage system can deliver a very high continuous data rate and the data rate needed to play the Video and Graphics files is low, you can select a small Video buffer. Buffer values above 6 seconds should be avoided, because such high buffer values put additional pressure on your system.
3. Preview: Configure the quality of the Preview which is shown in the user interfaces here.
Frame-rate: Allows you to specify the number of frames per second. This should never be higher than the native frame rate of the channel.
Resolution: This defines the number of pixels used for the Preview. Select from one of the values available.
Quality: This defines the amount of compression which is applied to the uncompressed image before it is used for the Preview
4. Apply new engine to: Define the Layers the new engine will be assigned to. After that click the Apply button.
| Info |
|---|
|